When you purchase through the links on my site, you support the site at no extra cost to you. Here is how it works.
If you’ve ever pulled up a vocal take and winced every time the singer hit an “s” or an “sh,” you already know what sibilance sounds like, even if you didn’t have a name for it. In this guide, I’ll show you what a de-esser actually does, how to use one without dulling the vocal, and how I approach the process in practice using De-Sipper, a $20 de-esser plugin from Carbonated Audio.
What Is a De-Esser in Music?
A de-esser is essentially frequency-selective compression. Instead of compressing the entire vocal, it detects excessive energy in a targeted frequency range, often somewhere around 4kHz to 10kHz, and reduces it when those harsh “s,” “z,” “sh,” and “ch” sounds become too prominent.
That’s what separates it from simply cutting the high end with EQ. A static EQ cut removes brightness whether sibilance is happening or not, while a de-esser only reacts when the problem appears. Done well, you can tame harsh consonants while keeping the vocal’s natural presence and air intact.
The exact frequency range depends on the vocalist, microphone, recording, and even the particular word being sung, so there’s no single frequency that works for every voice.
Sibilance itself usually comes down to a few things working together, and understanding them can help you fix the problem before reaching for a plugin.
- Mic technique and proximity
Microphone choice and positioning can have a big impact on sibilance. Many condenser microphones capture a lot of high-frequency detail, which can make already-prominent “s” sounds more obvious.
Getting extremely close to the capsule can also change the tonal balance of a vocal, although the effect varies from mic to mic. That’s why two takes from the same singer can sound surprisingly different even when the performance itself hasn’t changed much.
- EQ boosts during mixing
If you boost presence or air to make a vocal brighter or more “radio ready,” you’re also increasing the level of whatever sibilance happens to live in that area.
That’s one reason I often check the vocal after EQ before setting the de-esser. If you’ve already added a presence boost, it makes more sense to judge the sibilance after that tonal change rather than setting your processing around a signal you’re going to reshape later.
While vocals are the obvious use case, I’ve also found de-essers useful on harsh cymbals, dialogue, and other sources where a narrow range occasionally becomes too aggressive. It’s a surprisingly versatile tool when used lightly.
How to Use a De-Esser on Vocals Using De-Sipper by Carbonated Audio
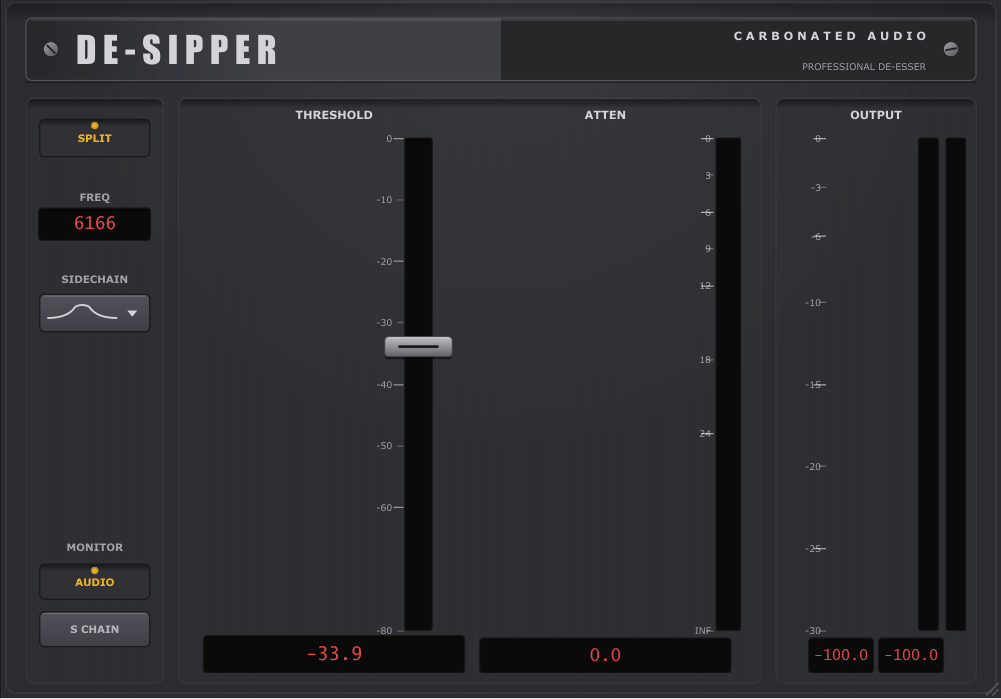
The basic workflow is similar with most de-essers: find the problematic range, listen to what the detector is actually catching, then use just enough reduction to make the harshness stop distracting you.
I generally like to check the vocal after EQ and other tone-shaping decisions, although the ideal position can change depending on the rest of your chain. Compression can sometimes bring sibilance forward again, so there’s nothing wrong with adding another light de-essing stage later if the vocal needs it.
Here’s how that process looks using De-Sipper. It runs as VST3, AU, and AAX on macOS, and VST3 on Windows, making it compatible with major DAWs including Pro Tools, Logic, Ableton, Studio One, Cubase, and Reaper. It’s also a $20 one-time purchase, with no subscription or iLok requirement.
1. Insert it after your main EQ
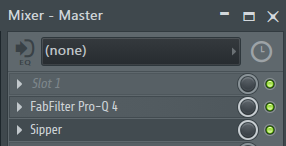
I’d start by placing De-Sipper after the EQ that’s shaping the vocal’s final tone. That way, you’re reacting to the vocal you’re actually going to hear rather than setting the de-esser and then substantially changing the high-end balance afterward.
De-Sipper uses split-band processing, so it can reduce the problematic range without pulling down the entire vocal every time the detector triggers. That’s particularly useful when you’re trying to keep the vocal bright while taking the edge off its sibilants.
I wouldn’t treat “after EQ” as a hard rule, though. If the vocal needs corrective de-essing before other processing, putting it earlier in the chain can make more sense.
2. Use S-Chain to hear what it’s detecting
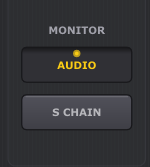
One of the most useful features in De-Sipper is its Monitor switch, which gives you two options: Audio and S-Chain.
Audio gives you the normal processed signal, while S-Chain lets you hear the sibilance the plugin is detecting. I like using this before making aggressive adjustments because it immediately tells you whether the detector is actually focused on the sounds you want to tame.
If you’re hearing lots of vowels, body, or other parts of the vocal in S-Chain, that’s a good indication that you need to rethink the detection range rather than simply pushing the threshold harder.
3. Move the threshold gradually
Once you’ve found the right area, start with a conservative amount of processing and increase it only when the vocal still sounds too sharp.
You don’t need a huge amount of gain reduction for a de-esser to be effective. The goal is usually to make the “s” and “sh” sounds stop jumping out without making them disappear completely.
Over-de-essing is easy to spot once you know what to listen for. The vocal can become dull, lisped, or strangely soft on consonants, and at that point you’re no longer fixing the problem; you’re changing the character of the performance.
I also recommend bypassing the plugin regularly while you’re working. Your ears adapt quickly to processed audio, so an A/B comparison helps you judge whether you’re actually improving the vocal or simply getting used to the change.
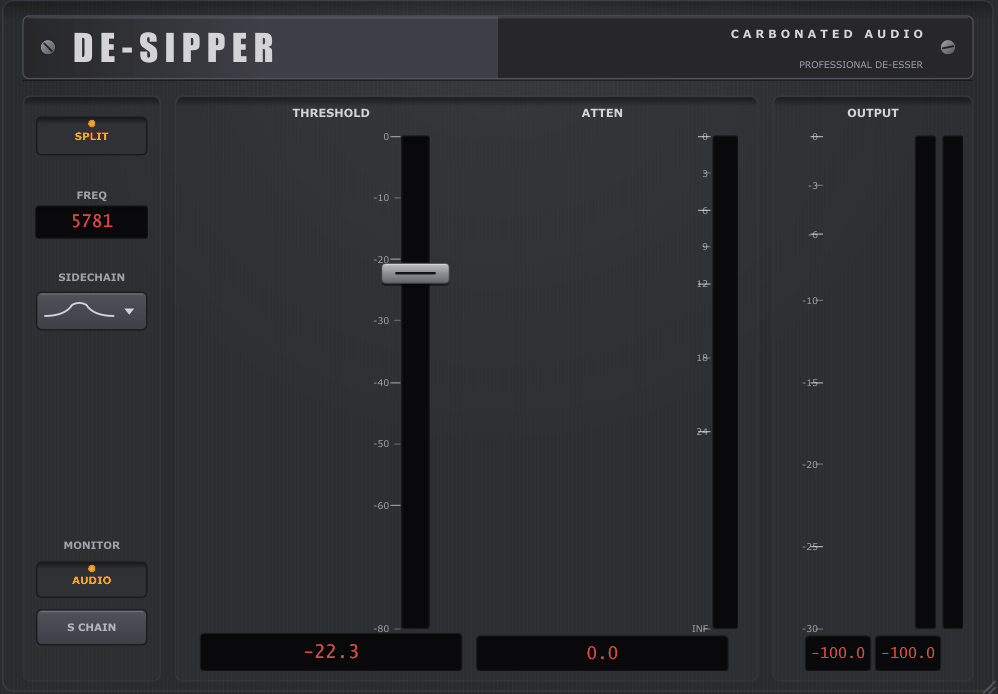
Watch the gain reduction
De-Sipper gives you real-time gain-reduction feedback, including an indication of where the processing is happening. That’s useful because you can see whether the plugin is reacting mainly to the consonants you intended to catch.
If you’re seeing consistent reduction on parts of the vocal that don’t sound sibilant, don’t automatically compensate by lowering the threshold. Instead, revisit the frequency target and detection behavior until the plugin is responding more selectively.
De-Sipper also includes a free demo that runs the full DSP with a 60-second-on, 10-second-muted cycle, so you can test it on your own recordings before buying it. There’s also a 30-day money-back guarantee, giving you a reasonable opportunity to see whether it fits your workflow.
You can try it directly from the Carbonated Audio De-Sipper page.
Common Mistakes to Avoid
- Setting the threshold too aggressively
This is probably the easiest mistake to make. A large amount of gain reduction can look reassuring on a meter, but more reduction doesn’t automatically mean a better vocal.
If the result starts sounding dull, lisped, or stripped of its natural consonants, back it off. A de-esser should usually be something you notice because the vocal sounds better, not because you can clearly hear the plugin working.
- Assuming the de-esser has to go before or after everything
There’s no universal insert position that works for every vocal. I often start after the main EQ, but compression, saturation, brightening EQ, and other processing can all change how much sibilance you’re dealing with.
If another processor brings the “s” sounds back out, a second, lighter de-essing stage later in the chain can sometimes work better than trying to make one plugin do everything.
- Skipping the dry-and-wet comparison
It’s easy to get used to the processed sound after a few minutes and lose track of how much you’ve removed.
Bypassing the plugin every so often keeps you honest. If the difference is huge when you switch it off, that’s not necessarily bad, but it is a good reason to check whether you’ve gone further than the vocal actually needs.
- Using one setting across an entire song
Sibilance can change between verses and choruses, especially when the singer changes volume, distance, or intensity.
A setting that works perfectly on a quiet verse may not be enough for a louder chorus, while a setting designed for the chorus could make the verse sound unnecessarily dull. Check the de-esser against both the quietest and most aggressive sections rather than setting it once and forgetting about it.
Wrapping It Up
De-essing is essentially frequency-specific compression for controlling harsh consonants, but getting good results is more about restraint than chasing a particular amount of gain reduction.
Find where the sibilance is actually happening, listen to what the detector is catching, start conservatively, and judge the result against the dry vocal regularly. If the “s” sounds stop distracting you while the vocal still feels bright and natural, you’re probably in the right place.
De-Sipper makes that process particularly straightforward with its S-Chain monitoring, split-band processing, real-time gain-reduction display, and low $20 entry price. The free demo also gives you a chance to hear how it behaves on your own recordings before committing to it.

Hey, I’m Viliam, I started Music Circuit to write about plugins and gear, so you always know what’s new and what’s worth trying. You’ll also find guides and tips here to help you get started, whether you’re picking your first plugin or building out a full studio.