When you purchase through the links on my site, you support the site at no extra cost to you. Here is how it works.
These days, you can put together an impressive vocal chain without spending anything. Here are twenty free plugins for vocals that cover everything from preamp color to pitch correction, delay, reverb, and de-essing.
You’ll find both well-known and smaller developers on this list. Instead of just listing features, I’ve pointed out what makes each plugin stand out.
Choose the ones that fit your setup best:
1. Integraudio Deelay
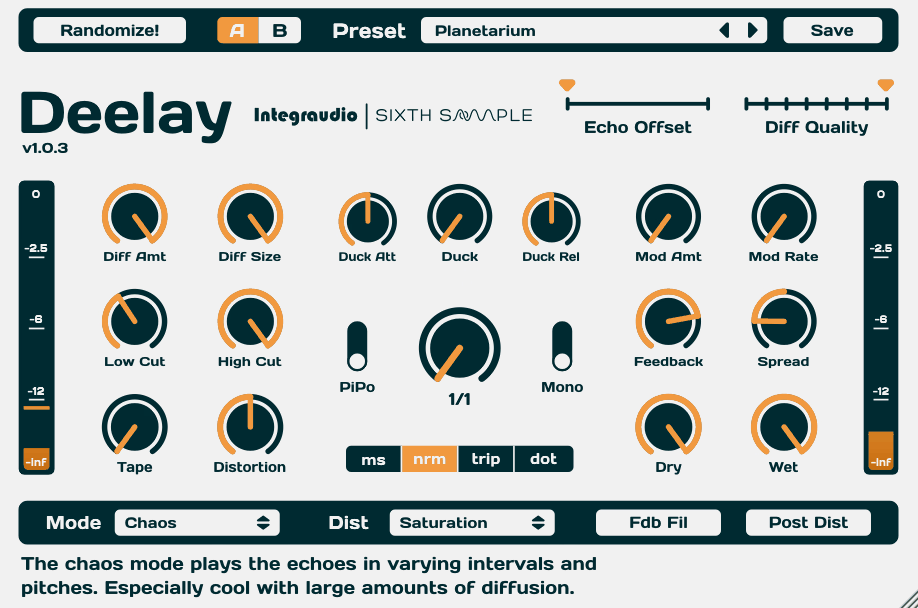
Deelay gives you five delay modes and built-in distortion right out of the box, which is more than most free delay plugins offer. Integraudio and Sixth Sample made it together, and you can see their teamwork in the flexible routing options.
I would use it whenever vocals need more than a basic echo. The diffusion section can transform a simple repeat into a rich, ambient sound. The interface is resizable and color-coded by mode, making switching settings quick and intuitive.
- Tape Character
There’s a Tape knob in the bottom right that adds wow and flutter, inspired by a reel machine pushed a bit too far. Use it lightly for warmth, or turn it up for more obvious, unstable flutter.
I like to use a little of this effect with almost no delay time to add a rough tape feel, without needing another saturation plugin. While it’s not a full tape emulator, the level of detail is a welcome inclusion for something free.
- Filter Routing
You can use high-pass and low-pass filters on either the input or just the wet output, plus there’s a separate feedback filter option.
- Preset Library
There are over 100 factory presets, organized into categories ranging from clean delays to wild sound-design patches. Browsing them gives you a good idea of what the plugin can do before you start tweaking.
2. Slate Digital Fresh Air
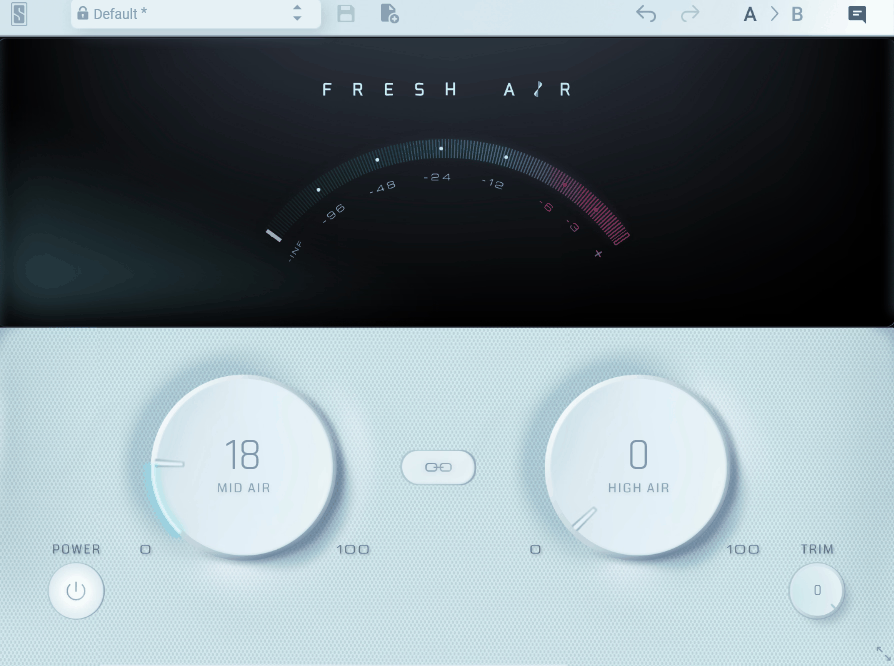
It can be tough to add brightness to a dull vocal without making it harsh. Slate Digital designed this plugin using vintage exciter circuits, based on the old noise-reduction gear engineers used years ago.
Fresh Air was first released as a Black Friday giveaway in 2020 and has been free ever since. I use it when vocals feel lost in a busy mix because it adds presence without making sibilance worse.
- Mid Air
This is one of the plugin’s two main controls. It boosts the upper midrange to help vocals stand out in a dense mix. It’s more about presence than just brightness, so vocals sound like they’re stepping forward.
I adjust this gradually while listening to the full mix, not just the solo vocal, because it’s easy to overdo. Small changes make a big difference.
- High Air
This control works with Mid Air but focuses on adding top-end sparkle instead of presence. With both knobs, you can shape the whole upper range without needing extra controls.
You can turn up High Air quite a bit on a dull recording without it sounding too processed, since the dynamics processing responds to the input level instead of just adding a fixed boost. That’s why many engineers trust it on both full mixes and single tracks.
3. Aegean Music Pitchproof
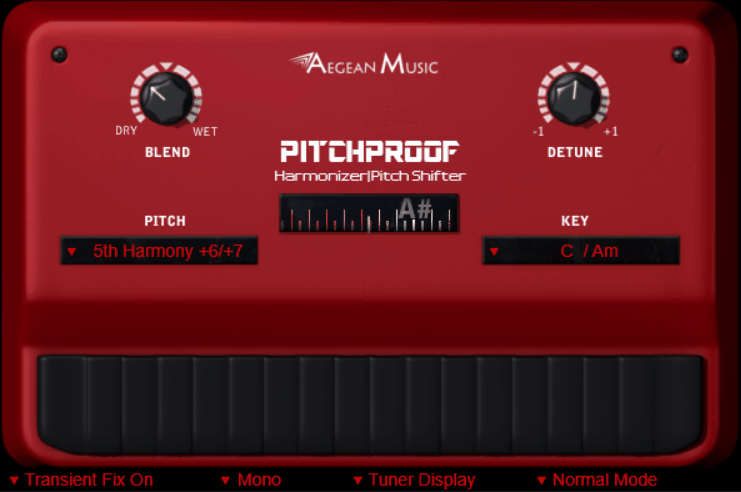
Guitarists have known about this one for years, since it was built around the idea of a harmonizer pedal rather than a studio pitch tool. Aegean Music‘s take on it, called Pitchproof, has stuck around for over a decade, which I think is rare territory for a free plugin.
I would primarily use it as a vocal tool, especially for sketching out harmony ideas before committing to a proper recorded take. It is most effective on a single monophonic line, so handling a full stacked chord isn’t really its strong suit.
- Key Lock
Selecting a key from the dropdown menu means the harmony settings will follow that scale rather than shifting by a fixed, rigid interval regardless of what’s being sung. Set it to match your track, and the generated harmonies land in tune.
I think this is one of the plugin’s cleverer touches, and it’s part of why it’s stayed relevant for backing vocal work even as newer pitch tools have arrived. It’s saved me from having to work out a harmony part purely by ear.
- Transient Fix
This option preserves the attack of a vocal phrase as it passes through the pitch engine, and Aegean Music recommends leaving it switched on for most material. If certain passages glitch in odd ways, turning them off can sometimes clear the issue.
I’d suggest testing both settings on a specific take, since the difference is more noticeable on clipped or percussive syllables than on smoother, sustained phrases. It’s worth the quick comparison.
4. iZotope Vocal Doubler
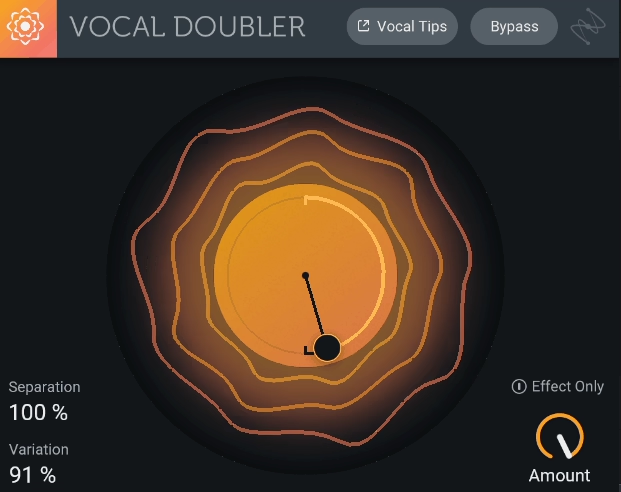
There’s a particular kind of thin, single-tracked vocal sound that shows up constantly in home recordings, and this plugin exists purely to fix it. iZotope rebuilt the interface around an interactive display, replacing separate knobs with a single draggable point.
I think it’s a genuinely focused tool, doing one specific job rather than trying to be a whole vocal chain in itself. Vocal Doubler is also light on your system, which matters if you’re stacking it across several backing vocal layers.
- XY Pad
Dragging up and down adjusts stereo separation, while dragging left and right introduces natural pitch and timing variation. Both parameters live on the same point, so you shape a convincing double in a single gesture.
I find this quick for choruses where I want an obviously wide vocal, since the width and the human character shift together as you move the control. When it comes to speed, it’s a faster workflow than a traditional knob-based doubler.
- Effect Isolation
An Effect Only mode lets you export or route only the doubled signal, separate from the original dry vocal underneath. Sending a vocal to a bus with this engaged, then adding reverb afterward, gives you a wider result than reverb on the dry lead alone.
Follow this workflow to achieve results beyond simply stacking chorus and reverb plugins. Use it to create spacious reverb when desired.
5. Analog Obsession EDComp
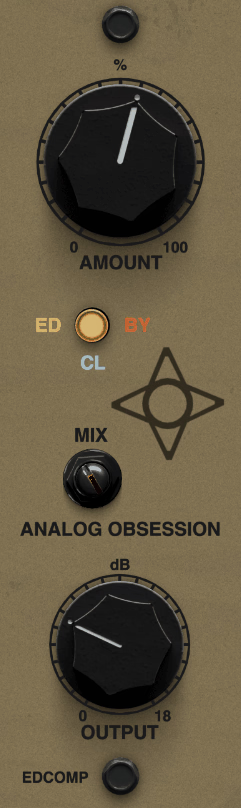
Compression can intimidate many newer producers, mostly because there are often four or five interdependent knobs to manage at once. This plugin simplifies that to a single control, which I’d say is a genuinely good entry point if you’re still building confidence with dynamics.
EDComp‘s design is based on an S-Type channel compressor concept, where the threshold remains fixed, and the ratio increases as you turn a single Amount knob. It also includes an ED mode that adds subtle tonal shaping alongside the compression itself, tuned specifically with vocals in mind.
- ED Mode
Switching into ED mode applies emphasis and de-emphasis to the lows and highs, similar in spirit to a tilt EQ but built around specific, pre-chosen frequencies rather than a simple linear tilt. Analog Obsession tuned this particularly for vocal material.
It delivers top-end clarity while keeping the low end warm rather than thin, and it saves a processing step during quick sessions when you’d otherwise reach for a separate EQ. I would use it as a default starting mode most of the time.
- Clean Mode
If you’d rather compress without any tonal colouration, CL mode removes the emphasis and de-emphasis entirely for a cleaner, more neutral result. This is worth switching to once you’ve already shaped tone elsewhere in your chain and just need level control.
I like that having both options in one plugin means I don’t have to swap compressors depending on whether I want colour or transparency. I switch between the two modes depending on what’s already happened earlier in the chain.
6. Luxora Audio Vocal Preamp
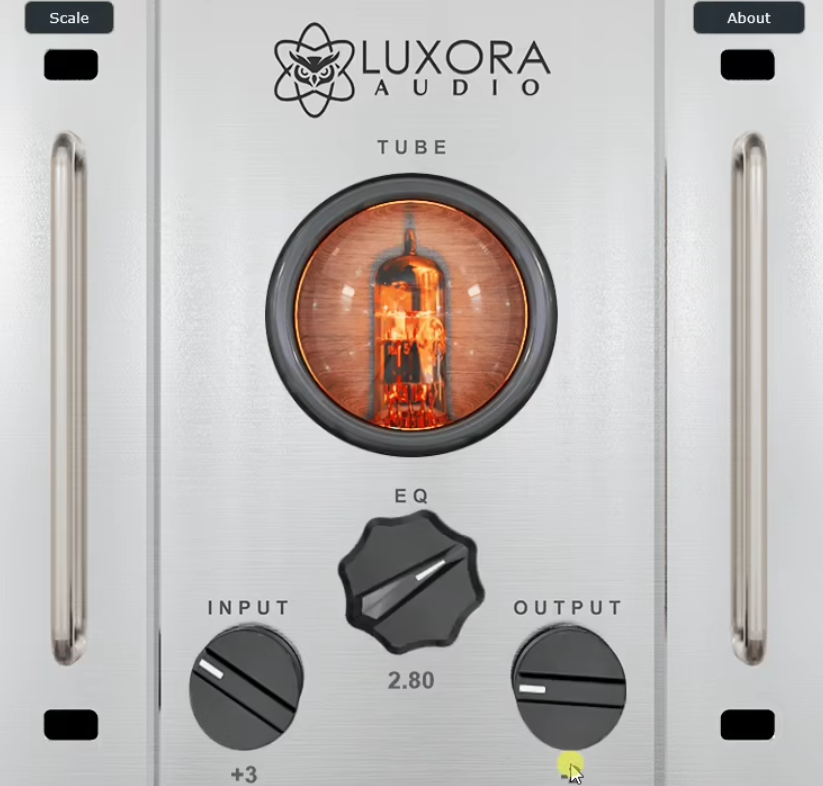
Newer developers rarely launch with something this polished, and that’s what stood out to me first. Luxora Audio released Vocal Preamp alongside a companion sub-bass saturator, and the interface on both looks closer to an established paid product than a debut freebie.
Modelled 12AX7 tube behaviour spanning several decades of hardware forms the core of the sound, paired with an optional EQ section tuned specifically for vocals. It’s built for a fast workflow, and even with the EQ switched off entirely, the saturation alone adds a genuine harmonic lift.
- Drive Knob
A single knob governs the intensity of tube saturation, moving from barely-there warmth to a noticeably driven, coloured tone, without needing multiple parameters. Because it’s built around measurement-based modelling of real tube behaviour, it holds together even when pushed fairly hard.
I like placing this early in the vocal chain, before compression, so it adds harmonic glue that shapes the dynamic response of later processors.
- Optional EQ
The equalizer section is entirely bypassable, meaning you can run the plugin purely as a saturator and skip tone shaping altogether if you’re handling that elsewhere. I think this flexibility means it doesn’t force a particular workflow on you.
Apply warmth without tonal rebalancing when needed by controlling the plugin’s flexible options. Many processors lack this straightforward choice.
- Tube Modelling
The saturation model draws on 12AX7 tube behaviour spanning several decades of hardware design, aiming for organic colour and wider headroom rather than an aggressive, obvious distortion. I’d call it a warm-sounding effect that suits thinner vocal recordings especially well.
I reach for it specifically when a take needs body added back in without leaning on heavy compression to get there. It fills a gap that a compressor alone can’t really address.
7. Chris Liepe Vocal MENACE
Vocal MENACE comes from someone who understands performance from the inside rather than purely from behind a mixing desk. Chris Liepe is a vocal coach whose lessons have racked up tens of millions of views, and his own voice has appeared on plenty of commercial jingles.
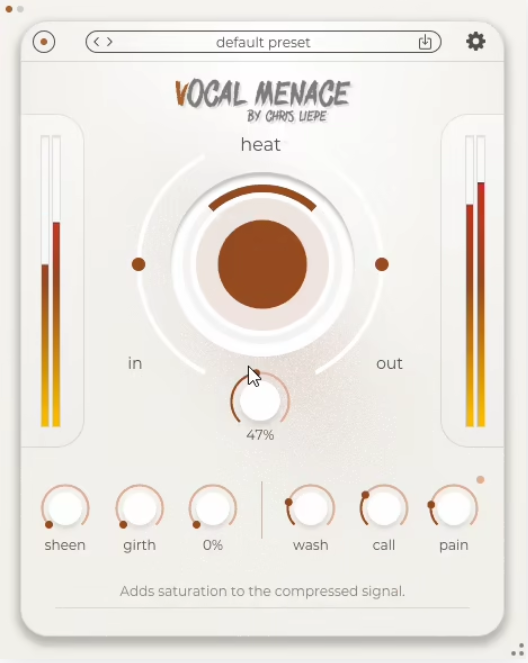
This is his first plugin release, combining multi-stage compression, several flavours of drive, EQ, reverb and tempo-synced delay into a single processor. I think it particularly suits aggressive or gritty vocal styles, though it holds up just as well on more restrained, melodic performances when the settings stay gentle.
- Heat Control
The Heat knob sets the threshold of the built-in compressor and limiter, shaping how aggressively the plugin reacts before you’ve touched any other controls. Pushed hard, it takes a clean vocal into gritty territory quickly.
Used gently, the same control simply adds a bit of edge and presence to a cleaner pop vocal, so I’d say it’s worth exploring the full range rather than assuming it’s only for heavier genres. It suits more styles than the name suggests.
- Drive Stage
Working alongside Heat, the Drive control adds saturation to the already-compressed signal, and together the two knobs can take a vocal from clean to properly aggressive. This pairing makes sense given Liepe‘s own background performing screaming and aggressive vocal styles.
I’d suggest starting with both controls low if you’re new to the plugin, since it’s easy to push past the point a mix actually needs. Dialling back is always an option.
- Built-in Delay
A tempo-synced delay sits within the signal chain, letting you add rhythmic interest without leaving the plugin or reaching for a separate processor. It syncs directly to your project tempo, speeding up demoing considerably.
8. TAL-Reverb-4
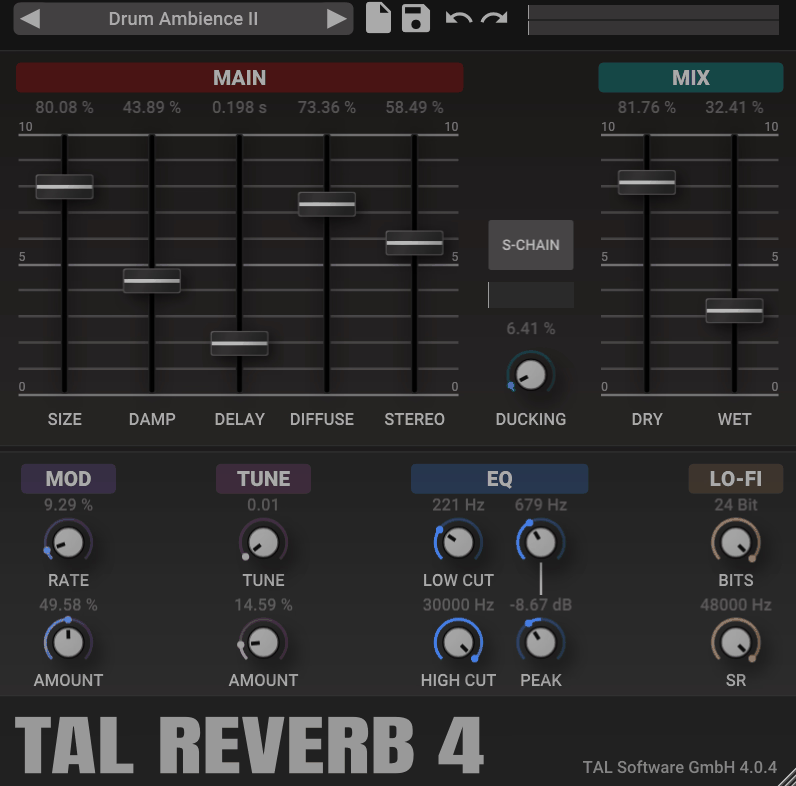
Restraint is a rare quality in a free plugin, and it’s exactly what makes TAL-Reverb-4 stand out from the crowded field of budget reverbs. TAL built it as a standalone version of the reverb algorithm from their Sampler instrument, retaining that vintage plate character throughout.
It recently received an update that improved reverb quality, refined the pitch shifter, and added a Damp control for smoother tails. It’s stereo-only, so if you load it on a mono track and can’t find it in your plugin list, that’s usually the reason.
- Plate Modulation
The core algorithm emulates a classic plate unit, with subtle modulation running through the tail to keep it feeling alive rather than static. This gives vocals a smooth, slightly shimmering quality that avoids the metallic edge cheaper digital reverbs sometimes introduce.
I think this modulation is part of what makes the reverb sound convincing rather than obviously synthetic, particularly at longer decay settings. It shows up most on longer vocal tails specifically.
- Damp Control
Added in a recent update, this lets you tame the high-frequency content of the tail as it decays, giving a warmer finish when needed. It’s useful on brighter vocal recordings where a fully open tail can start to feel harsh.
I’d suggest pairing this with the high-cut control, since together they provide decent tonal shaping despite the otherwise minimal parameter count. It’s the most useful of the recent additions.
- Cross-Platform Build
The plugin runs on Windows, macOS and Linux, in VST2, VST3, AAX and CLAP formats, and it’s light on CPU for what it delivers. Several instances can sit across a vocal-heavy session without real performance concerns.
That matters when you’re sending multiple backing vocal layers to separate sends. I think staying free and actively updated for this long reflects how much the developer values its place in people’s toolkits.
9. Analog Obsession PREDD

The hardware this plugin is modelled on genuinely helped shape the history of recording. It emulates the REDD 47 Mic/DI preamplifier found in the Abbey Road Studios console used to track and mix The Beatles back in the 1960s.
Chandler Limited later reissued a modern version of the hardware in partnership with Abbey Road, and that appears to be the reference point Analog Obsession worked from for PREDD. It follows the original layout fairly closely, too, which helps if you’re already familiar with the hardware or other emulations of it.
- Input Switching
A dedicated switch lets you choose between mic preamp and DI input modes, making the plugin flexible enough for more than just vocal tracking. For vocals specifically, the mic preamp mode is what you’ll reach for most often.
I like that having both options in one plugin means it’s useful beyond a vocal chain too, a nice bit of added value for something free. The DI side works well on bass sources.
- Compensated Pad
The -20dB pad includes internal compensation, a feature that Analog Obsession notes wasn’t present on the original vintage hardware but does appear on the modern Chandler reissue. You can attenuate a hot input without the overall output level jumping around unexpectedly.
- Rumble Filter
A sweepable filter running from 20 to 180Hz lets you clean up unwanted low-end noise before it ever reaches your compressor. Alongside it sits a 10dB big boost, which the original hardware didn’t include at all.
- Oversampling Toggle
Clicking the Analog Obsession logo engages internal oversampling, reducing aliasing at the cost of a modest CPU increase. Given how much of this plugin’s character comes from saturation, I’d keep this switched on for final mixes.
10. Slate Digital Heatwave
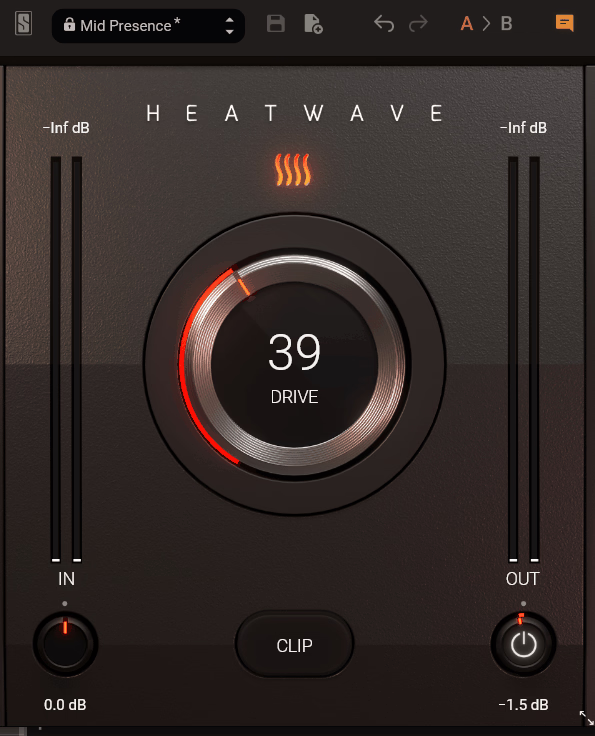
Saturation plugins usually soften transients as you push them harder, which is the opposite of what most engineers want on a vocal. Heatwave fights against that tendency by combining transient shaping with saturation, compression and EQ behind a single control.
It first appeared as a Black Friday release and has stayed free ever since. It’s often discussed in the context of drums and bass, though I’ve found it does a convincing job of adding presence to vocals that feel flat in a mix.
- Drive Control
A single Drive knob governs saturation, EQ shaping and compression simultaneously, meaning every adjustment touches multiple aspects of the sound at once. I think this macro-style approach means you don’t need to understand the individual processing stages to get a musical result.
For vocals, modest amounts add presence and a bit of edge without pushing into obviously distorted territory, while heavier settings transform the character for more aggressive productions. The range covers a lot of ground for one knob.
- Clip Stage
The Clip control tames unruly transients or leans into a more aggressive, distorted sound, and you can bypass it entirely if you’d rather keep things smoother. Combined with the Input knob, it changes the character of the saturation rather than just its overall amount.
I treat Input as a way to fine-tune how hard the algorithm is working, separate from the Drive-set amount. That gives a fair amount of tonal range from what appears to be a fairly simple interface.
11. TDR Nova
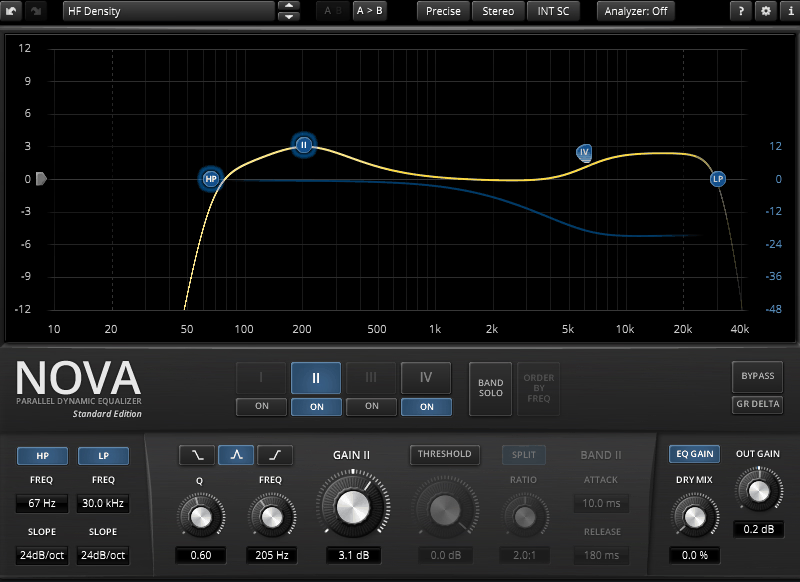
Dynamic EQ used to be something you’d only find in expensive mastering suites, and this plugin quietly changed that for an entire generation of home producers. Tokyo Dawn Labs built it as a parallel equalizer with a full dynamics section running behind every band.
That combination makes it remarkably versatile for vocal work specifically, covering standard EQ, frequency-selective compression and de-essing within a single instance. TDR Nova uses a familiar node-based display with a frequency analyser running behind it, keeping the transition from static to dynamic control approachable.
- Dynamic Bands
Each of the four bands includes shelf, bell, and high-shelf curve shapes, alongside threshold, ratio, attack, and release controls. Any band can behave as a standard static EQ or switch into dynamic mode, reacting only when a chosen frequency range crosses your threshold.
For vocals, I find this particularly useful for taming a resonant frequency that only becomes a problem on louder phrases. Targeting it dynamically avoids the static cut that would otherwise affect quieter passages unnecessarily.
- Wideband Compressor
Beyond the four EQ bands, a standard wideband compressor is accessible by switching on the Threshold control while none of the parametric bands are active. This means you can handle general vocal levelling and frequency-specific control from a single plugin instance.
- Loudness Matching
Equal loudness compensation kicks in automatically as you adjust EQ gain, helping you judge the tonal effect of a change honestly rather than being fooled by a boost simply sounding louder. A global EQ Gain control and a Dry mix knob round out this section.
12. Cymatics MEMORY
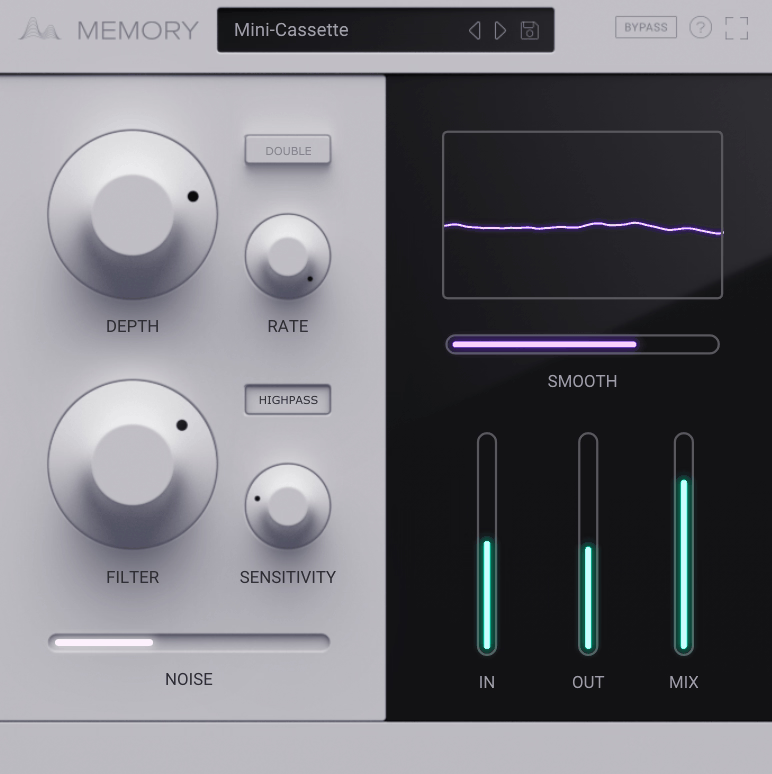
MEMORY doesn’t fit neatly into any one category, which is exactly why I wanted to include it here. Cymatics built it around emulating a bucket-brigade delay chip, modelling the pitch instability and flutter you’d get from an old tape machine or vintage chorus pedal.
It draws specific inspiration from the Fairfield Circuitry Shallow Water pedal, a unit well known among guitarists but increasingly used on sampled and vocal material too. Used with restraint, it adds a nostalgic, dreamy quality that I think is hard to fake with a conventional chorus plugin.
- Depth and Rate
The Depth control governs how strongly random modulation affects pitch, while Rate determines how often those fluctuations occur over time. Lower depth settings, generally below about 10 percent, add a pleasing sense of movement without drawing obvious attention.
I’d recommend starting conservatively with both, specifically on vocals, since it’s easy to cross the line from subtle character into something that sounds unintentionally out of tune. A light touch does most of the work.
- Modulation Smoothing
A Smooth slider works alongside Depth and Rate, softening the random pitch fluctuations so the effect feels more organic rather than jarring. This bridges the gap between a predictable chorus effect and the plugin’s fully random modulation capability.
On backing vocals, particularly, I find a bit of extra smoothing helps the effect blend into the mix rather than calling attention to itself. It’s worth engaging whenever the character needs to sit further back.
- Analogue Noise
The Noise parameter injects a controlled amount of analogue-modelled hiss, letting you lean further into vintage tape character if that suits the production. Cymatics sets this to zero by default, so nobody is stuck with unwanted noise unless they add it deliberately.
I like that plenty of modern productions can benefit from the pitch modulation alone, without any added texture underneath. This keeps that option genuinely optional rather than baked in.
- Envelope Filter
A built-in low-pass filter reacts to the incoming audio’s envelope, with a Filter knob controlling how strongly that reaction affects the cutoff frequency and a Sensitivity control defining its lowest reachable point. This gives the effect an organic, almost wah-like quality that responds dynamically to the performance.
I think it’s a genuinely creative addition that sets this apart from more straightforward chorus plugins. It’s worth exploring even if pitch modulation is the main reason for reaching for the plugin in the first place.
13. epicPLATE mkII
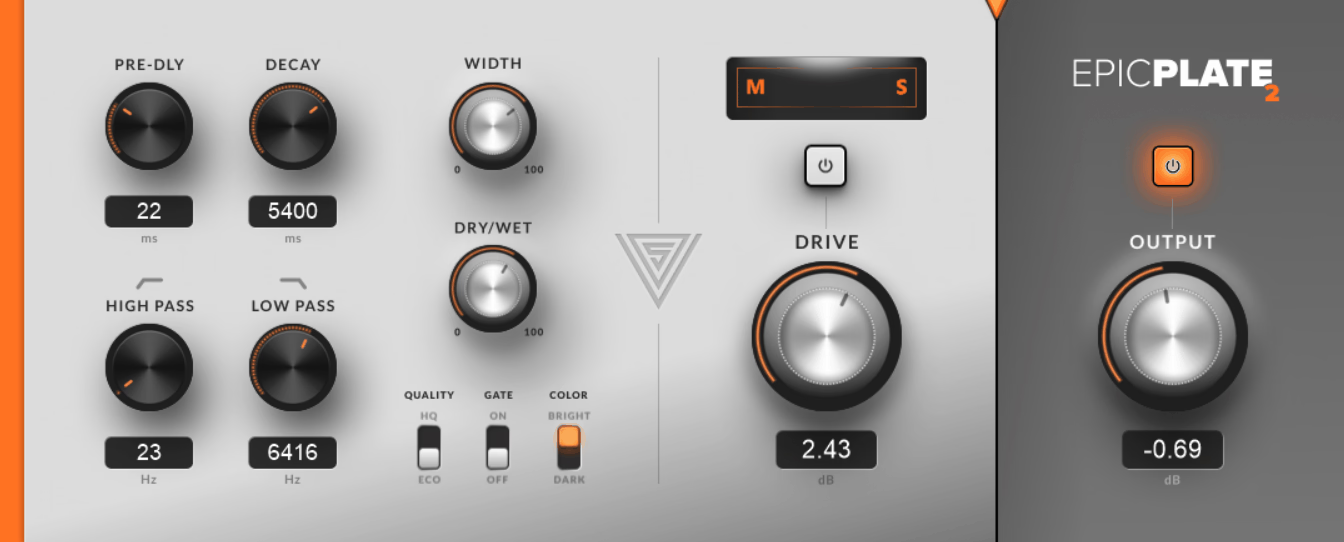
That distinctive plate reverb tonality suits vocal material in a way that algorithmic room or hall reverbs often struggle to match. Variety of Sound built this as a successor to their original epicPLATE, itself a follow-up to the now-discontinued epicVerb.
epicPLATE mkII added VST3 support and higher-quality processing while retaining the character that made the original such a well-loved freebie. It’s Windows-only, which is a shame for Mac-based producers, though for anyone on Windows, I’d say it’s one of the better free plate reverbs currently available.
- Gate Mode
Nicknamed the developer’s own Phil Collins Mode, the Gate switch brings back the iconic gated reverb sound that defined so much of eighties production. While it’s more commonly associated with drums, I think it can add real drama to certain vocal ad libs or shouted phrases when used sparingly.
- Colour Switch
A Bright and Dark toggle quickly shifts the overall tonal character without diving into detailed filter settings. Bright mode leans into that classic plate shimmer, while Dark mode pulls back the top end for a warmer, less aggressive result.
I tend to reach for Dark mode on brighter vocal recordings that already have plenty of top-end energy, letting the reverb sit underneath rather than compete with the vocal. It’s a quick fix for a common tonal problem.
- Drive Saturation
Carried over from the original plugin, the Drive control adds a touch of saturation to the reverb signal, giving the tail some grit rather than staying perfectly clean and digital-sounding. Used lightly, this helps a reverb tail feel more cohesive with a vocal that’s already gone through analogue-style saturation earlier in the chain.
- Quality Switch
A dedicated control lets you balance processing fidelity against CPU usage, which matters when running several instances across a vocal-heavy session with multiple sends.
14. MeldaProduction MAutoPitch
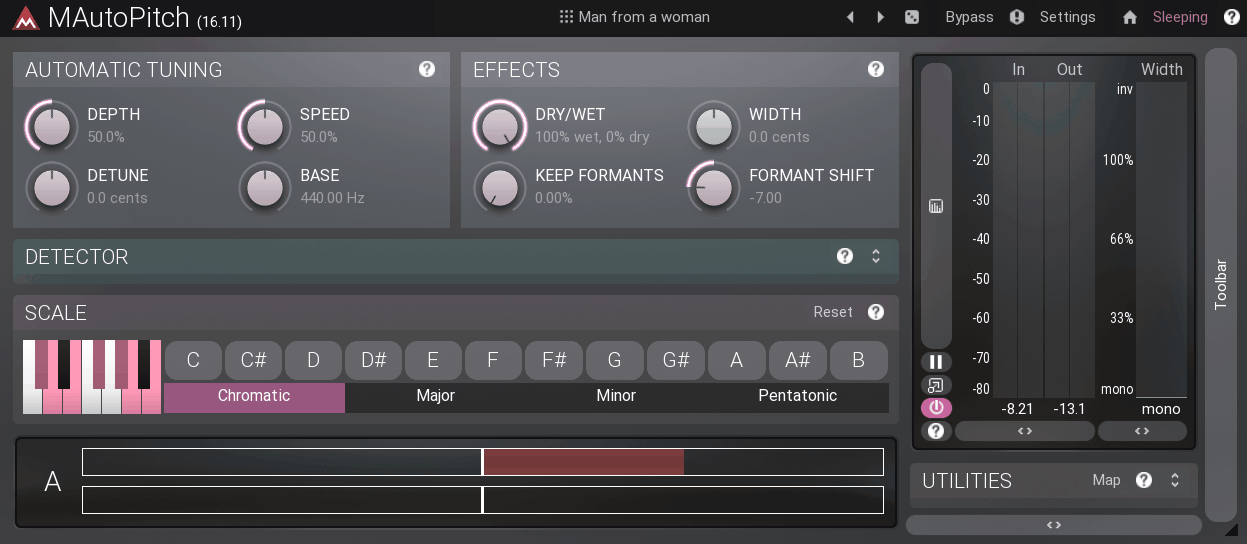
Pitch correction plugins tend to sound either obviously robotic or unconvincingly subtle, and this one manages to cover both extremes well, in my view. MeldaProduction built MAutoPitch specifically for vocals and other monophonic instruments, adding formant shifting and stereo expansion alongside the core correction.
Both the fully hard-tuned effect and a gentle, natural polish are usable settings here, unlike with free pitch correction tools. It also runs on Melda’s proprietary GUI engine, so it doesn’t feel like a stripped-down product compared to the rest of the company’s paid catalogue.
- Speed and Depth
Speed determines how quickly the plugin reacts to pitch changes, ranging from a natural, gentle polish at lower settings up to an instant, obviously processed sound at maximum. Depth then determines how fully the pitch is pulled toward the target note.
I keep Speed relatively low and Depth moderate for the most natural correction on a lead vocal, while pushing both toward their extremes creates the stylized, unmistakable effect when that’s the goal. It’s a wide range for just two controls.
- Formant Shift
Beyond straightforward correction, this control lets you alter the perceived character of a voice independently of its actual pitch. I’ve used it to subtly adjust a backing vocal’s character so it sounds different from the lead without changing which notes are being sung.
I think it’s an effective trick for adding variety across layered vocal parts. Small amounts are worth trying first, since large shifts sound obviously artificial fairly quickly.
15. Ignite Amps PTEq-X
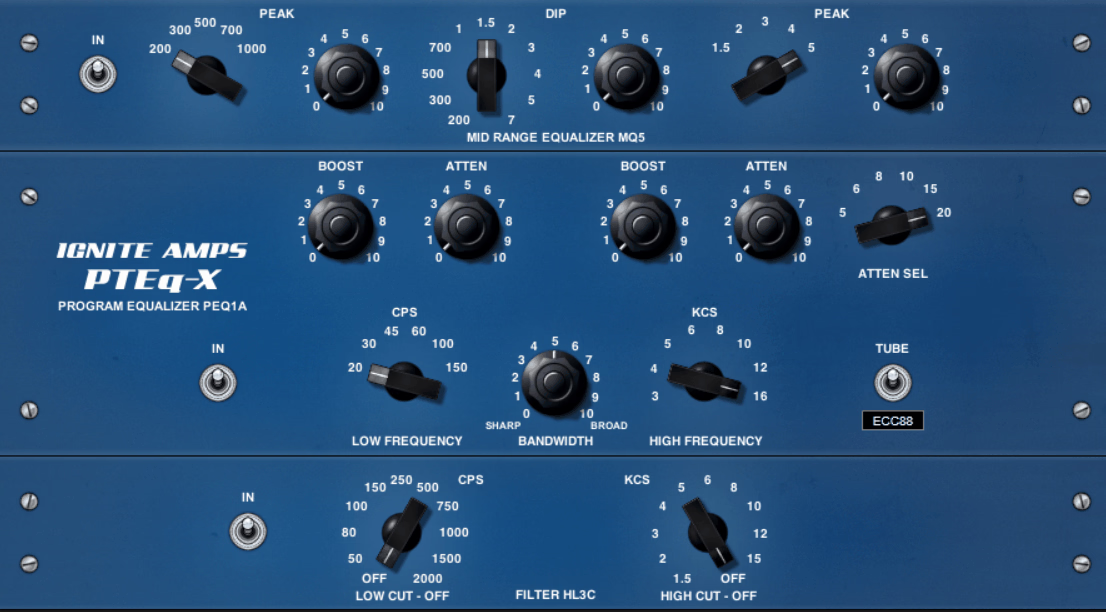
Owning three separate pieces of vintage hardware to get this range of EQ shaping would cost a genuinely significant amount of money, which is what makes this free plugin so remarkable. PTEq-X combines three famous passive program equalizers, essentially the classic Pultec family, into a single processor.
Every component along the original signal path has reportedly been modelled rather than just approximated, and the result is a passive-style character I’d say is genuinely difficult to fake digitally. It shines when boosting and cutting the same general frequency range simultaneously, since that interaction is exactly what gives Pultecs their distinctive, musical curve.
- Three EQ Modules
A Program Equalizer module handles classic high- and low-shelving; a mid-focused module adds peak and dip controls; and a filter section covers high- and low-cut filters, each independently bypassable. This means you’re effectively getting three separate vintage-style EQs from one plugin.
I use the Program Equalizer module first for that classic Pultec low-end thickening, with the mid module brought in separately when a vocal needs targeted presence work. Treating them as independent stages rather than a single fixed chain gives much more control.
- Tube Selection
A dropdown menu offers four different tube emulations, each subtly altering the harmonic colouration the plugin adds to the signal. I think it’s worth spending time comparing them on a specific vocal to hear how each one genuinely shifts the character.
16. Valhalla Supermassive
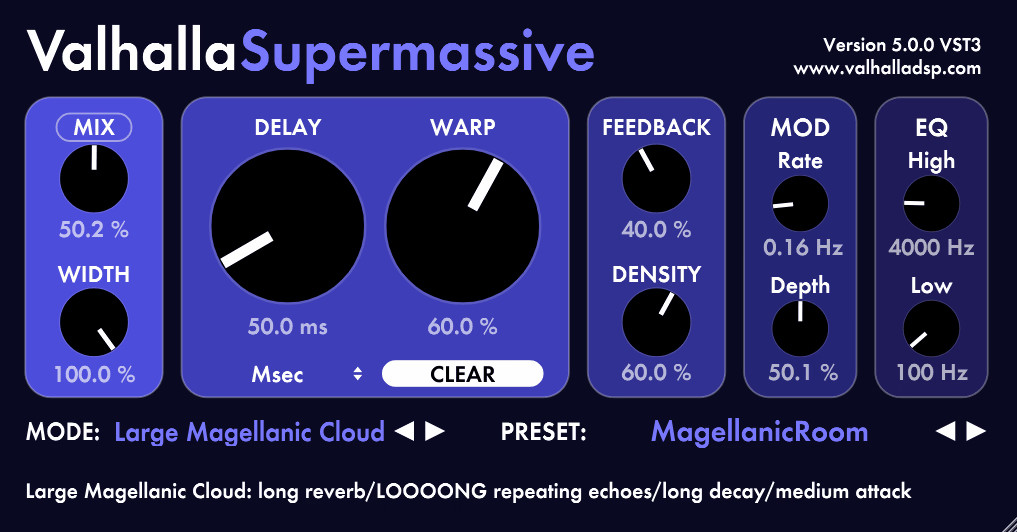
This isn’t really a conventional reverb plugin, and that’s precisely its appeal, I think. Valhalla DSP built it around massive, otherworldly delays and reverbs, using feedback-delay networks in which individual delays can stretch up to 2 seconds.
For vocals, I reach for SuperMassive most often on ad libs or atmospheric textures rather than as a first-choice utility reverb. It now offers 22 distinct modes, each named after a celestial object and each with a genuinely different character in terms of attack, decay and echo density.
- Mode Selection
Modes range from a fast attack and high echo density through to extremely slow, dense builds, with newer additions offering the smoothest, most transparent decay in the whole collection. Each one sounds like a genuinely different plugin rather than a minor variation.
For vocals specifically, I’d try the smoother, more natural-sounding modes first before exploring the more extreme, glitchy options for creative sound design. The range on offer here is broad.
- Warp Control
Combined with the plugin’s long delay times, this control can push reverb tails into slowly fading echoes, cascading harmonic repeats, or reverbs that keep decaying for minutes at a time. This is where the plugin moves well beyond what a standard reverb can do.
I’ve used extreme settings on a single held vocal note to create a swelling, ambient texture that fills space in a sparse arrangement. It’s a useful substitute when there’s no room for an actual synth pad.
- Modulation Depth
Built-in modulation rate and depth controls add motion to the reverb tail, ranging from a barely perceptible shimmer through to an obviously wobbly, chorused quality. This is particularly effective for vocal textures that need to feel alive rather than static.
Combined with the plugin’s longer decay modes, pushing modulation depth up creates lush, swirling backdrops behind a more restrained lead vocal. I think it’s a combination worth exploring on ambient or atmospheric productions.
17. Techivation T-De-Esser 2
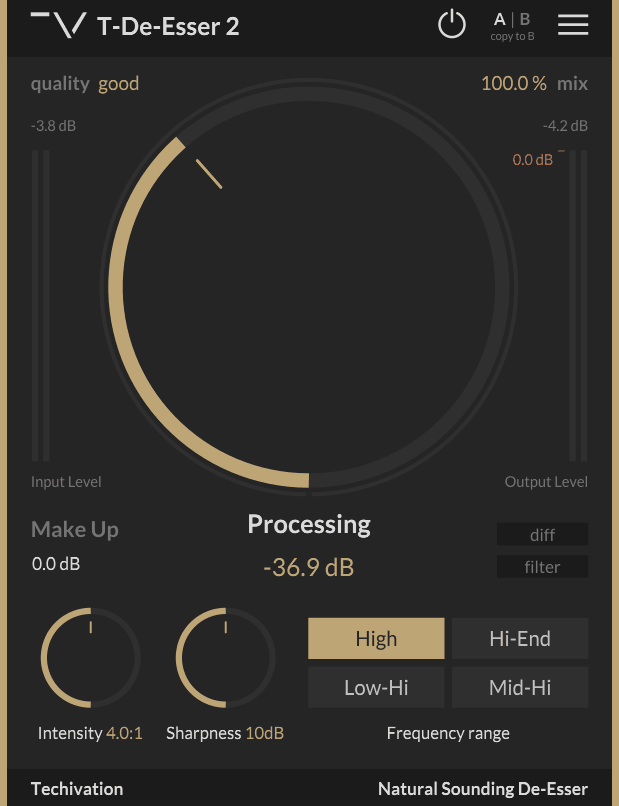
Released to mark the third anniversary of Techivation’s original free de-esser, this is a genuine step up in both functionality and sound. The core goal hasn’t changed, smoothing excessive high-frequency content while keeping the result natural rather than obviously processed.
T-De-Esser 2‘s interface deliberately avoids graphs and meters, reasoning that visual feedback can distract your ear and skew decisions that should really be made by listening. It’s also effective on other bright sources beyond vocals, including harsh acoustic guitars, pianos and cymbals.
- Range Selection
Four frequency range modes determine which part of the signal the plugin analyses to trigger gain reduction, letting you target where a specific voice’s sibilance sits. Since every voice differs slightly, this targeted approach genuinely improves the accuracy with which problems are caught.
I use the Filter button first to isolate and audition each range in solo, since it’s quicker than guessing at the problem frequency by ear alone. It narrows things down fast.
18. Analog Obsession & BPB Rare Program Equalizer
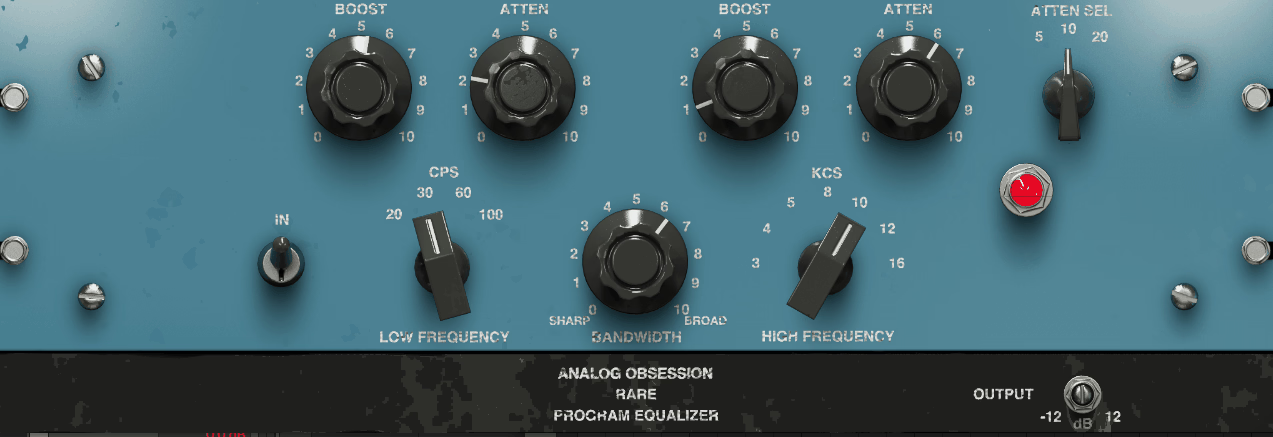
Rare EQ takes a fairly crowded category, free Pultec-style equalizers, and finds a genuinely different angle within it. This is a collaboration between Analog Obsession and Bedroom Producers Blog, and the developer changed the gain stage placement rather than simply replicating the classic hardware design.
On the original hardware, the gain stage sits after the EQ section, reacting to whatever boosting or cutting you’ve applied. Letting that gain stage sit before the EQ instead means you can saturate at unity gain without your EQ moves affecting that saturation, which I think is a genuinely clever bit of lateral thinking applied to a well-worn plugin category.
- Dual Bands
Two frequency bands, each with independently switchable frequencies and separate boost and attenuation controls, closely follow the classic hardware layout. Boosting and cutting the same low frequency simultaneously produces that distinctive Pultec low-end thickening.
For vocals, I tend to use the high band more than the low, adding air while attenuating a touch of harshness nearby to get an open, present top end without it turning brittle. It’s a technique worth learning even outside this specific plugin.
- Mid-Side Mode
The companion RareSE version adds proper mid-side handling alongside standard left-right mode, with a link feature tying the two channels together for matched processing. Soloing either channel individually makes it easier to hear exactly what’s happening to the stereo image.
I think this version suits vocal bus or mastering work particularly well, where controlling the tonal balance of a centred lead vocal separately from wider stereo elements can genuinely change how a mix translates. It’s the version I’d reach for specifically for bus processing.
19. BPB Dirty LA
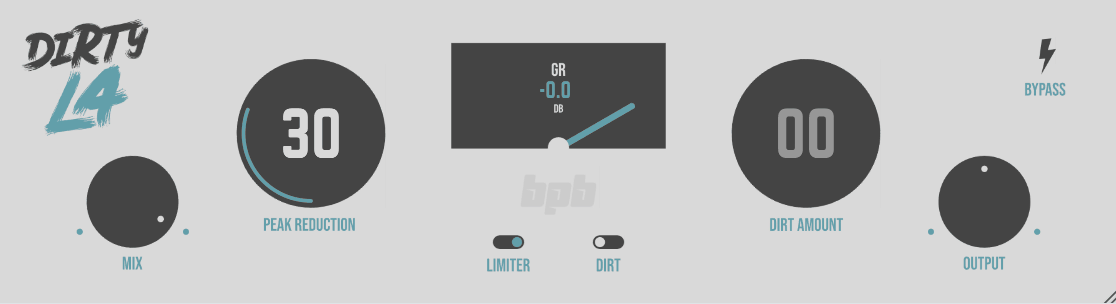
Vintage limiting amplifiers earned their reputation through rich, musical compression rather than clinical precision, and that’s exactly what Bedroom Producers Blog set out to capture here. It’s not modelled on any single specific hardware unit, but it clearly draws from several classic designs in that general family.
The goal behind BPB Dirty LA was smooth, musical compression while keeping the workflow genuinely simple. For vocals specifically, I’ve found it a reliable, no-fuss way to tame dynamics without endless tweaking. It also bundles in one of the developer’s own saturation algorithms, adding flavour alongside the compression itself.
- Compression Modes
By default, a relatively fast attack pairs with a moderate ratio, tuned to sound musical across most vocal material without much adjustment required. Switching to Limiting mode delivers faster attack and a higher ratio, making it better suited to aggressive levelling or glue on a drum bus.
For lead vocals, I generally stick with the default mode, saving Limiting mode for moments where I specifically want to catch and control more extreme dynamic peaks. The distinction matters depending on the material.
- Dirt Saturation
One of the developer’s signature saturation algorithms is baked directly into the compressor, adding character and gentle transient reduction alongside the dynamics processing. Engaging this triggers 4x internal oversampling automatically, switching off again when disabled to keep CPU usage sensible.
I like a light touch of Dirt on thinner vocal recordings, since it adds harmonic weight that a plain compressor alone wouldn’t. It’s a small addition that changes the character noticeably.
- Parallel Blend
A dedicated Mix knob lets you blend compressed and dry signal together, making parallel compression genuinely straightforward without needing a separate bus setup. This is particularly handy for preserving some of a performance’s natural dynamics while still benefiting from the compression underneath.
The developer specifically mentions this being useful for New York-style drum compression, and I think the same principle translates well to vocals when punch matters without losing dynamic nuance. This blend approach suits most lead vocal takes.
- VU Metering
Classic VU-style metering gives a visual reference for how much gain reduction is happening as you dial in settings. While the plugin is clearly designed to be judged by ear first, I still find having this familiar visual feedback available a welcome addition, especially for anyone newer to compression.
It works as a sanity check even after settling on a sound purely by listening, confirming the compressor is behaving as expected. It’s reassurance more than a strict necessity at that point.
20. Kiive Audio XTMax
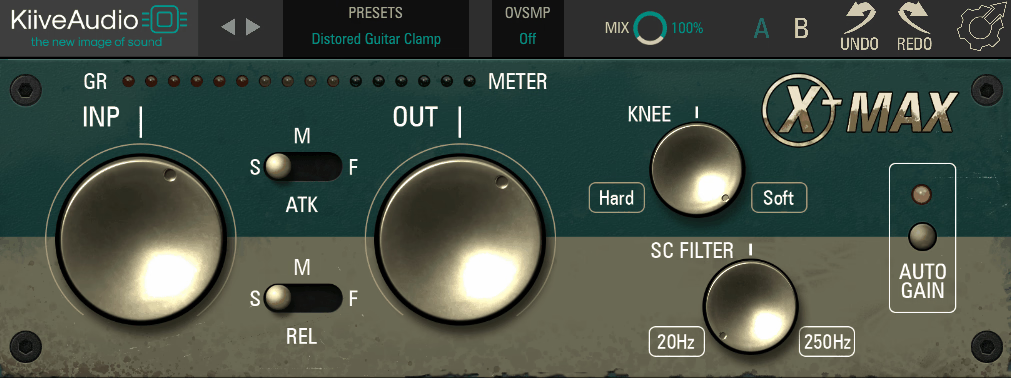
Getting your input and output controls to interact intuitively is harder than it sounds in compressor design, and XTMax manages it in a way that feels closer to a classic 1176 in practice. It sits as a little sibling to Kiive Audio‘s paid XTComp plugin, available exclusively through Plugin Alliance.
The underlying inspiration draws more from Distressor territory, though Kiive Audio is clear that it’s not a direct emulation or officially licensed product.
- Release Modes
Three release settings, fast, medium and slow, let you shape how the compressor responds after gain reduction kicks in. Faster settings add more obvious pumping and energy, while slower settings keep things smoother and more controlled overall.
For vocals specifically, I’d say the medium setting is a sensible starting point, since it strikes a reasonable balance between adding character and staying musical across a full performance. It’s the default I return to.
- Sidechain Filter
A built-in filter prevents low-frequency content from triggering excessive gain reduction elsewhere in the signal, which matters on vocals sitting alongside a bass-heavy arrangement. It stops low-end bleed or proximity effect from causing the compressor to react more than intended.
I think it’s a practical inclusion that plenty of free compressors skip entirely. A vocal feels noticeably more controlled once this filter is engaged properly on a busy mix.
- Rebuilt Interface
Kiive Audio completely remodelled the interface and processing engine from the plugin’s original release, giving it a cleaner layout alongside a new menu and top bar.
- Grit Character
Beyond its technical controls, the plugin has a genuinely identifiable sonic personality, adding punch and a slightly aggressive edge that many cleaner compressors don’t. This character comes through even at fairly restrained settings, not just when pushed hard.
Extra: Analog Obsession Room041
This one deserves a mention even as a bonus entry, since it was the developer’s first-ever reverb plugin and holds up well against most of what’s come since. Room041 is fully algorithmic rather than modelled 1:1 on specific hardware, though it borrows some characteristics from famous plate reverb units.
I find it particularly effective on vocals sitting further back in a mix, or on close-mic’d instruments where you want a natural, intimate sense of space. The interface splits cleanly into a preamp section, a core reverb section, and a post-EQ stage, wrapped in the familiar red power-button aesthetic that the developer’s plugins are known for.
- Drive Preamp
A tube-style Drive control offers ±24 dB of input drive, letting you push the signal from a clean, controlled reverb to something genuinely dirty and saturated. A high-pass pre-filter ranging from 20 to 100Hz sits alongside it, cleaning up unwanted low end before it reaches the reverb algorithm.
I like pushing Drive fairly hard on backing vocal reverb sends specifically, since it helps the tail feel cohesive with the rest of a saturated mix. It’s a more characterful starting point than most clean algorithmic reverbs offer.
- Stereo Spread
A dedicated control adjusts stereo separation from fully mono through to full width, giving precise control over how the reverb spreads. On mono source, this creates a convincing fake stereo effect, while on genuine stereo material, it behaves as a true-width control.
This is particularly useful for placing a vocal reverb precisely within a mix, whether tucked tightly behind the lead or spread wide behind a chorus of backing vocals. I adjust this early, before decay or EQ, to set a useful reference point.
- Post Equalizer
After the reverb signal is generated, a Low and High band, each offering plus or minus 24dB of gain, let you shape the tonal character of the tail itself. This means brightening a dull-sounding reverb or taming one that’s turned too harsh, without a separate EQ plugin afterward.
Some users have noted the reverb can develop a slightly metallic quality at longer decay times on brighter sources, and I find this section useful for dialling that character back. It’s worth reaching for whenever a longer tail starts sounding a touch ringy.

Hey, I’m Viliam, I started Music Circuit to write about plugins and gear, so you always know what’s new and what’s worth trying. You’ll also find guides and tips here to help you get started, whether you’re picking your first plugin or building out a full studio.