When you purchase through the links on my site, you support the site at no extra cost to you. Here is how it works.
FL Studio already ships with a substantial collection of instruments and effects, including Sytrus, Harmor, FLEX, Gross Beat, Patcher, Maximus and Edison. The reason to add third-party plugins is not simply to get more sounds, but to cover workflows or techniques the stock tools handle differently.
That’s why I wouldn’t pick plugins for FL Studio just because they sound good on their own. The more useful question is what does a plugin add, how does it fit FL Studio’s piano roll and mixer, and will it actually change the way you work?
The 30 below cover very different jobs, from synthesis and sampling to modulation, distortion, dynamics, stereo control and metering. I’ve also included a separate group of free plugins that can fill real gaps without making the list longer just for the sake of it.
1. u-he Zebra 3 (Hybrid Modular Synth)
A hybrid modular synth makes the most sense when you want to build the signal path yourself rather than work inside a fixed architecture, and u-he Zebra 3 takes that approach with spline-based wavetables, additive synthesis and modal resonance.
Instead of working through one oscillator-to-filter path, you build the sound from the modules you actually need and connect them into your own structure.
- Multi-Engine Synthesis
The synthesis section combines a spline-based wavetable engine, an additive engine with up to 1,024 partials, and through-zero FM oscillators. You also get modal resonators, comb filters, and 13 filter models, so the same instrument can cover conventional synthesis and more physical or experimental sounds.
I use it when a sound needs to be built rather than simply dialled in. A patch can move from a resonant, physical texture into a wavetable-based lead without requiring several separate instruments in FL Studio.
- Adaptive Interface
The Generator Rack hides unused modules and colour-codes the routing, which becomes useful once patches get dense. I find that easier to follow than a static modular layout where every possible module remains visible whether you’re using it or not.
- Modulation Architecture
You can route envelopes, LFOs, key tracking and other modulation sources across the generator structure rather than limiting each source to one part of the patch. That makes it practical for sounds where oscillator shape, filter movement and effects all need to evolve together.
- MSEG and Performance Control
The envelope system can create complex, time-based movements instead of simple ADSR shapes. You can also assign macros and performance controls so one gesture changes several parts of a patch at once, which works nicely with FL Studio automation clips.
2. Native Instruments Absynth 6 (Semi-Modular Synth)
Absynth 6 offers three-channel hybrid engine, a large preset library and a visual Preset Explorer that lets you browse by sound rather than only by name.
The synthesis side combines subtractive, FM, wavetable and granular processing, with 68-point envelopes and independent modulation across the three channels. I wouldn’t choose it simply for straightforward basses or leads, but it makes considerably more sense for atmospheres, transitions and evolving textures.
- Three-Channel Hybrid Engine
Each of the three oscillator channels can run a different synthesis method. A single patch can therefore combine a subtractive layer, an FM layer and a granular texture without stacking separate instruments across the FL Studio project.
The practical advantage is that the movement stays inside one patch. Instead of building an evolving background from several channels and automation clips, you can keep the whole sound inside the instrument.
- Modern Standards Support
The current version supports VST3, MPE, poly aftertouch and MTS-ESP microtuning. Those features matter most when you’re using newer controllers or working with alternative tuning systems.
- Mutator
The Mutator can generate controlled variations from existing patches, which is more useful than pure randomisation when the original sound is already close. I find that practical for exploring alternate versions of a pad or texture without rebuilding the patch from zero.
- Envelope-Based Sound Design
The long-form envelope system is particularly useful for risers, drones, evolving pads and transitional textures. You can build movement over an extended period without relying on a separate automation lane in FL Studio.
3. Xfer Serum 2 (Advanced Wavetable Synth)
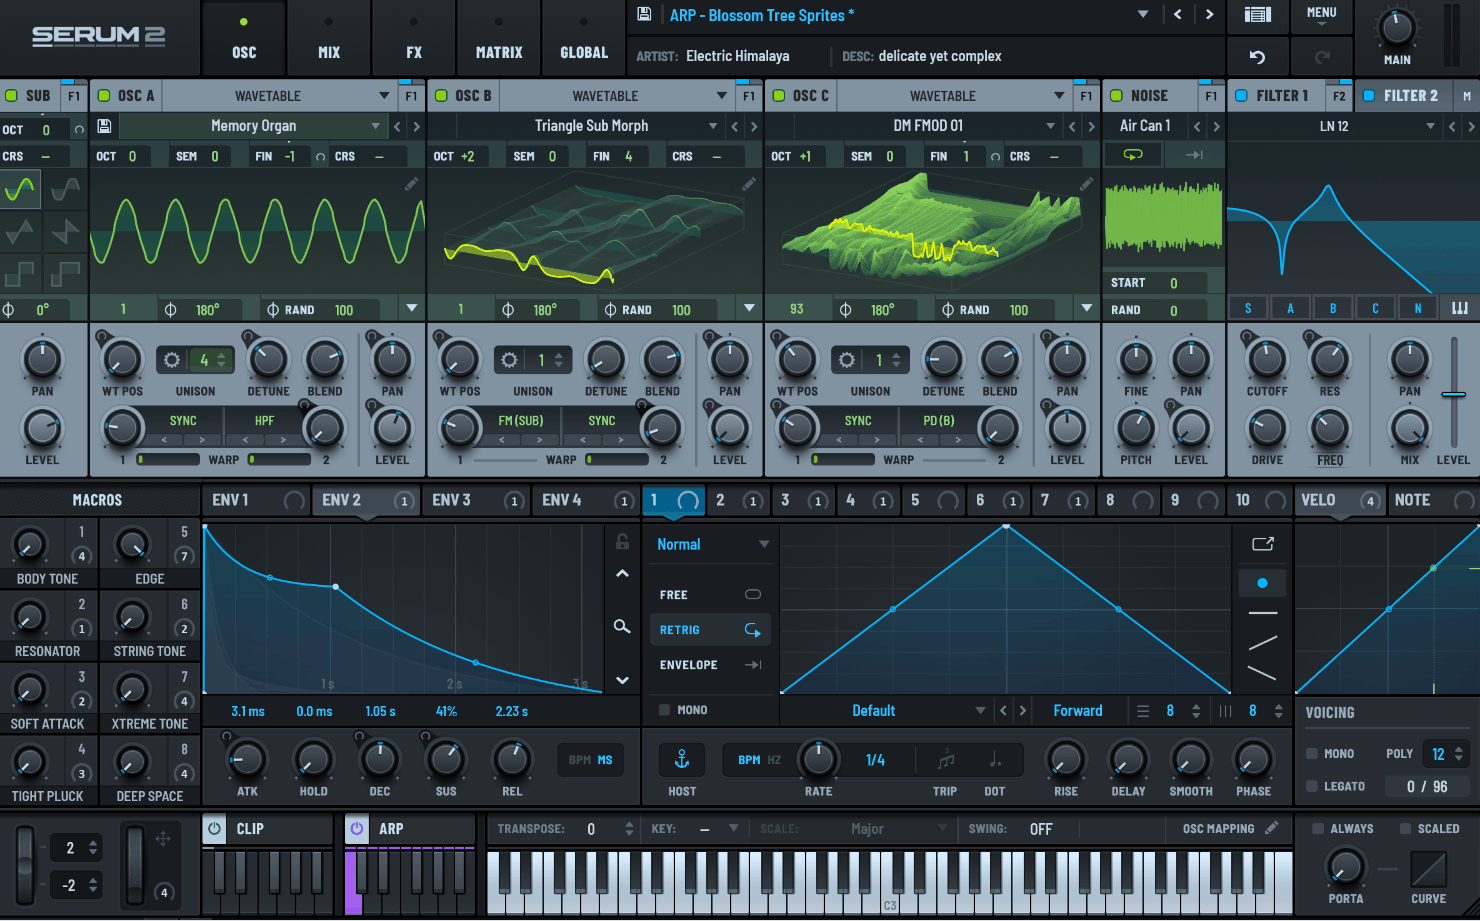
Standard synths often make you choose one synthesis approach at a time, which means building a hybrid sound can turn into several layered channels. Serum 2 brings wavetable, granular, spectral and sample synthesis into one environment, so those approaches can interact inside the same patch.
The modulation system can also respond to audio, MIDI and host tempo, which gives you more ways to create movement without filling the FL Studio project with automation clips. I find that especially useful when the sound itself needs to carry the rhythmic or timbral variation.
- Granular and Spectral Oscillators
These are the parts of the synth I reach for when a normal wavetable does not give me enough material. You can bring in a vocal, field recording or other sample directly and treat it as synthesis material rather than bouncing it through Edison first.
The spectral oscillator works with the harmonic content of the source, while the granular engine works with its fragments. That gives you two very different ways to move from a recording into a playable synth sound.
- Built-In Sequencer
You can sketch rhythmic material inside the synth and hear it immediately. I mostly use the sequencer for auditioning ideas, then move anything worth keeping into FL Studio’s piano roll for the final part.
The granular side can be CPU-heavy, particularly in more complex patches, so freezing or rendering dense instances can still make sense in a large project.
- Deep Modulation Routing
- Sample and Oscillator Layering
The ability to combine sampled material with synthesized sources gives you a practical middle ground between a dedicated sampler and a traditional synth. You can keep the attack from a recording while generating the sustain and harmonic movement yourself.
4. Knif Audio Knifonium (Tube-Driven Synth)
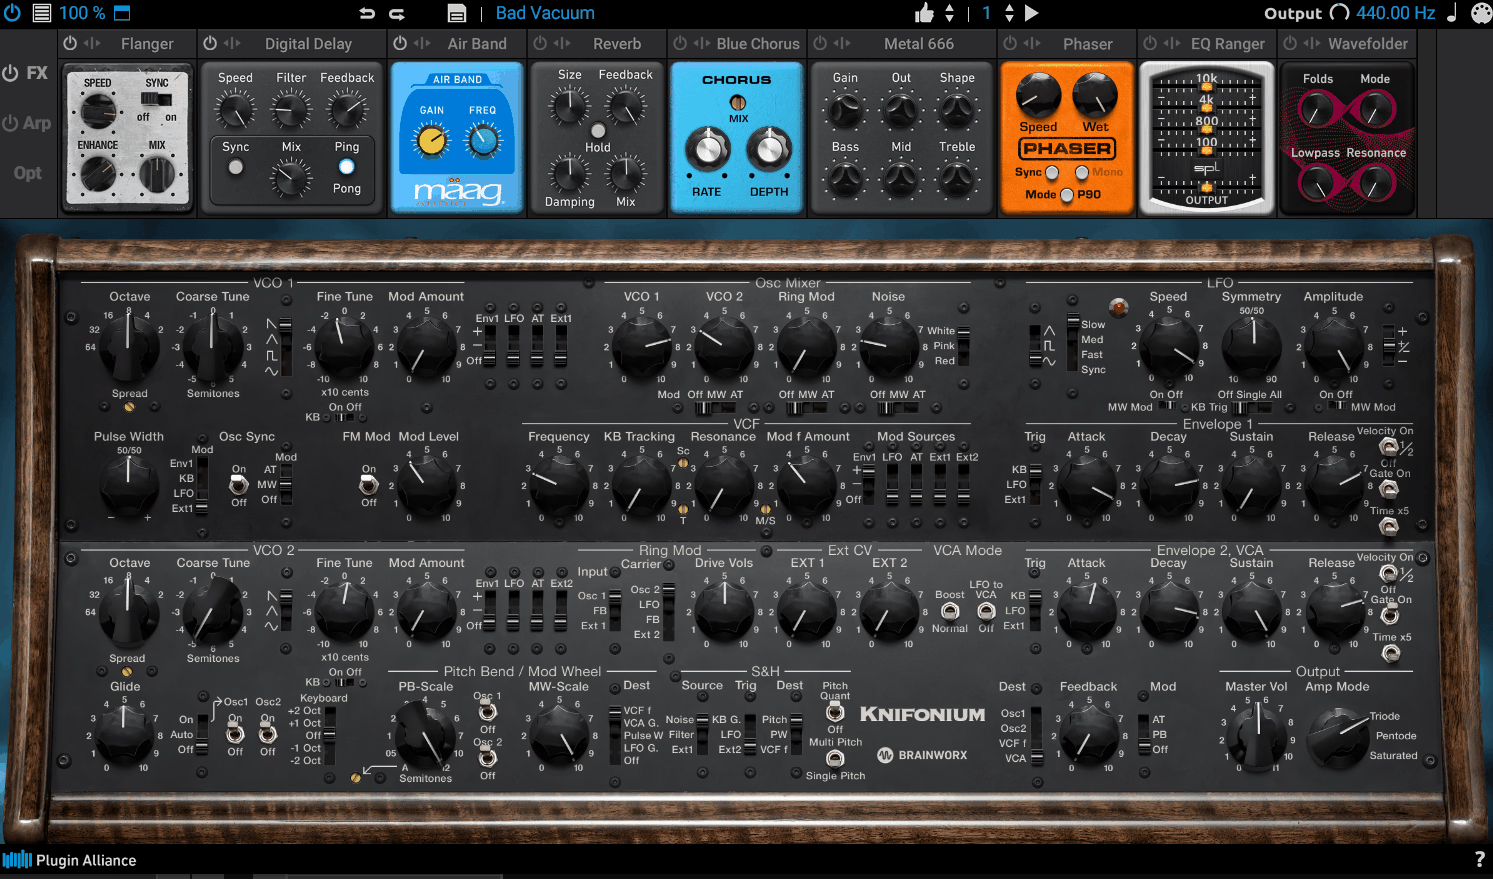
Most modern synths prioritise clean oscillator behavior, but tube-driven synthesis takes a different route, and that’s where Knifonium becomes interesting. Its architecture is built around 26 modeled vacuum tubes, two oscillators, a fourth-order ladder filter and ring modulation, while the software version adds eight-voice polyphony, unison, stereo tools, Mid/Side processing and an arpeggiator.
What matters most in practice is the harmonic character created by the interaction between those stages. I use it for individual leads, basses and pads that need a more pronounced tone without assembling several saturation and distortion plugins after the synth.
- Valve Filter Character
The filter drive produces asymmetric distortion and compression rather than behaving like a neutral digital saturation stage. That changes the harmonic balance as you push it, so the filter itself becomes part of the tone.
- Ring Modulation
The ring modulator generates inharmonic content, giving you metallic and unstable tones that sit outside the usual harmonic series. Smaller amounts add edge, while more extreme settings can push a conventional oscillator into much more abstract territory.
- Eight-Voice Polyphony
The software version extends the original concept with 8 voices, making chords, layered pads and unison sounds possible. That changes how you can use the instrument compared with a strictly monophonic design.
- Built-In Effects
The internal effects include tools for further shaping the synth without immediately opening additional plugins. I use these when the patch already has the right distortion and filtering character and only needs final movement or stereo treatment.
5. FAW SubLab XL (Bass & 808 Designer)
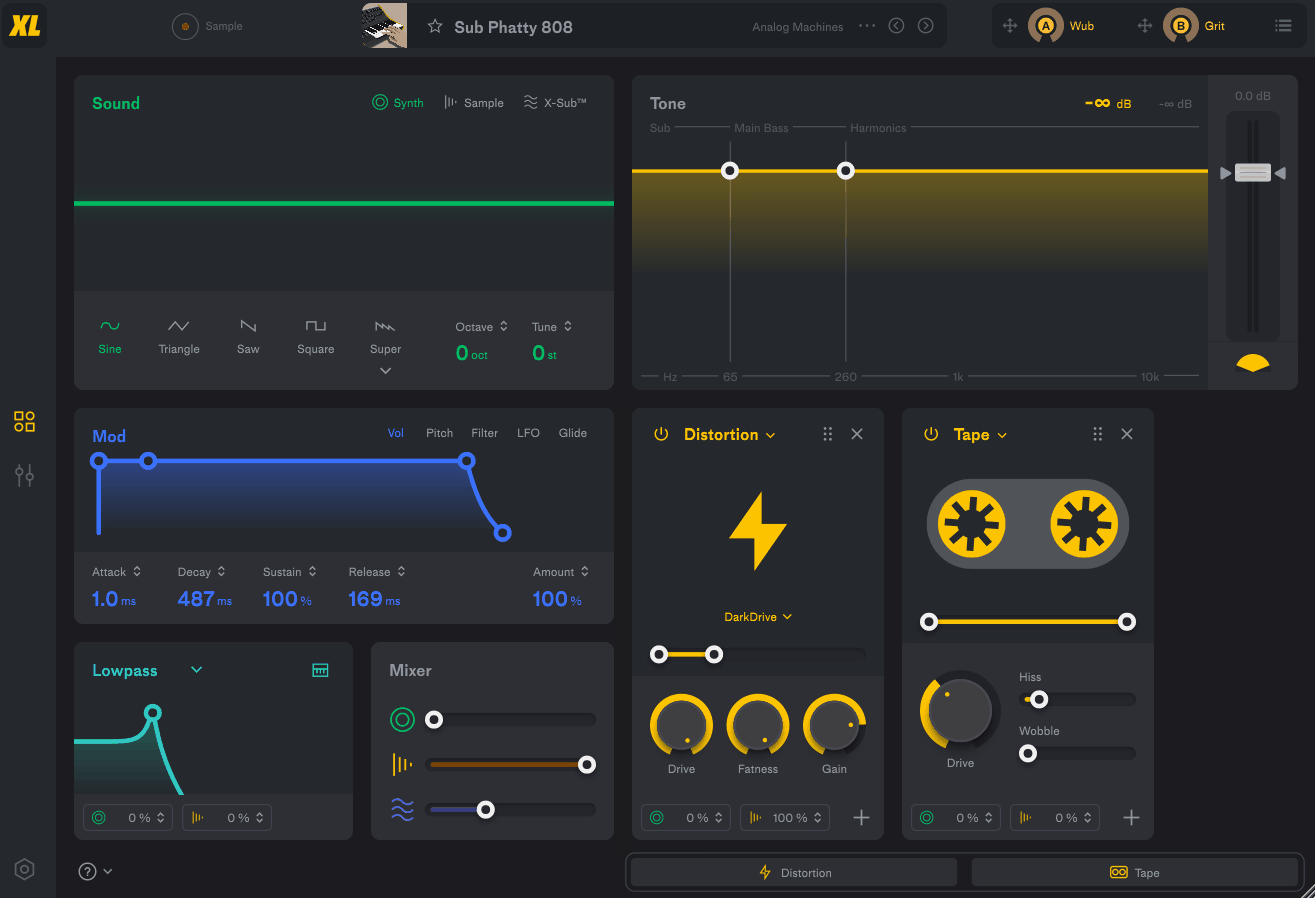
A focused 808 instrument is useful when you don’t want to build the entire low-end chain yourself, and SubLab XL is designed specifically around sub bass and 808 production. It combines a synth layer, sample layer and X-Sub engine, keeping the main focus on the low end while providing enough shaping and processing to finish the sound in one instrument.
- X-Sub Psychoacoustic Processing
X-Sub creates harmonics that help imply very low fundamentals on smaller playback systems. Instead of saturating the entire bass and hoping the right harmonics appear, you can create that information as part of the bass engine.
I find this particularly practical when a sub sounds fine on full-range monitors but disappears on headphones, laptops or phones.
- Dual-Layer Bass Engine
The synth and sample layers have independent tuning and envelope controls, so you can combine a clean sub with a more textured sampled layer. That keeps the low-end source organised instead of requiring several channels for one bass sound.
The included presets lean heavily toward trap and modern hip-hop, so producers working in other genres may want to build more from scratch. The underlying engine is still flexible enough to handle different approaches.
- 808 Glide and Pitch Control
The instrument is designed around the kinds of pitch movement that make programmed 808s work, including slides and tuned low-end movement. That makes it easier to turn a static bassline into something with the phrasing normally associated with a played part.
6. Baby Audio Grainferno (Granular Synth)
Granular synthesis becomes more playable when it can work with two sources at once, and Grainferno combines two-sample morphing with audio-rate granular synthesis. The grain rate, scan position and scatter controls give you control over how the original material breaks apart and reforms.
I find it useful when you want a granular instrument that can still produce clearly playable tones. At higher grain rates, the source starts behaving more like an oscillator with the spectral character of the original recording underneath it.
- Dual-Sample Morphing
You can load two samples and morph between them using seven modes. Some are straightforward blends, while others use one source to influence the grain behavior of the other.
That makes it possible to combine sources in ways a normal one-sample granular processor cannot. A vocal can provide the tonal material while a percussion loop influences the movement.
- Audio-Rate Grain Behaviour
At high grain rates the engine crosses into synthesis territory, so a sample can become the basis for a new oscillator-like tone. This is useful when you want to preserve the spectral fingerprint of a recording without keeping its original timing.
- Morph-Based Texture Design
The two-source design gives you a practical way to move between related and unrelated materials. I find that particularly useful for transitions because a single patch can gradually shift from recognisable source material into something completely synthetic.
7. Futurephonic Rhythmizer Fusion (Randomizer)
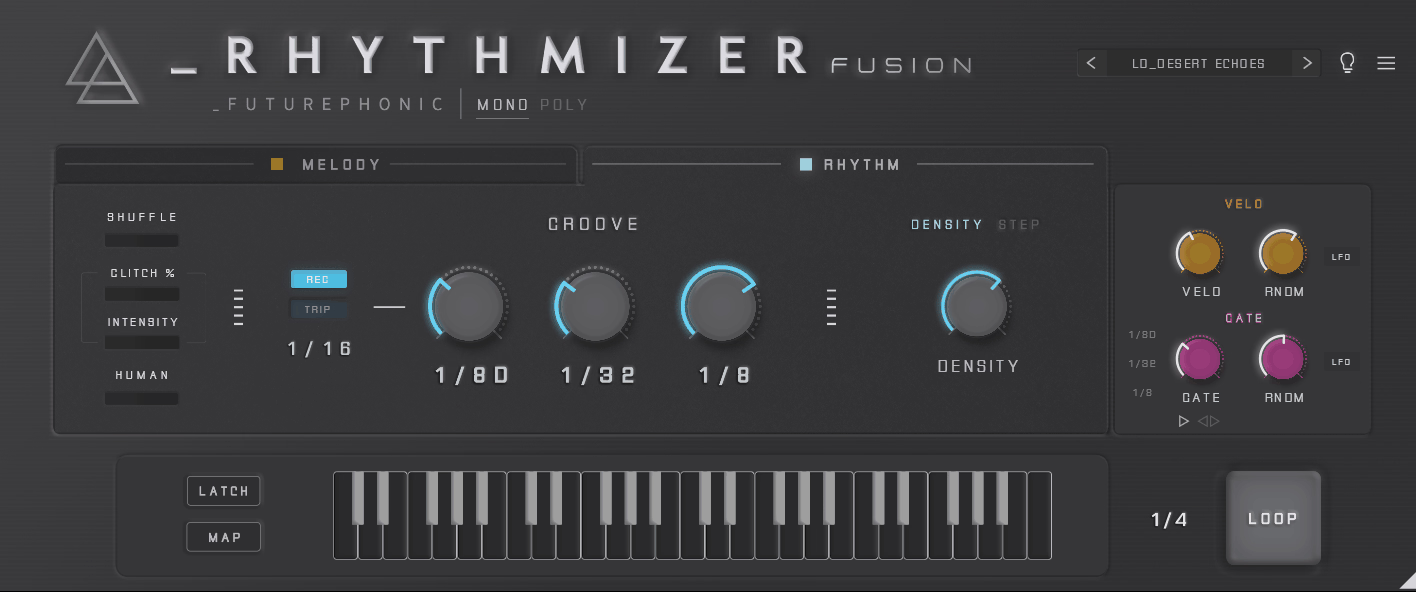
Randomisation is useful when a pattern is technically fine but musically predictable, and Futurephonic Rhythmizer Fusion approaches that through a poly arpeggiator, step sequencer, glitch engine, velocity randomisation and pitch-bend randomisation. It changes the MIDI feeding your instrument rather than processing the audio itself, so the result remains editable inside FL Studio.
That’s useful when the problem is a repetitive musical pattern rather than the sound itself. I treat it more as a writing tool than a finished-performance generator, because the strongest results usually come from capturing a useful variation and then editing it in the piano roll.
- Poly Arpeggiator
Fusion can work with polyphonic input, allowing you to feed it chords and generate variations from them. That gives you more possibilities than a traditional single-note arpeggiator.
- Loop and Capture
The randomisation system lets you define how much variation you want, then use Loop to keep a result that works. I usually record the useful result as MIDI, delete the weaker variations and continue arranging in FL Studio.
That is the practical advantage of this kind of plugin. It gives you a starting pattern without forcing the generated material to remain inside the instrument.
- Glitch and Repetition Tools
The glitch section gives you another way to make a pattern change without replacing the underlying notes. I use this when the MIDI should remain recognisable but the rhythm needs occasional interruptions or accents.
8. Scaler 3 by Scaler Music (Chord Progressions)
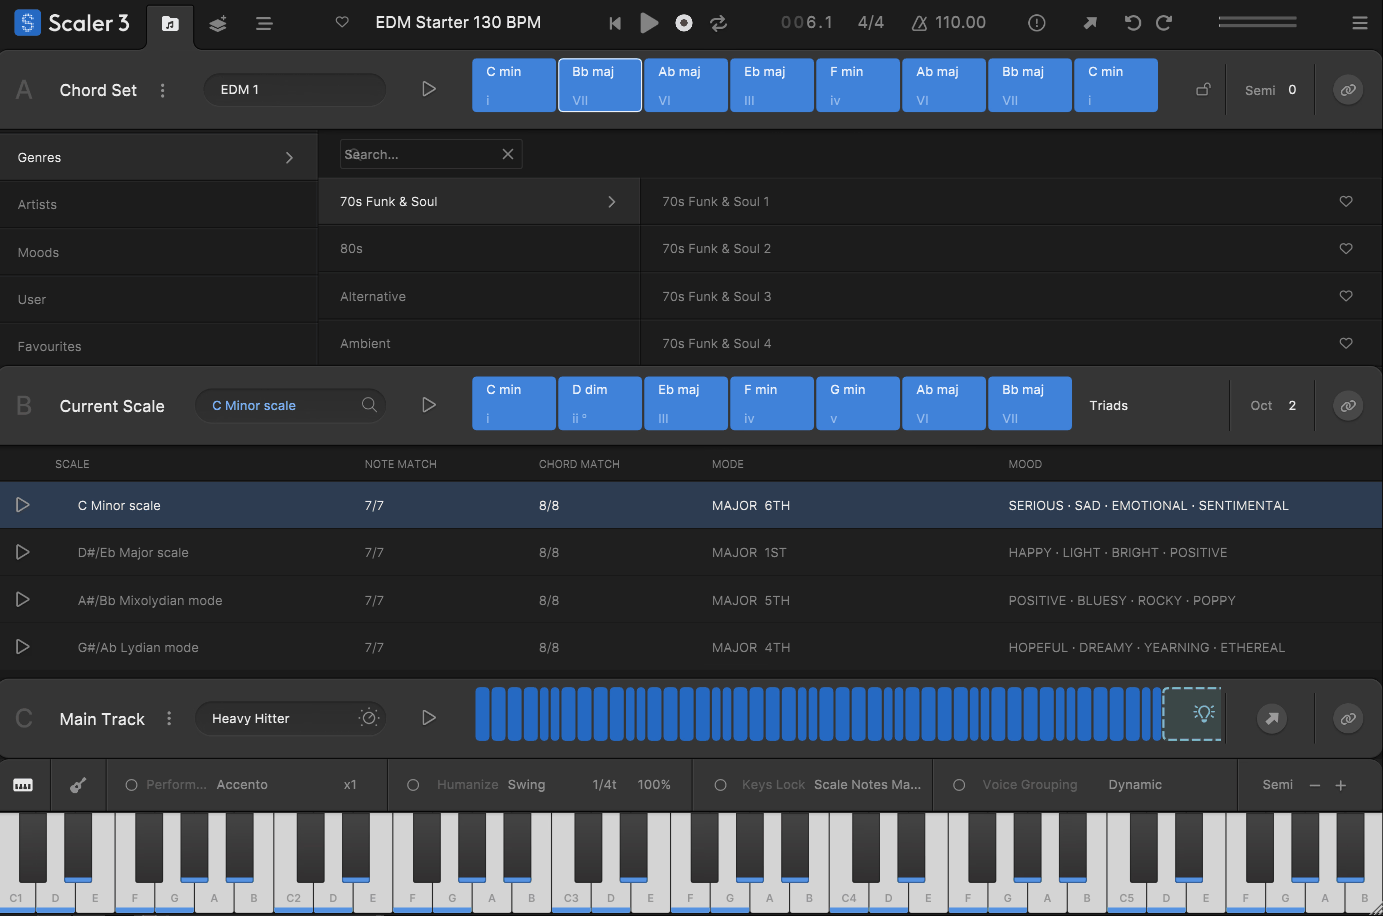
When the difficulty is finding the right harmony rather than the right sound, Scaler 3 gives you a separate environment for working with chord relationships, scales and MIDI generation. It can detect musical material, generate progressions and provide variations without requiring you to manually build every chord in the piano roll.
For FL Studio users, the important part is that the result can come back into the piano roll as editable MIDI. I find that much more useful than a chord tool that leaves you locked into its own playback system.
- VST/AU Plugin Hosting
You can audition the progression through the synth you actually plan to use instead of a generic piano sound. That makes decisions about rhythm, voicing and register much easier in context.
- Dynamic Scale Detection
Scaler can track the harmonic material you’re working with and suggest compatible scales. That gives you a reference when a progression starts moving beyond its original key or mode.
The interface takes some learning, especially if you’re coming from a simple chord generator. If you already own an earlier version and only want basic chord suggestions, the extra depth may not be necessary.
- Performance and Voicing Controls
You can change inversions, voicings, tensions and rhythmic patterns without rebuilding each chord manually. That makes it easier to find a progression that works in the actual register of your instrument.
- MIDI Export Workflow
Once you have the progression, you can move the notes into FL Studio and continue there. I find that the combination of theory assistance and normal MIDI editing keeps the final part under your control.
9. Polyverse Manipulator (Vocoder & Sound Design)
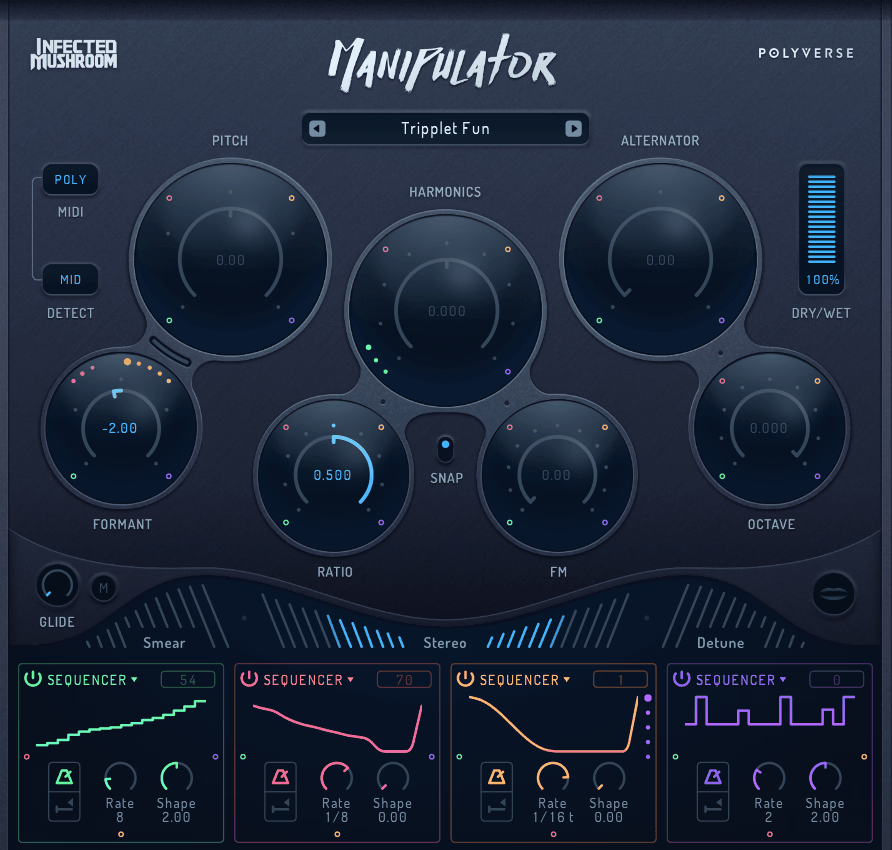
Granular vocal processing works particularly well when a source needs a different identity without losing its performance, and Manipulator from Polyverse Music, developed in collaboration with Infected Mushroom, is built around exactly that idea.
It works particularly well with monophonic material such as vocals, leads and basslines, where pitch, formant, harmonic and granular processing can reshape the source without replacing it completely.
I find it especially useful when a vocal or sustained sound has the right performance but feels too predictable. You can keep some of the original character underneath while pushing the processed layer into a much more synthetic direction.
The processor includes 10 effects, including pitch shifting, formant shifting, harmonic shifting, Grain Alternator, Smear, Stereo and Detune. The useful part is combining several of them rather than treating them as isolated processors.
- Gated MIDI Playing
The gated Mono and Poly modes mute the processed audio when no MIDI note is held. A sustained vocal or other monophonic recording can therefore behave more like a playable instrument inside FL Studio.
That is particularly useful for rhythmic vocal stabs, harmonised phrases and pitched sound-design layers.
- Polyphonic Harmonization
The polyphonic engine can create up to four simultaneous voices from a monophonic source. That is enough to turn one vocal phrase into a simple chordal texture without recording every harmony separately.
- Grain Alternator
The granular section can work from very short grain lengths through much larger values, making it useful for both subtle thickening and more obvious rhythmic destruction. I use this when conventional pitch shifting sounds too clean.
10. Ohmforce Ohmicide-S (Distortion, loved by Skrillex)
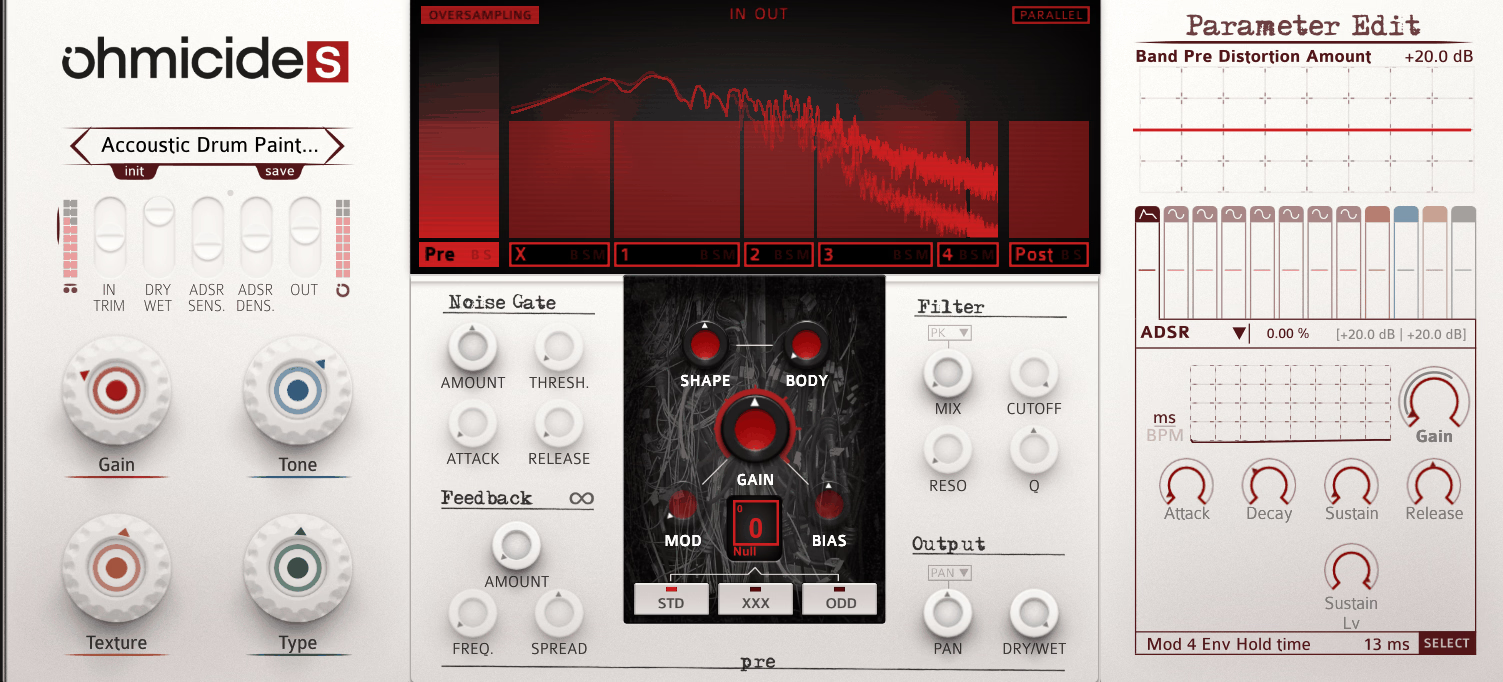
Multiband distortion becomes more manageable when the low end can stay controlled while the upper ranges are pushed, and Ohmicide-S is built around that approach. It provides 37 distortion types across three modes, alongside dynamics, filtering and modulation.
For me, the main advantage is keeping the low end controlled while the mids and highs receive much more aggressive processing. That makes it particularly useful on basses and drums where full-range distortion would interfere with the fundamental.
- Multiband Distortion
The range of distortion types gives you different ways to create harmonic content from the same source. I generally start with the presets and then adjust the individual bands for the actual bass or drum sound.
The interface is dense, so learning the main routing and band controls pays off more than trying to understand every parameter immediately.
- Independent Band Dynamics
Each frequency section can be treated differently instead of simply adding distortion after a fixed crossover. That makes it possible to keep the sub controlled while letting the mids compress and distort much more heavily.
- Per-Band Processing
Each band can be processed independently, so the low range can remain relatively clean while the mids and highs receive much more drive. That removes the usual compromise between a distorted harmonic layer and a stable sub.
You can therefore push the upper portion of a bass into aggressive territory without forcing the same treatment onto the fundamental.
- Modulation and Macro Control
The modulation system gives you ways to automate distortion behaviour over time. I find this particularly useful for turning a static bass sound into something that evolves across a phrase.
11. AAS Chromaphone 3 (Physical Modelling Synth)
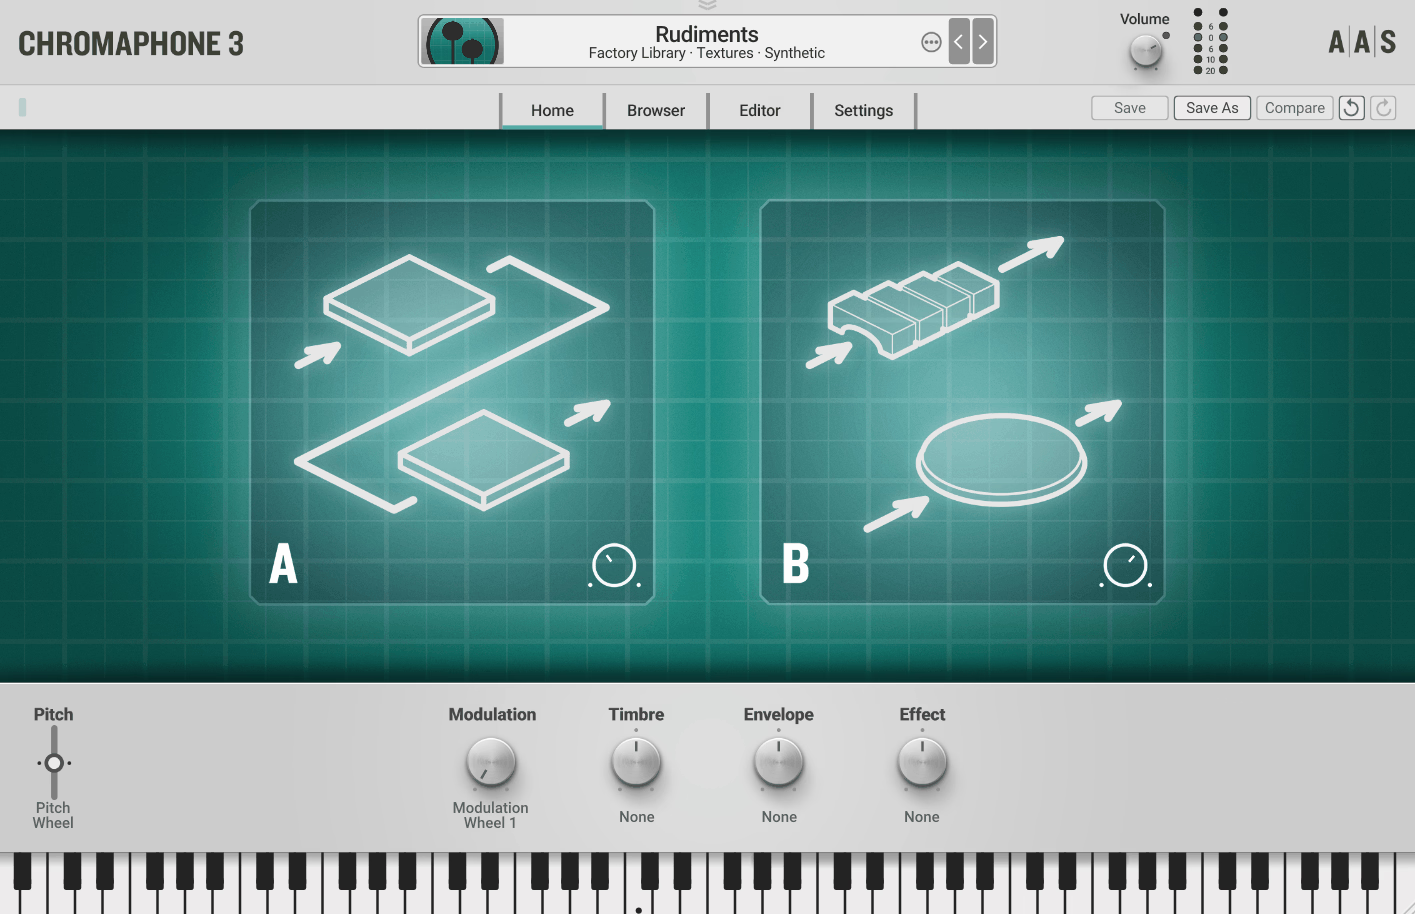
I like that Chromaphone 3 keeps the exciter and resonator concept clear rather than hiding the physical-modeling process behind a single macro. You can choose a resonator such as string, plate, membrane, tube or marimba, then control the material, damping and interaction with another resonator.
That workflow is particularly useful for percussion and plucked sounds because the result changes with the performance rather than simply triggering a fixed sample. It also gives you a way to make original percussion without relying on another familiar sample pack.
- Resonator Coupling
Two resonators can interact instead of simply playing side by side. A membrane coupled to a tube can therefore create a result that neither resonator produces alone.
For FL Studio users, this is a practical way to build unusual kicks, percussion, plucks and metallic sounds without reaching for several layers of samples.
- Independent Excitation
You can control how the resonators are excited rather than simply changing the resonator itself. That makes it possible to move from a clean mallet-like attack toward something noisier or more synthetic.
- Performance Macros
The instrument provides performance-oriented controls for changing timbre and behaviour while you play. I find those more useful than deep parameter editing when a percussion part needs to evolve across a phrase.
12. Arturia Vox Continental V (Organ)
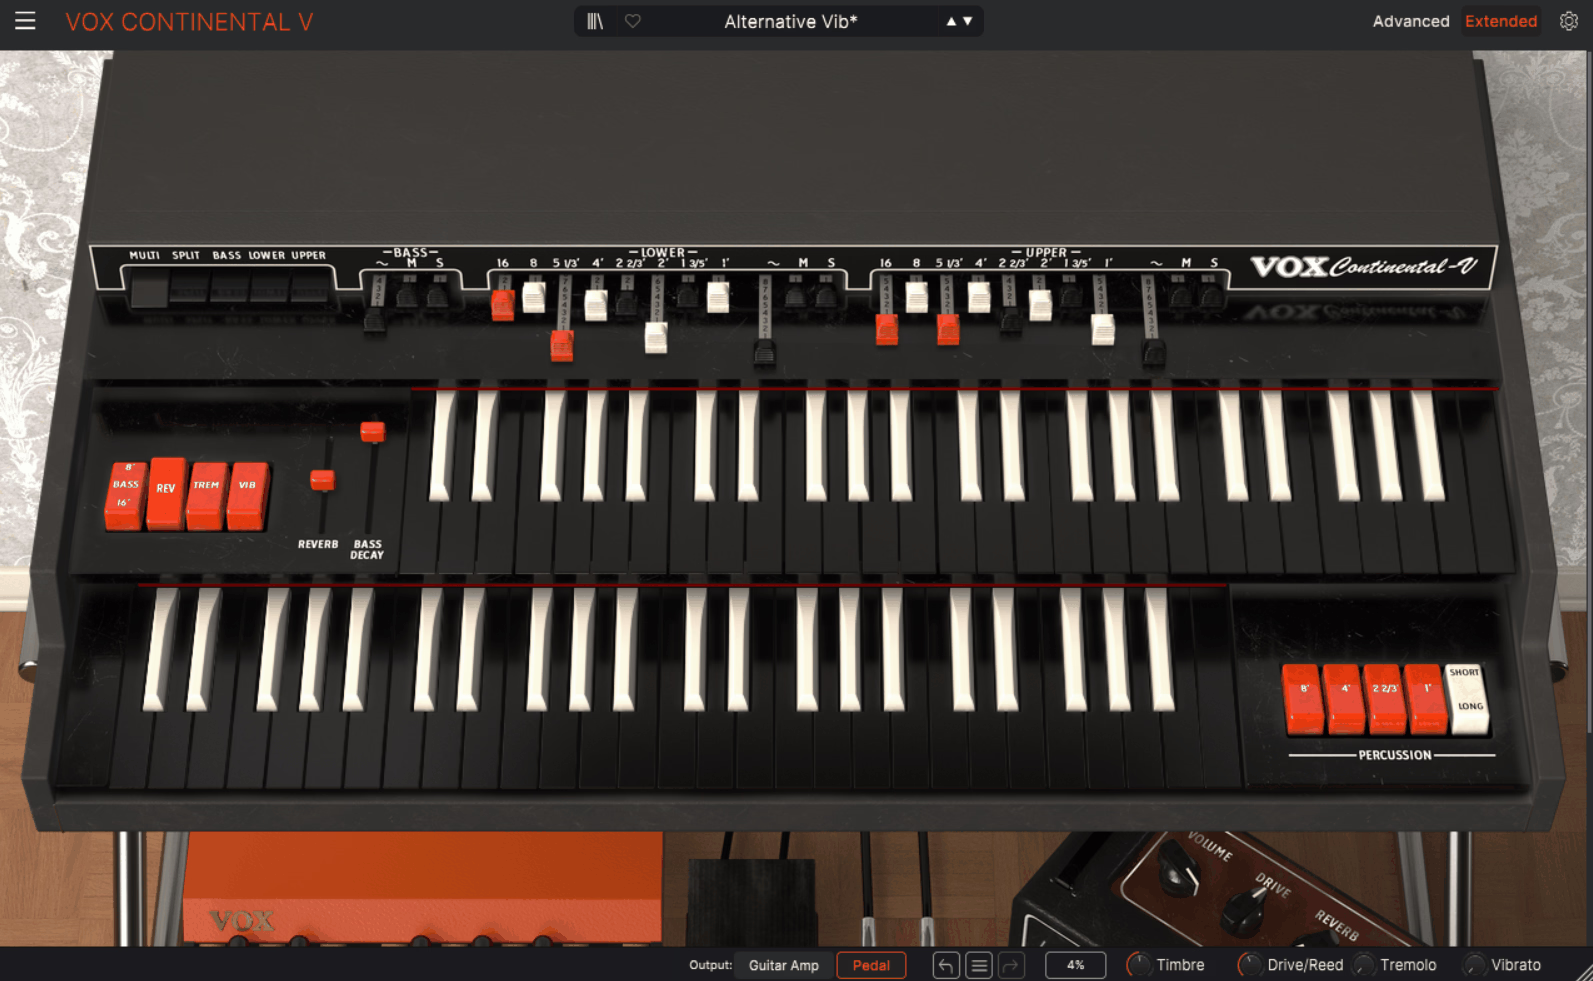
A transistor organ can fill the midrange very differently from a modern synth pad, and Arturia Vox Continental V recreates the harmonic character of the Vox Continental. The main reason to use it is not simply historical accuracy, but the way its tone fills the midrange with a sharper, more defined character than many modern organ sounds.
- Drawbar Control
The drawbars determine the harmonic balance of the instrument. I use them to build supporting layers rather than leaving the organ entirely at a preset.
That can help fill the space around 1 kHz without adding another broad pad that competes with vocals and leads.
- Organ Effects
The built-in effects provide additional movement and ambience. I particularly like rotary-style processing on sustained chords because the part can move without requiring extensive automation clips.
- Percussion and Keying Behaviour
The organ architecture includes controls that affect the onset and character of the notes rather than simply the final EQ. That gives you another way to make a part feel sharper, softer or more rhythmic.
- Layering Workflow
I find this instrument particularly effective beneath vocals and lead synths because it fills a narrower part of the spectrum than a wide pad. That can give the arrangement more harmonic support without adding another large stereo source.
13. Beatsurfing CHeat Code (Multi Effect)
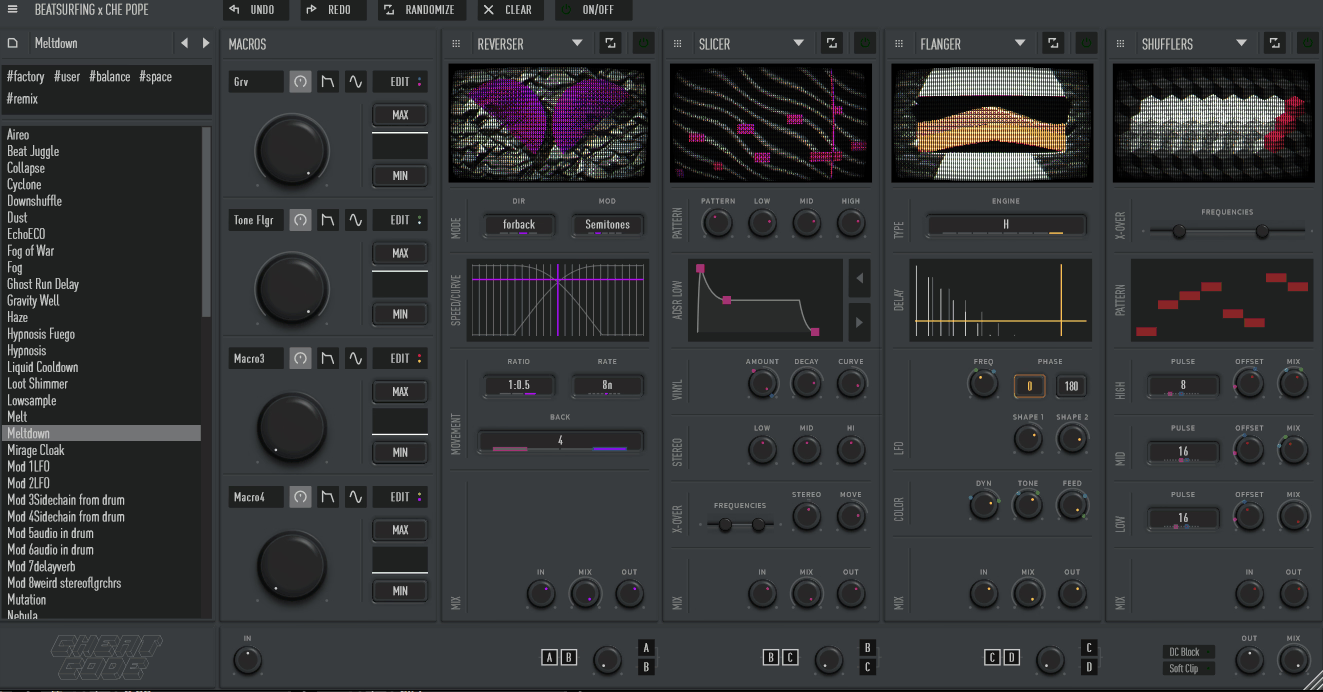
If a loop or synth part feels too static, CHeat Code gives you several ways to create movement without building a long effects chain in FL Studio. It combines 16 effects across four interchangeable slots and lets you change how those modules interact.
I use it when the sound itself is fine but the arrangement needs more variation. The performance controls also make it useful when you would rather perform a transition than draw every automation move manually.
- Fluid Series/Parallel Routing
The routing control blends between series and parallel processing. Because that balance is continuous rather than a simple switch, routing itself becomes another parameter you can automate.
That can produce substantial changes from the same effects without rebuilding the chain.
- Performance Widget
Four macros can be driven by modulation sources, while the performance widget provides momentary effect changes. I find this useful during arrangement because a transition can be performed first and edited later in FL Studio.
- Envelope Following
The effect can respond to the incoming signal so the treatment changes with the performance rather than staying fixed. That is practical on loops where you want the processing to follow the transients.
- LFO Modulation
LFO-based modulation adds repeatable movement that stays locked to the project. I use that when randomisation would make a part too unpredictable.
14. Polyverse FilterVerse (Creative Filter)
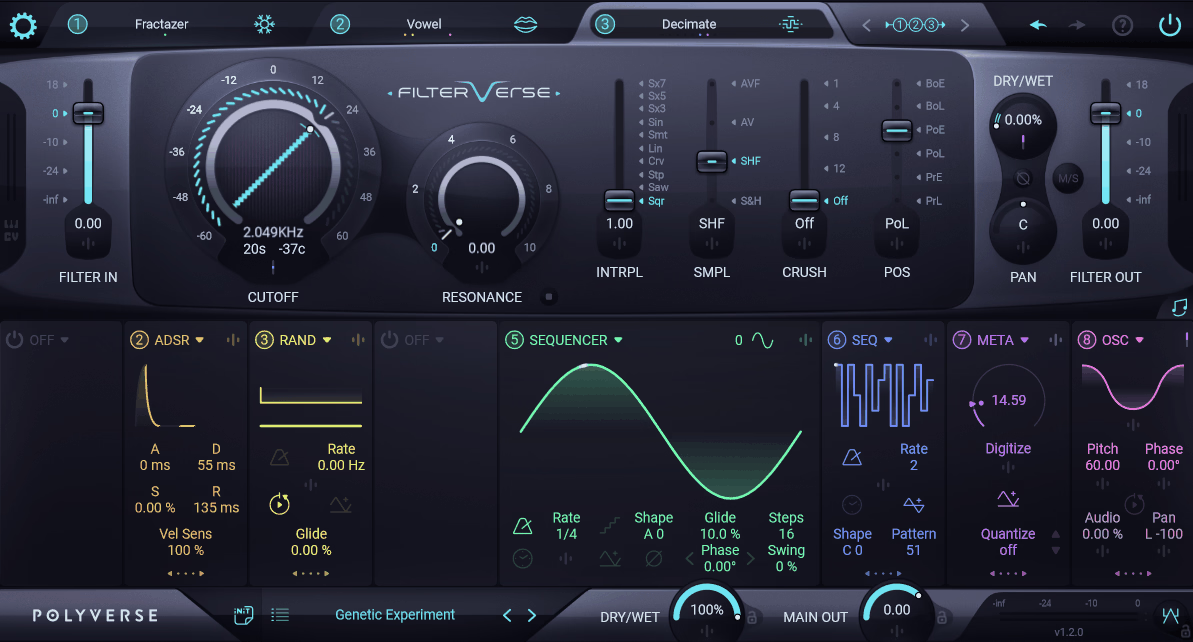
Creative filtering becomes much more flexible when several stages can interact, and FilterVerse combines multiple filters, routing, stereo control and internal modulation. The movement can therefore happen inside the patch rather than through a collection of automation clips.
For FL Studio, I see it as a creative filter rather than a replacement for a conventional EQ. I use it most on basses, leads and textures that need movement beyond a normal cutoff sweep.
- Five Routing Schemes
The routing changes how the filters interact, so the same three stages can produce very different results depending on whether they’re working in series, parallel or a hybrid structure.
That makes routing part of the sound design rather than a decision you have to make once and forget.
- Per-Filter Stereo Controls
Each stage includes panning, phase and Mid/Side controls. I find these more useful on leads and atmospheres than on the central low end, where keeping the stereo field stable usually matters more.
The internal modulation also reduces the need for repeated FL Studio automation when the movement needs to stay connected to the patch itself.
- Eight Modulation Sources
You get modulation sources including sequencing/LFO, ADSR, envelope following, randomisation, pitch detection, MIDI/CV and audio-rate modulation. These can target filter parameters and, in some cases, other modulation sources.
- Non-Filter Processing
The environment also includes processors beyond standard filtering, including rhythmic granular and resonant effects. That makes it useful when a sound needs a broader transformation rather than another conventional cutoff sweep.
15. XLN Audio XO (Sampler, Browser, Drum Machine & Sequencer)
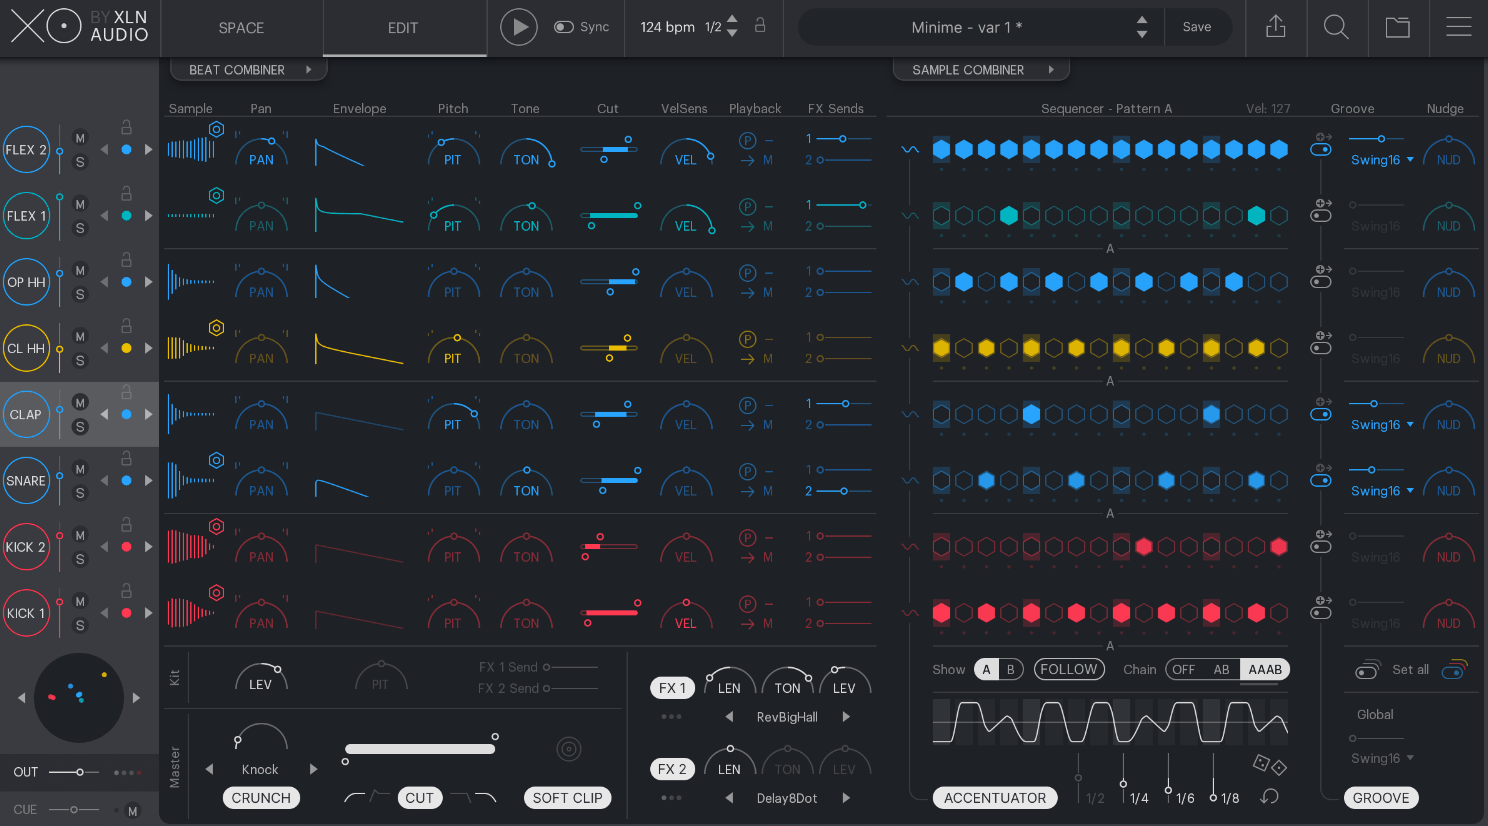
XLN XO maps your one-shot library by sonic similarity, giving you a visual alternative to folder browsing. You can compare kicks, snares, hats and percussion while the beat is playing instead of opening individual files and waiting for each one to audition.
That is especially valuable once your sample collection becomes large. I find the biggest practical benefit is being able to find alternatives without leaving the context of the groove.
- Sonic Similarity Mapping
The sampler groups sounds according to their sonic relationships. You can start with a kick you already like and browse nearby alternatives rather than relying on filenames or folder structure.
- Multi-Out Wrapper Setup
The built-in sequencer is useful for sketches, but FL Studio already handles sequencing very well. I mostly use it for sample discovery, auditioning and replacement, then move the sounds into the Channel Rack.
You need to enable the plugin’s extra outputs in the FL Studio wrapper if you want individual drum sounds on separate mixer inserts. Setting that up early avoids having to reorganise the routing later.
- Groove Templates
The sequencer includes groove and timing options that let you alter the feel of a pattern without redrawing every hit. That can be useful when a straight grid rhythm works technically but feels too rigid.
- Sample Locking and Randomisation
You can keep the drums that already work while changing the others. I find that quicker than replacing the whole kit when only one or two sounds are actually causing the problem.
16. Native Instruments Kontakt 8 (Sampler & Kontakt Library Platform)
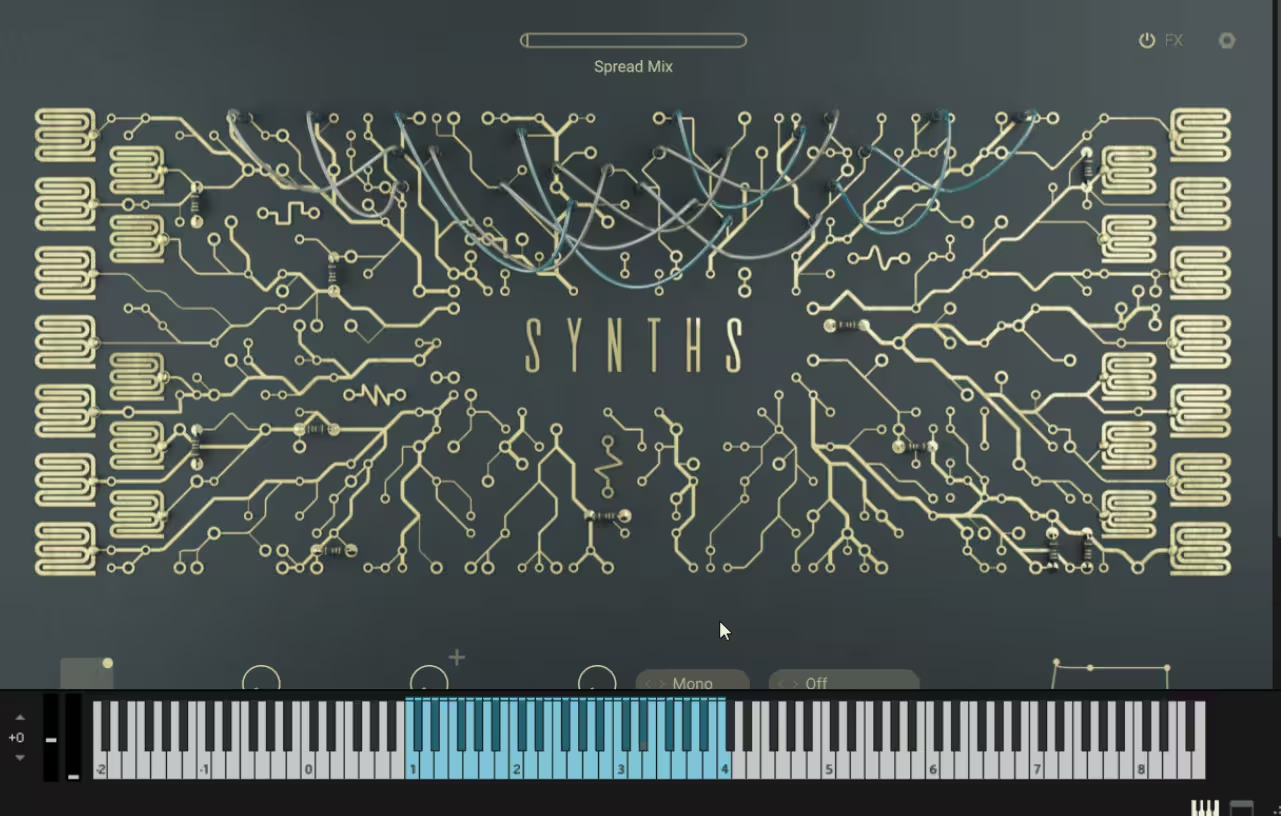
A sampler platform becomes worthwhile when the libraries themselves are the reason to keep it installed, and Kontakt 8 sits in that role for orchestral libraries, pianos, cinematic instruments, keyboards, drums and a large third-party ecosystem. It supports a much broader range of sampled instruments than a single-purpose sampler usually does.
I’ve used Kontakt for very different types of sample libraries, and the advantage is that the same platform can cover all of them. The interface is dense at first, but the browser and routing become much easier once you’ve set up a few libraries.
- Kontakt Player Compatibility
The platform can also load compatible Kontakt Player libraries, giving you access to free and paid instruments without requiring the full instrument-building workflow. That makes it easier to explore the ecosystem before committing to large libraries.
- Multi-Output Routing
Individual instruments and layers can be routed to separate audio outputs. In FL Studio, you need to enable those outputs in the plugin wrapper before connecting them to separate mixer inserts.
- Tools and Leap
The newer ecosystem includes Leap, a performance sampler designed around loops and one-shots, along with Tools for generating phrases and MIDI material. These make the platform more useful for quick sketching as well as detailed sampled instruments.
- Conflux
The Factory Library includes hybrid instruments that combine sampling with synthesis. That gives you a way to start from recorded material while still having control over the resulting tone.
17. Arturia Augmented GRAND PIANO (Expressive Piano)
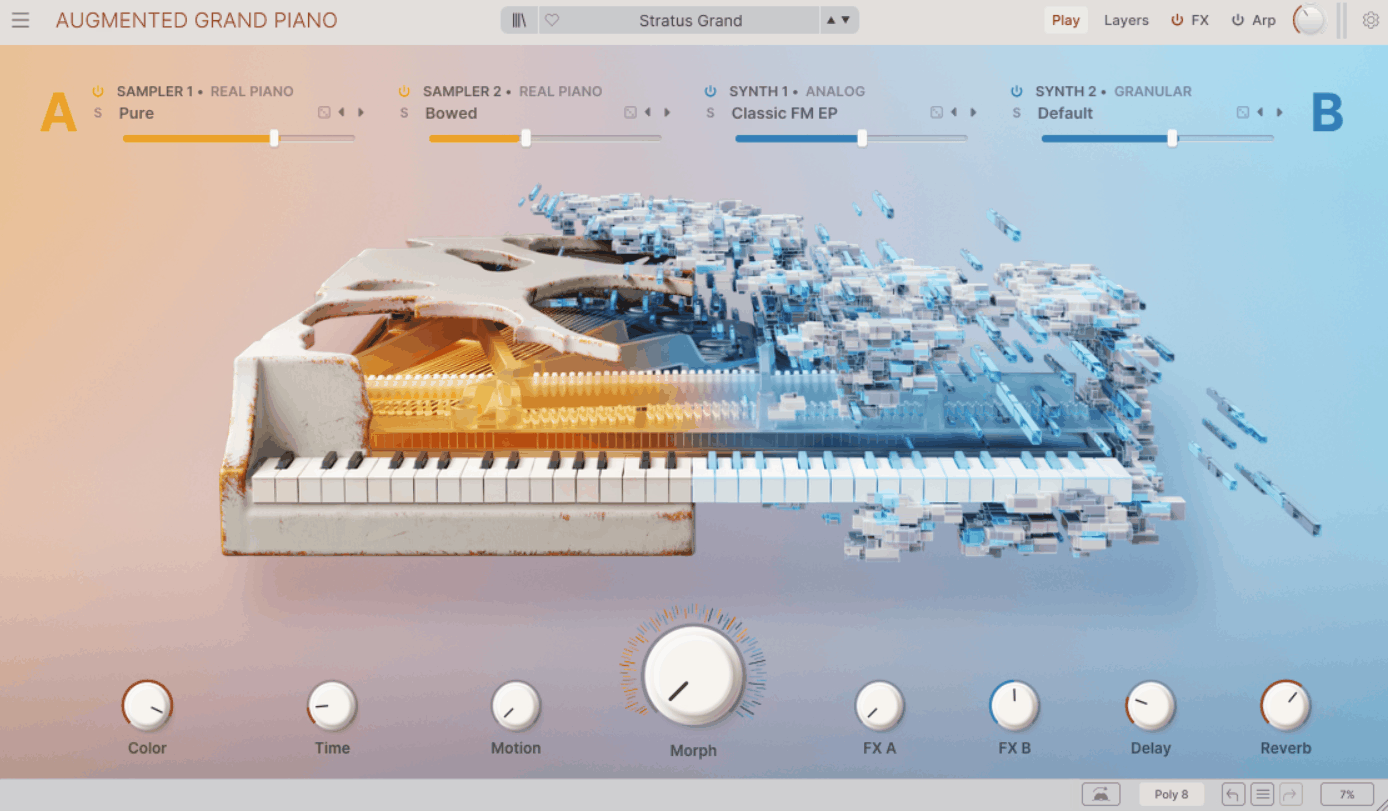
A hybrid piano makes sense when a traditional piano gives you the right notes but not quite the right texture, and Augmented GRAND PIANO combines recorded grand-piano material with a synthesized layer and a small set of performance controls.
The point is not to replace a full piano library, but to give the piano a more contemporary role when a pure acoustic sound feels too static.
I find it useful for cinematic chords, pop layers, ambient passages and hybrid piano textures. The limited control set also makes it quick to set up inside an FL Studio project.
- Morph Macro
The Morph control moves between the acoustic and synthesized layers. Automating it across a section can gradually turn a piano part into something more electronic without changing the MIDI notes.
- Layered Synthesis Bed
The synthesis layer follows the same performance as the piano. That keeps both parts moving together instead of requiring separate programming for the supporting texture.
I wouldn’t make it the main piano in a project that needs detailed classical realism. Its strength is the combination of familiar piano tone and electronic movement.
- Performance Controls
Additional controls let you shape the character and behaviour of the hybrid layer without opening a large synthesis interface. That keeps the instrument quick to use when the main goal is to make the piano sit differently in the arrangement.
- Expressive Layering
Because the acoustic and synthesized components share the same performance, you can automate their balance over a section rather than writing a second MIDI part. I find that particularly useful for intros and breakdowns where the piano gradually becomes more electronic.
18. DataMind Audio Concatenator (AI Mosaicing)
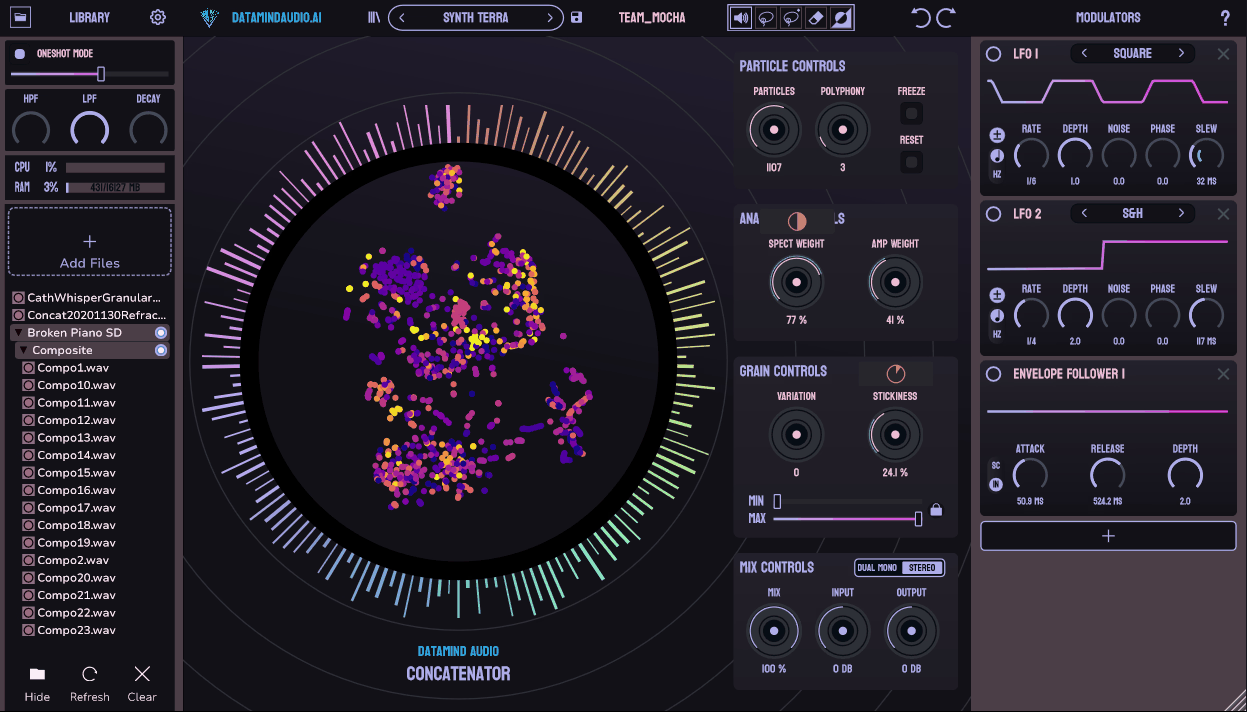
Audio mosaicing becomes interesting when the source performance can influence which fragments are chosen. DataMind Audio Concatenator reconstruct an incoming performance from a sample corpus. The source performance determines what the system looks for, while the corpus supplies the actual fragments.
That makes it different from ordinary granular processing, where fragments are usually selected according to timing, position or randomness. I find it more useful when the goal is to keep aspects of a performance while changing its entire sonic material.
- Real-Time Corpus Matching
The processor analyses the incoming signal and chooses fragments from the loaded corpus according to its characteristics. That allows rhythm and phrasing to remain related to the source while the timbre comes from another collection of samples.
- Probability Controls
Controls for variation, particle reset, stickiness, particle count and polyphony determine how closely the reconstruction follows the source and how quickly it changes material. I keep variation more controlled for melodic sources and increase it for textures or percussion.
- Spectral vs. Amplitude Matching
You can alter how strongly the system prioritises spectral information versus amplitude information from the input. That changes whether the rebuilt sound follows the source’s tone more closely or tracks its rhythmic energy.
- Corpus-Based Workflow
The quality of the result depends heavily on the material you give the system to work with. A carefully chosen corpus of related samples usually produces more useful results than throwing thousands of unrelated files into the browser.
19. Eventide H910 (Harmonizer)
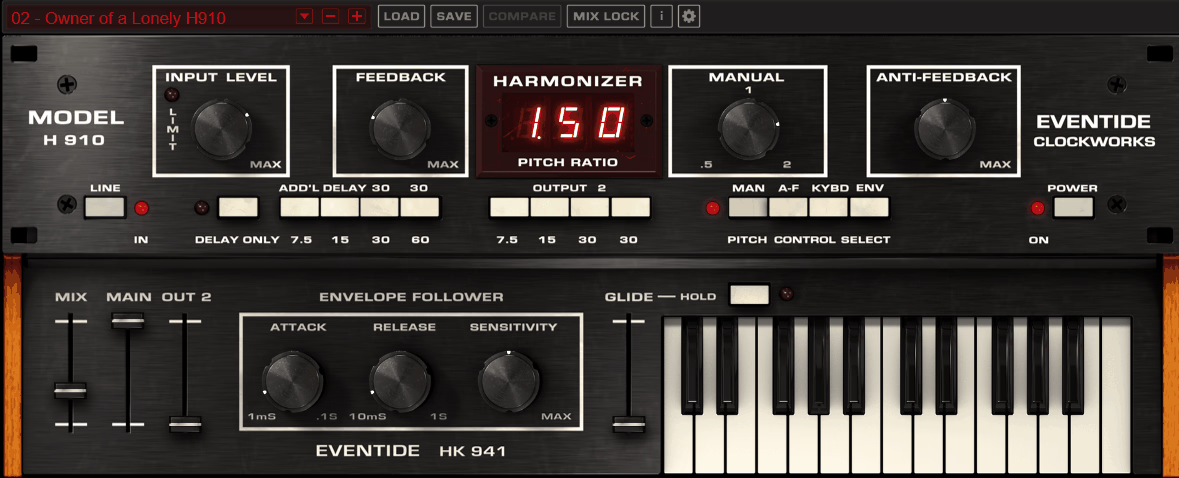
Vintage pitch processors had a less polished character than modern transparent pitch shifters, and Eventide H910 recreates that approach through pitch shifting, delay and feedback. That makes it useful when you want a shift that contributes its own tone rather than disappearing into the background.
I’ve used it on vocals, guitars and synths when a modern pitch processor sounded too clean. The slight digital instability becomes part of the character rather than something you have to remove.
- Dual-Instance Detuning
Two slightly different pitch settings can create width around a mono source. I find this particularly useful when a vocal or lead needs a thicker double without the more obvious modulation of a chorus.
- Feedback Pitch Spiral
Feedback around the shifted signal can move the effect beyond doubling and into sound design. Lower settings add resonance, while higher settings create repeating pitch movement that can become a texture of its own.
- Micro Pitch Movement
Small pitch offsets can be used as a thickening effect rather than an obvious transposition. I use this when a sound needs more depth but a chorus or stereo widener changes its character too much.
- Delay-Based Doubling
The delay stage makes it possible to turn the pitch shift into a fuller slap or doubling effect. That gives you another practical use before moving into the more extreme feedback settings.
20. Arturia Rev SPRING-636 (Spring Reverb)
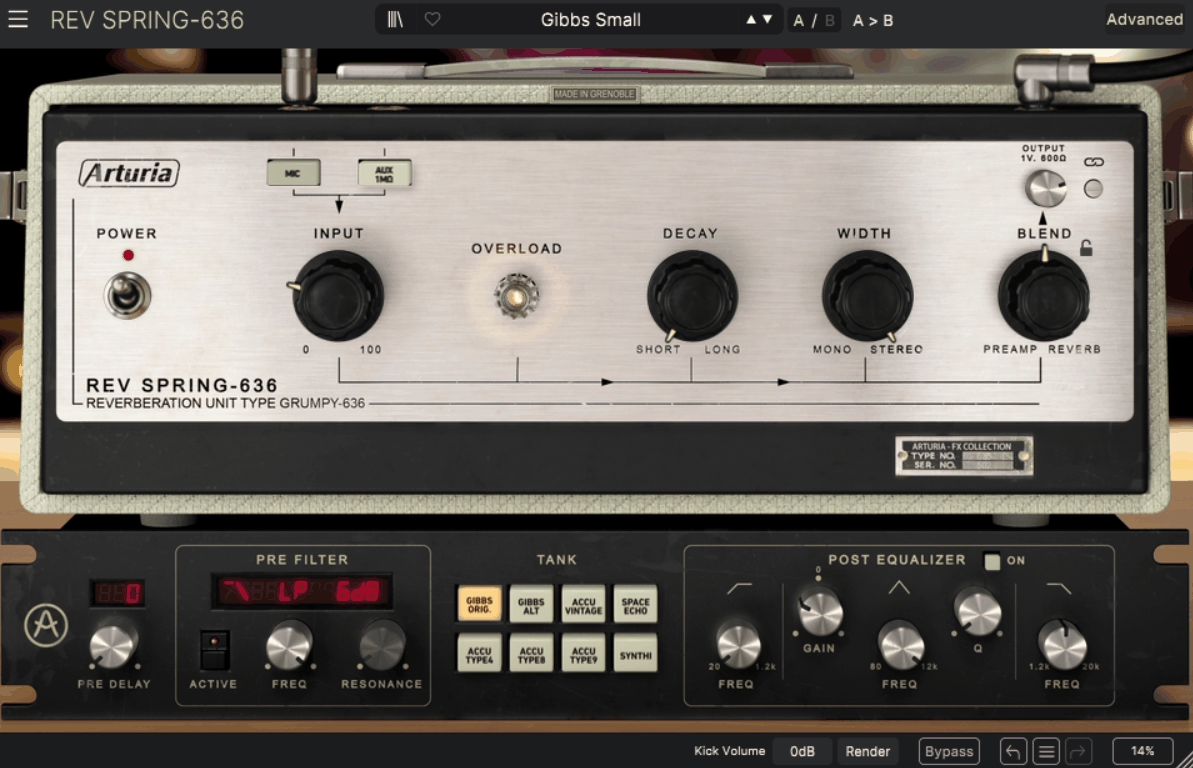
Spring reverb behaves differently from a clean room algorithm, particularly once the input starts driving the physical response. The mechanical resonance, metallic decay and drive response give it a different role from a plate or hall.
I would use Rev SPRING-636 on guitars, percussion, organs, synth stabs and drum sends when a cleaner reverb makes the source feel too distant or polished.
- Drive-Dependent Character
Driving the reverb changes both its density and the way the spring character comes forward. I use lower levels for ambience and higher levels when the reverb itself needs to become part of the tone.
- Spring Tone Shaping
The reverb can be filtered and adjusted before it reaches the mix, which is useful for preventing a long spring tail from filling the low midrange. That keeps the mechanical character while making the effect easier to fit around vocals and guitars.
- Modulation
The spring behaviour can be given additional movement for a less static tail. I use this more on sustained synths and sound-design parts than on short percussion.
21. Valhalla DSP FutureVerb (Reverb)
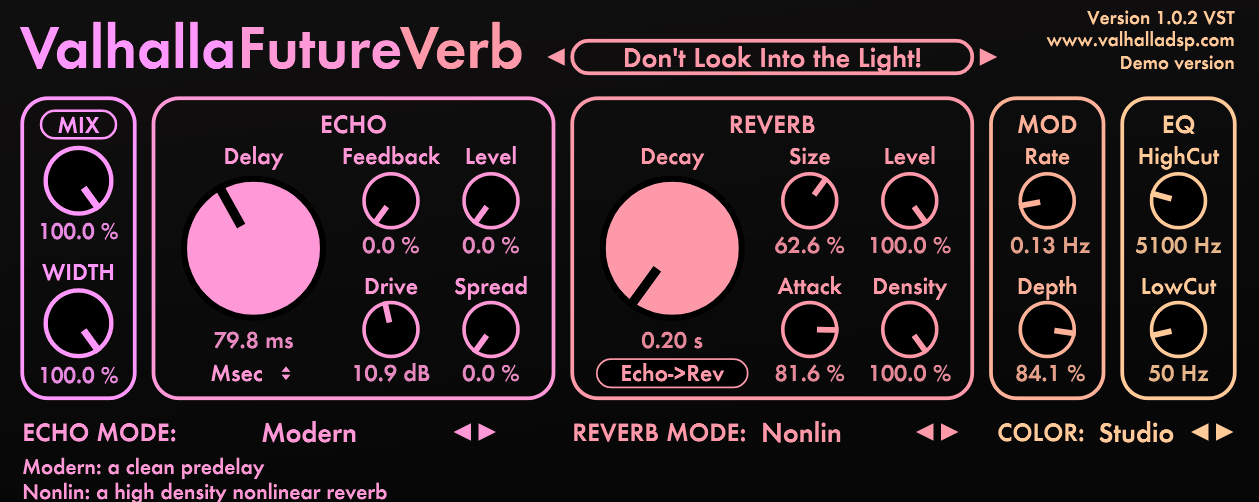
A reverb becomes more flexible when delay is part of the same signal path, and FutureVerb combines both stages with the option to change their order. That lets you decide whether the repeats should feed into the space or whether the already-reverberated sound should be repeated afterward.
- Reorderable Echo and Reverb
Echo before reverb creates repeats that dissolve into the tail, while reverb before echo repeats the space itself. I find that distinction useful when building rhythmic ambience around synths and vocals.
- Eight Reverb, Twelve Echo Modes
The reverb section provides eight modes, while the echo section provides 12 modes. That covers conventional ambience as well as more synthetic and rhythmic effects without needing another plugin for every variation.
- Color Controls
The available colour modes let you move the overall tone of the effect brighter or darker without rebuilding the individual reverb settings. That is handy when the space is working but the tonal balance is not.
- Tempo-Based Delay
The echo section can lock into musical timing so repeats stay related to the project. I find this particularly useful for synths and vocals where the delay needs to behave as part of the groove.
22. PluginBoutique StereoSavage 2 (Stereo Width)
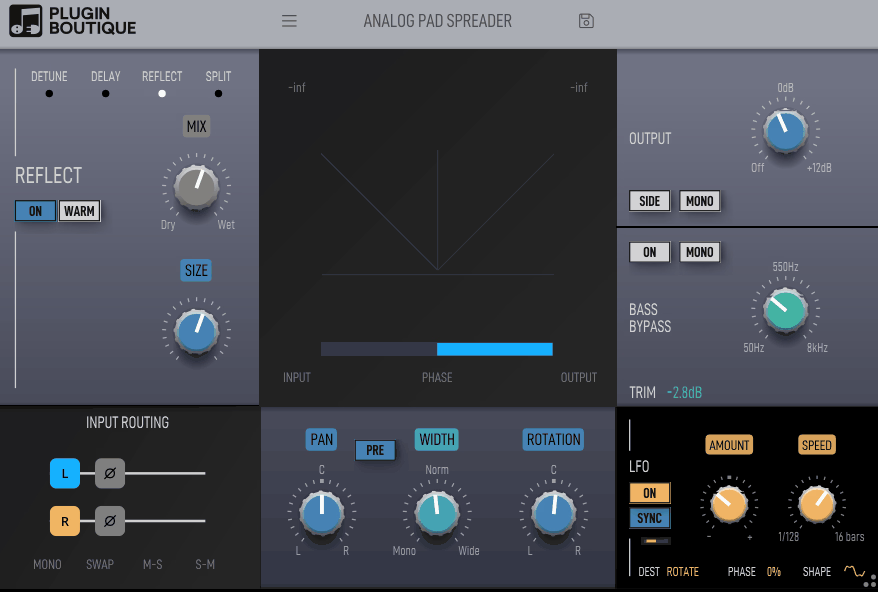
Stereo widening is easier to judge when the width and phase information sit close together, and StereoSavage 2 combines width, balance, frequency splitting and stereo processing with phase and correlation metering. That makes it useful when a source needs more space but the low end should remain controlled.
I use it mostly on pads, synths, vocals and percussion rather than basses. The frequency-dependent processing gives you more control than simply widening the entire source.
- Correlation Metering
The correlation meter shows what happens as you increase the stereo processing. I find that useful because a wider visual image is not automatically a better stereo image.
- Frequency-Dependent Widening
You can leave the low frequencies outside the widening process while opening up the upper range. That gives you a way to make a source feel broader without moving the sub information around the stereo field.
Check larger changes in mono before committing them. The wider the processing, the more important that check becomes.
- Stereo Creation Modes
You get several ways of creating width rather than relying on one fixed widening method. That gives you different options depending on whether the source needs subtle spread, more obvious separation or a stronger stereo effect.
- Phase Monitoring
The built-in metering lets you watch what happens as the stereo image changes. I use that to find a setting that is wide enough for the mix without making the mono version unnecessarily weak.
23. SSL X-Phase (Phase Aligner)
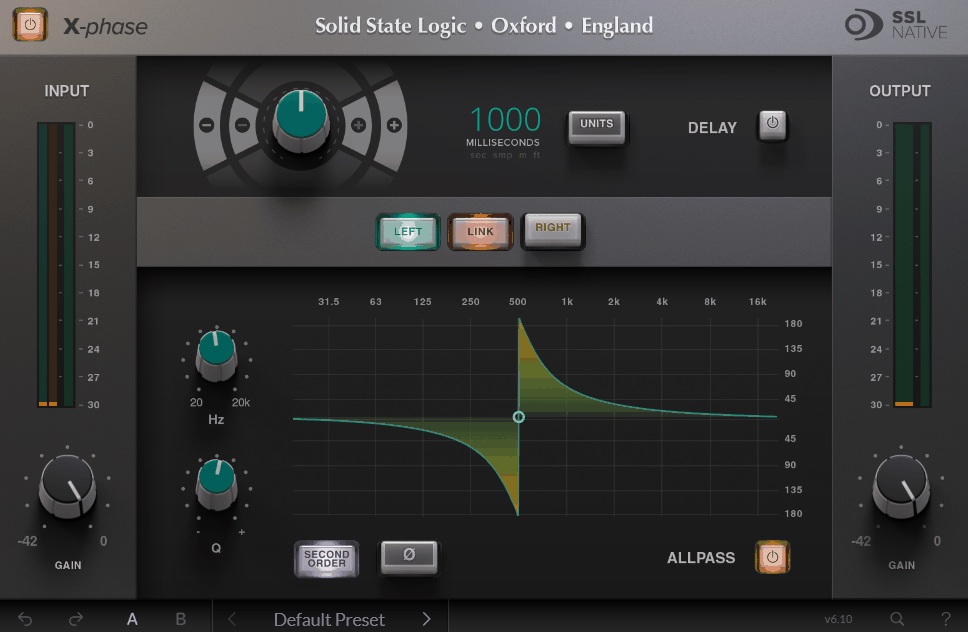
Phase problems are usually more obvious in the combined signal than in the individual tracks, and X-Phase is designed for aligning those related sources. It combines time correction and variable all-pass filtering, so you can change the phase relationship without relying entirely on EQ.
For FL Studio users, the obvious applications are layered kicks, 808s, multi-mic drums and parallel recordings. If two signals sound weak together even though each works independently, alignment is worth checking before adding more processing.
- Variable All-Pass Filter
The all-pass filter changes phase around selected frequencies while keeping the overall gain response relatively flat. That lets you adjust how two signals interact without simply cutting or boosting the frequency.
- Kick and 808 Layering
Layered kick and 808 parts are a common source of low-end cancellation. If the combined low end loses weight even though each part sounds fine separately, phase alignment can be a more direct fix than further EQ.
- Time Alignment
You can make fine timing adjustments instead of moving audio clips manually. That is useful when the source tracks are already arranged and you want to test the relationship without permanently changing their position.
- Phase Monitoring
The phase display gives you a visual reference while you make the adjustment. I use the display alongside level-matched listening because the most mathematically neat position is not always the best-sounding one.
24. IK Multimedia MODO BASS 2 (Bass Guitar Collection)
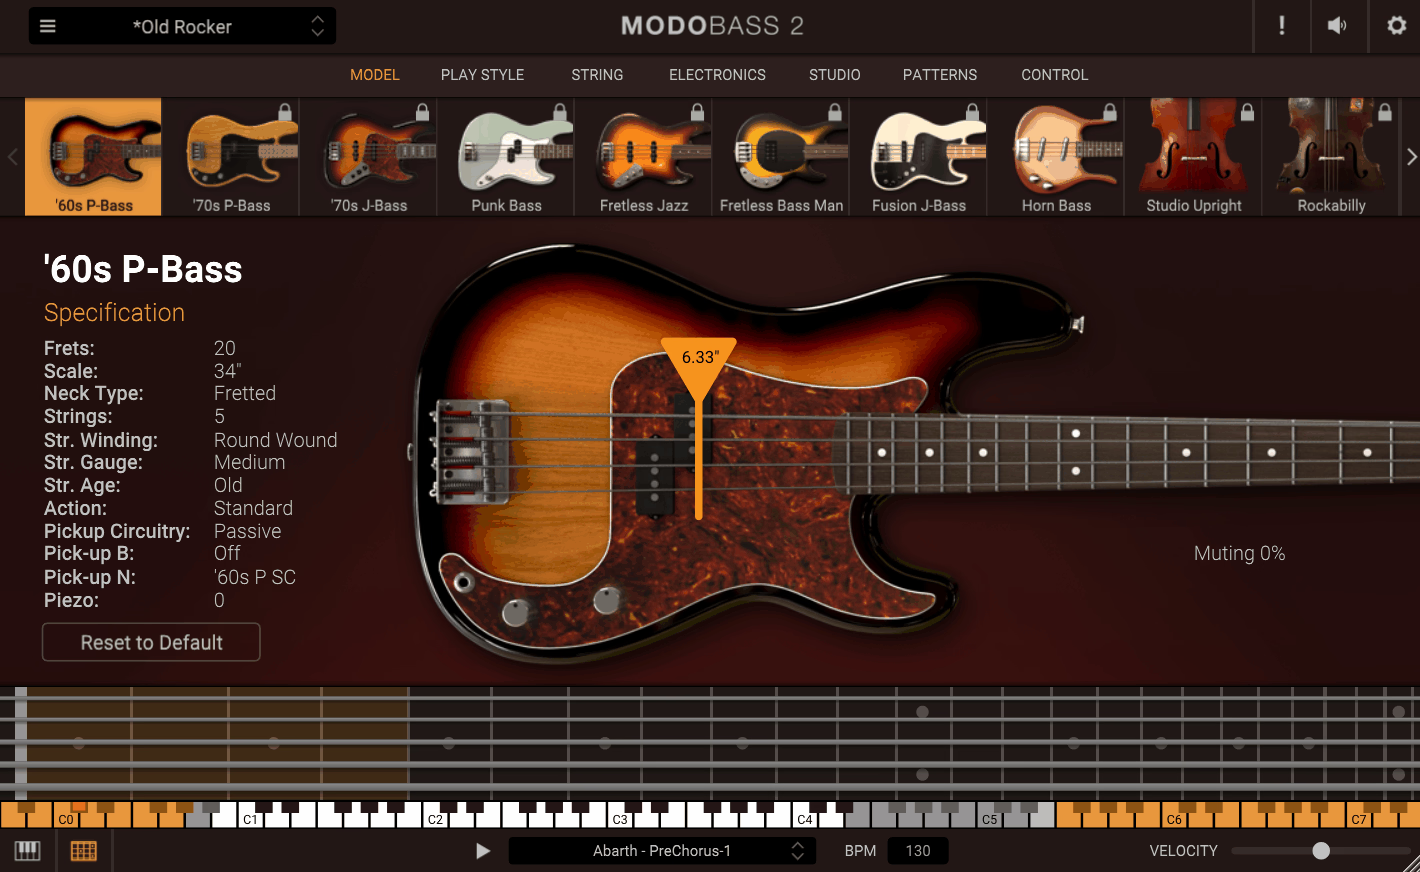
A virtual bass becomes more flexible when you can change the physical instrument after the MIDI is written, and MODO BASS 2 models the instrument rather than simply switching between recorded articulations. That gives you control over bass model, string behaviour, pickup position, articulation and playing style.
For FL Studio users who program bass parts, that flexibility is the main reason to consider it. I find it particularly useful when the arrangement changes late and the bass needs a different character without replacing the whole MIDI part.
- Physical String Modelling
Different playing styles change how the instrument responds, so the same MIDI pattern can feel different without rewriting every note. That is useful when a programmed part sounds too uniform.
- Extended Bass Types
The instrument covers electric and additional bass models, giving you more options for reworking the same MIDI performance. If you only need a bass guitar for a short section, a sampled instrument may be simpler.
The modelling approach becomes more valuable when you want to keep changing the instrument itself.
- Pickup and Playing Position
Changing pickup position and playing position can alter the tone before you reach for EQ. I find that useful when one bass patch needs to move from a warm supportive role to something more aggressive and present.
- Performance and Articulation
You can change techniques such as finger, pick or slap instead of simply increasing velocity. That gives the MIDI performance more physical variation and makes repeated patterns less uniform.
25. Waves IDX Intelligent Dynamics
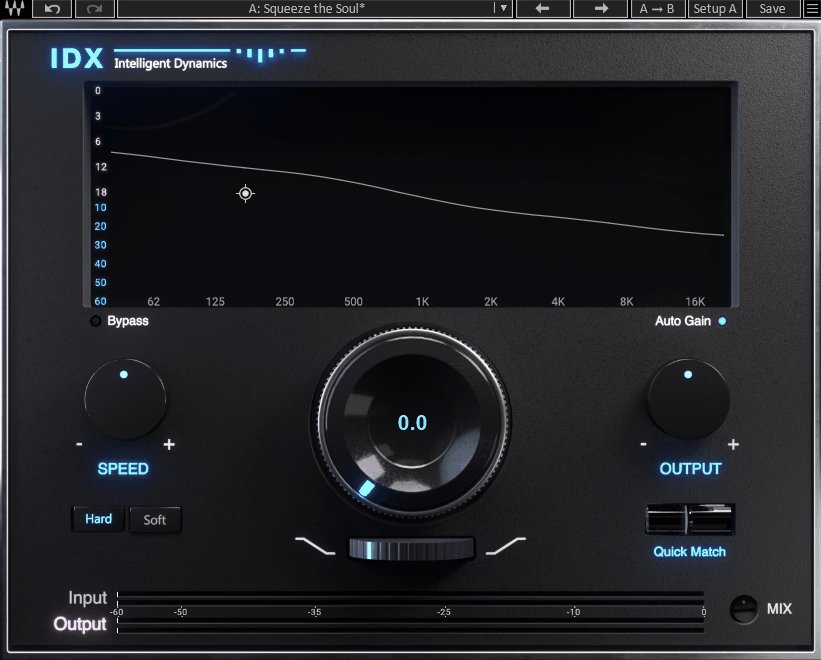
IDX Intelligent Dynamics responds to the incoming signal instead of relying entirely on a fixed compressor curve. Its approach combines energy detection, progressive attenuation and tonal shaping through Tilt.
I use it when a source needs more consistency but I don’t want to build a detailed compression setup for every channel. I would still compare it with a conventional compressor at matched level because automatic processing is not necessarily the better choice in every mix.
- Progressive Frequency Attenuation
The processing responds to where the signal is most active, allowing busy frequency areas to be controlled without treating the whole signal identically. This can be useful on vocals, basses and individual instruments with changing energy.
- Chain-Start Positioning
IDX works well near the beginning of the chain, before more targeted EQ or compression. The Tilt control then gives you a broad way to adjust the tonal balance before the rest of the processing.
- Adaptation to the Source
Because the process responds to the incoming material, the amount of intervention changes with the performance. That can make it quicker on inconsistent sources, although it also means you have less direct control than with a conventional compressor.
- Wet/Dry Use
Blending the processed signal with the original can keep the result more conservative. I find that useful when the algorithm is doing the right thing but the full-strength version feels too obvious.
26. Brainworx bx_crispytuner (Auto-Tune)
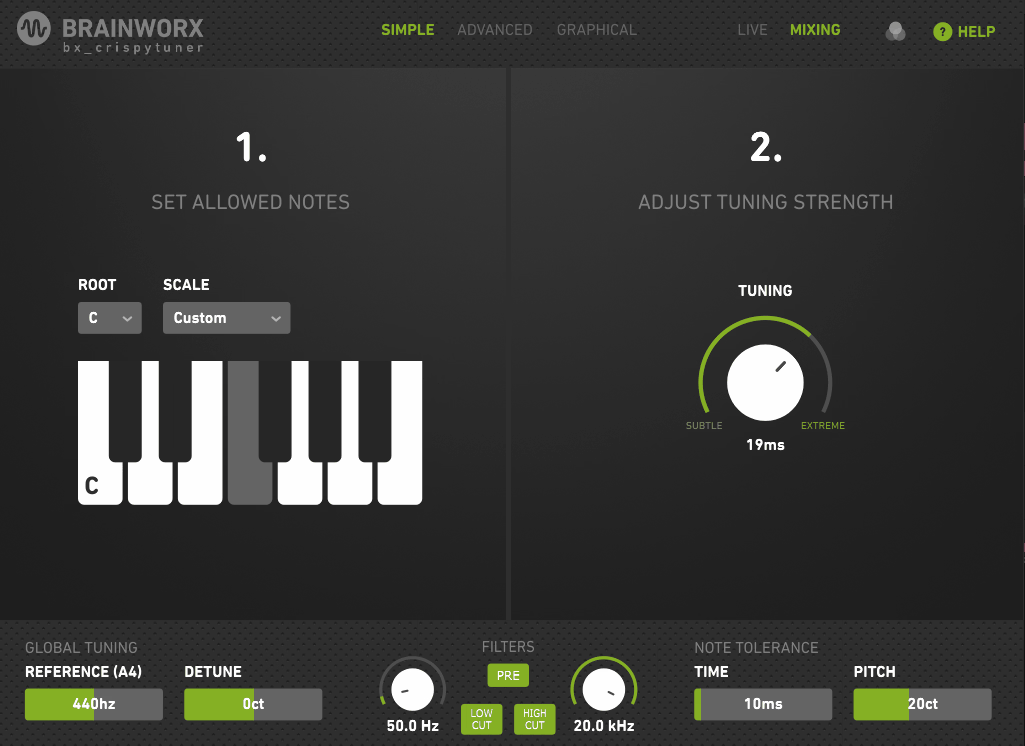
bx_crispytuner is aimed at vocals and other monophonic sources where the correction needs to remain either natural or deliberately audible.
- Retune Speed
Slower settings preserve more natural pitch movement, while faster settings produce a tighter and more obvious correction. I use the control to decide whether I’m fixing the performance or making the tuning part of the sound.
- MIDI-Driven Pitch Targeting
MIDI input can direct the correction toward specific notes rather than simply choosing the nearest note in a scale. That is useful for targeted corrections and vocal harmonies where the intended note is known in advance.
- Pitch Tracking Display
Visual pitch information helps you see where the performance sits relative to the target. I find this useful when deciding whether a note really needs correction or whether its movement is simply part of the singer’s expression.
- Vocal Editing Workflow
The plugin fits naturally on recorded vocal channels where you want the correction to happen during playback rather than after an external render. That keeps the process easy to audition while the arrangement is still changing.
27. Swivel Audio HitStrip (Modern Channel Strip)
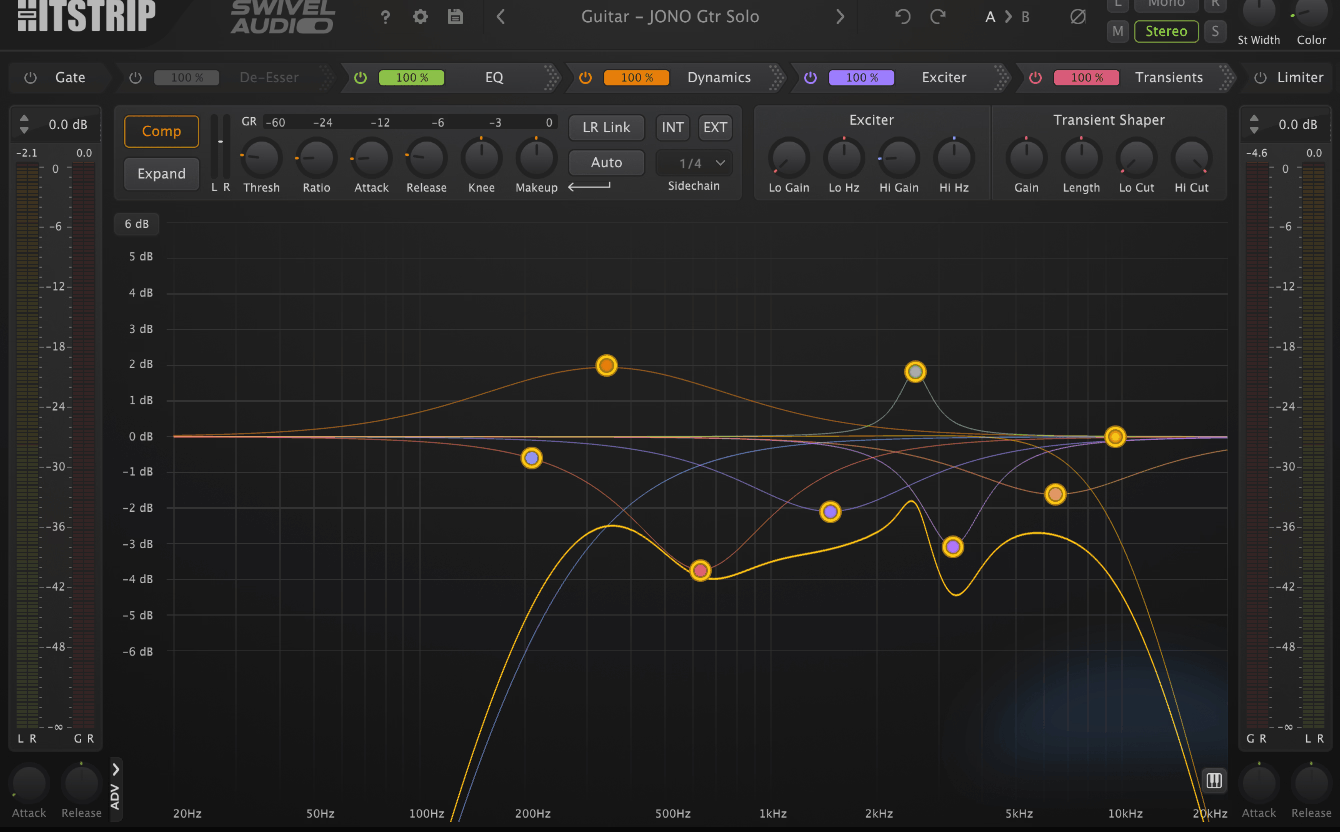
A channel strip becomes more practical when common processors can stay together without forcing you to build a long insert chain, and HitStrip combines EQ, dynamics, tape saturation, gate, de-esser, limiter, exciter, transient shaping and stereo width in one environment. The main advantage is keeping related processing stages together instead of spreading them across several inserts.
I like this approach when several channels need the same broad treatment. It is also easier to copy a complete channel setup from one track to another.
- Internally Timed Sidechain
The compressor provides internal sidechain timing that can create rhythmic pumping without additional routing. I find that useful when the compressor needs to follow the groove but I don’t want to create a separate trigger send.
- 61,000 Strip Combinations
The nine modules can be configured in many combinations, giving you a large number of possible chains inside one instance. CPU use is low enough for it to function across multiple channels rather than being reserved for one track.
The hit-record presets are better treated as starting points. They cannot account for the differences between your source and the recording the preset was originally built around.
- Three EQ Approaches
The strip provides Dynamic, Transient and Tonal EQ approaches, giving you different ways to shape frequency depending on whether you are dealing with level-dependent problems, attack information or broad tonal balance.
- Built-In Gate and De-Esser
The gate and de-esser cover two common cleanup jobs before the more creative processing happens. I find that especially useful on vocals because the basic cleanup can stay inside the same channel strip.
28. UVI Shade (Sound Design Filter)
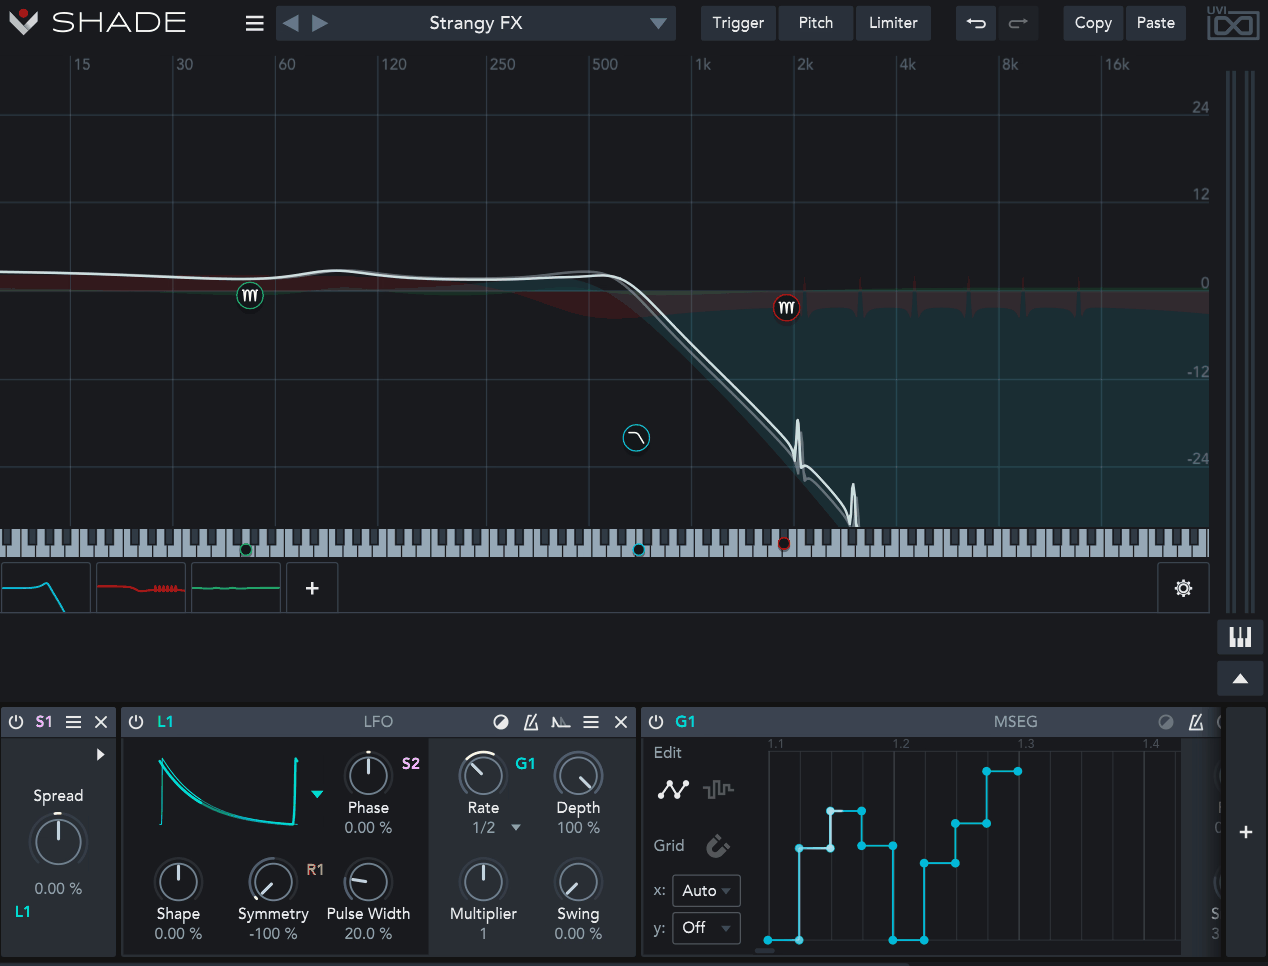
Combining corrective EQ with modulation is useful when the filter itself needs to become part of the sound, and Shade brings those jobs into one environment. It includes 35 filter shapes and nine modulation types, with LFOs, envelopes, followers, MSEGs and randomisation among the available tools.
I find it most useful when the filter needs to respond to the source or another track rather than follow one fixed automation curve. That makes it a useful step beyond ordinary filter sweeps.
- Envelope Follower Filtering
The envelope follower can drive filter movement according to the incoming signal. That keeps the movement connected to the audio instead of running independently from an LFO.
- Modular Node Chain
You can build a sequence of filter nodes and route modulation between them. I use this when several stages of filter movement need to stay inside one patch rather than becoming separate plugins and automation clips.
Compared with FilterVerse, Shade is the more general-purpose option. FilterVerse leans further toward unusual routing and creative processing.
- Cross-Modulation
Modulators can influence other modulators rather than stopping at the final filter parameter. That opens up more complex movement without requiring a separate collection of LFOs in FL Studio.
- Triggerable Envelopes
Envelopes can respond to host timing, audio thresholds or MIDI triggers. That makes the effect useful for note-based filter movement as well as continuous automation.
29. iZotope Stutter Edit 2 (Stutter & Glitch)
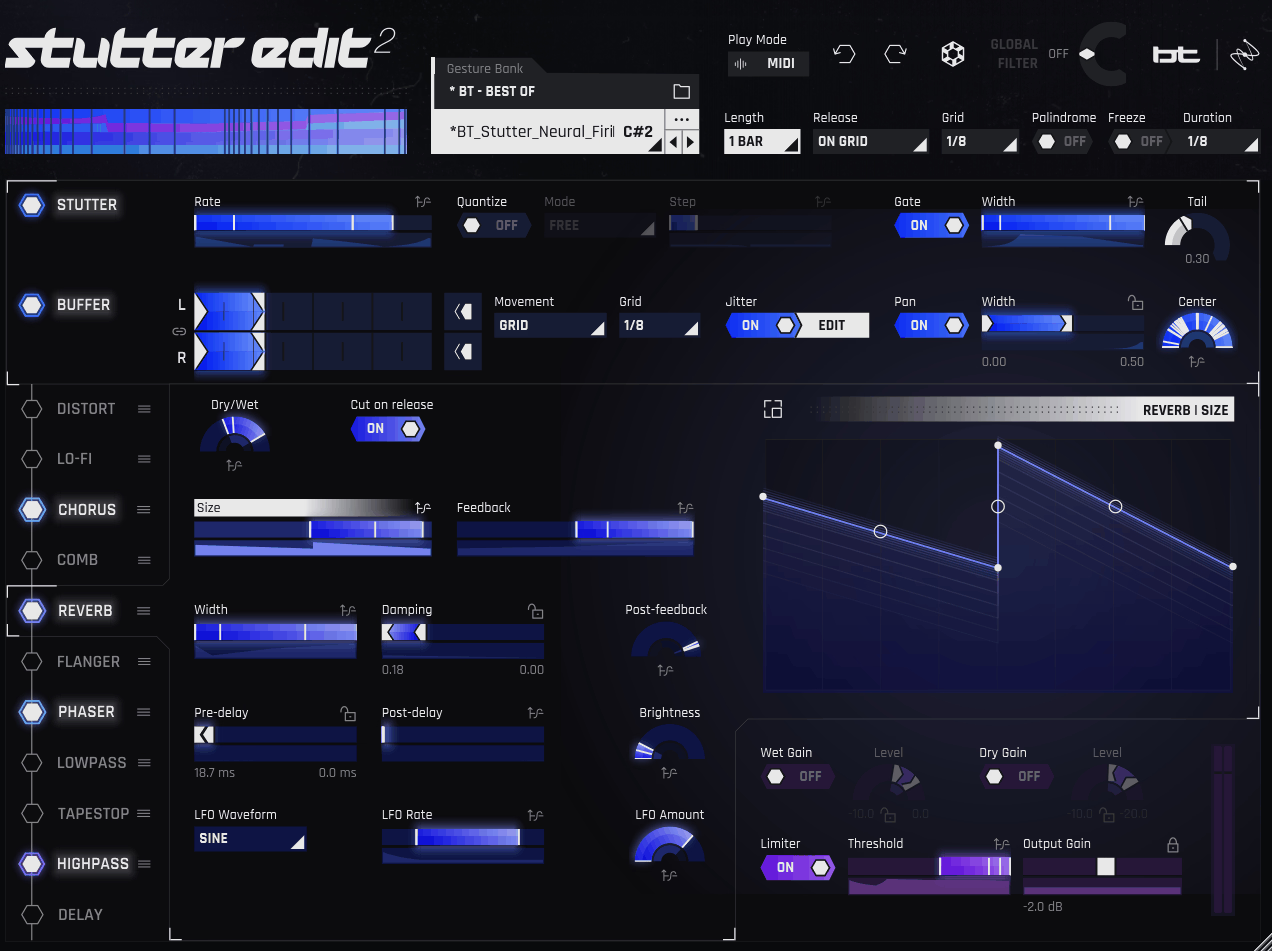
Stutter Edit 2 can chop, reverse, repeat, filter and reshape audio through MIDI or automatic triggering. In FL Studio, I find it most useful for transitions, vocal edits, fills, drum breaks and resampling because a complex gesture can be triggered from the piano roll instead of drawn as several automation clips.
- Designed Gesture Curves
A gesture can contain multiple connected effects and timing changes rather than one simple volume curve. I use this when a transition needs to develop over several beats instead of repeating one fixed stutter.
- Piano Roll Playability
The gestures can be triggered from MIDI, which fits naturally with FL Studio’s pattern workflow. You can arrange the effect triggers alongside the musical material and edit them later like any other MIDI pattern.
If Gross Beat already covers the stutters and tape stops you need, Stutter Edit 2 is less necessary. It becomes more useful when the effect itself needs to be composed as part of the arrangement.
- Auto Mode
Automatic triggering lets the processor generate gestures from the incoming audio rather than requiring every event to be played manually. That gives you a faster way to add movement to loops and transitions.
- Buffer-Based Processing
The buffer provides the source material for repeats, reverses and rhythmic edits. I find this particularly useful when resampling because you can turn a static passage into several different rhythmic variations without touching the original audio.
30. Mastering The Mix LEVELS (Loudness Metering)
A monitoring plugin only matters if it helps you make a decision, and LEVELS focuses its interface on loudness, dynamics, stereo imaging, phase and low-frequency balance. The information is presented around common mix and mastering problems rather than as a large collection of disconnected meters.
I like to use LEVELS for both mixing and mastering, particularly near the end of a project. The important point is that the warnings are there to guide a decision, not replace listening.
- Bass Space Analysis
Bass Space highlights low-frequency information that may be difficult to judge on smaller systems. I use it when several bass-heavy instruments are competing for the same area.
- Stereo Field Warning
The stereo checks show width and correlation issues while you’re working. I find that useful after widening plugins because a source can sound wide in headphones while losing information when summed toward mono.
- Loudness and True Peak
The meter tracks LUFS and true peak so you can judge the final level in relation to the delivery target. That is more useful than relying on peak meters alone when preparing a finished master.
- Platform and Delivery Targets
Presets help you check the mix against different streaming and delivery requirements. I use these as reference points rather than treating them as absolute rules, because the appropriate target depends on where the track is going.
Freebies
1. Socalabs Wavetable
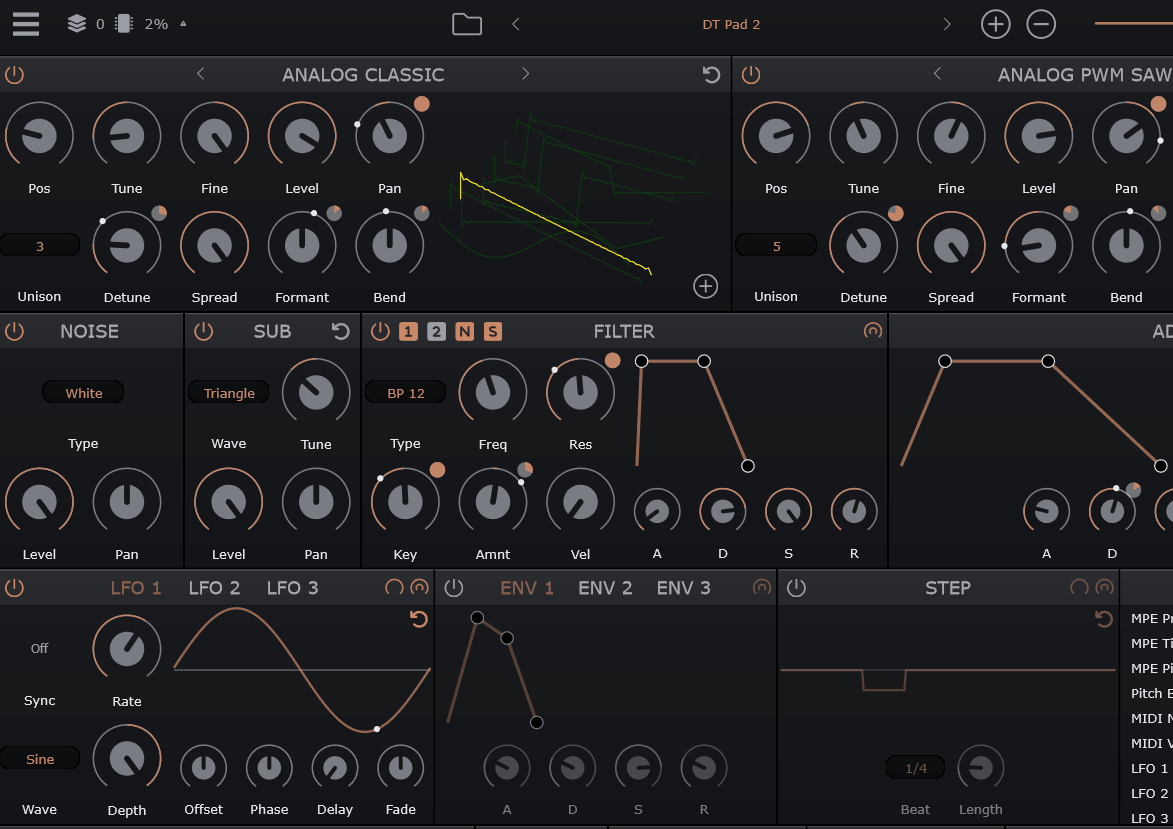
A compact wavetable synth can still be useful when the patch only needs a few core controls, and Socalabs Wavetable keeps the architecture focused on that job. It works well for basic leads, basses, pads and quick sound-design sketches.
I use simpler instruments like this when the sound only needs a few oscillators, a filter and some modulation. There is little reason to open a deep hybrid synth for every basic patch.
- Wavetable Synthesis
The main engine is based around wavetable playback and modulation. You can create moving oscillator tones without committing to the deeper workflow of something like Serum or Zebra.
- Lightweight Workflow
The interface focuses on synthesis rather than a large effects environment. That makes it easy to build a basic sound and send it straight into the FL Studio mixer.
- Basic Modulation
You can shape oscillator and filter movement with standard modulation sources. I use that for simple patches where the sound only needs a small amount of movement rather than a complex modulation network.
- Quick-Learning Architecture
The relatively compact interface makes it useful as a teaching and sketching instrument. You can see the relationship between oscillator, filter and modulation without dealing with a huge number of hidden pages.
2. Matt Tytel Vital
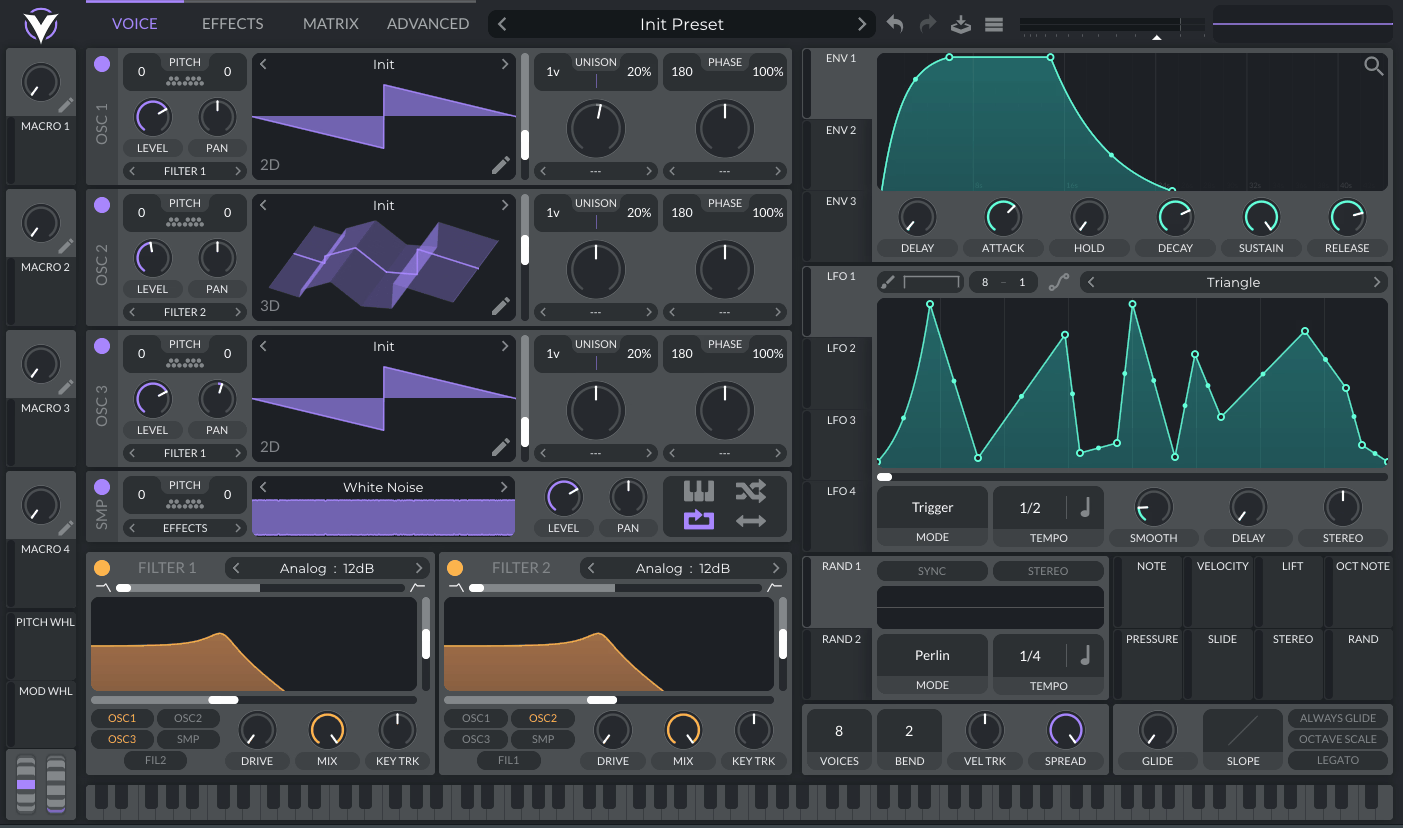
A free wavetable synth becomes genuinely useful when the core engine is not heavily restricted, and Vital gives you a complete synthesis workflow rather than a stripped-down demo. For FL Studio users, it is one of the most useful free alternatives to a commercial wavetable synth. I would start here before buying another wavetable instrument if budget is the main limitation.
- Three Wavetable Oscillators
The instrument provides three wavetable oscillators plus a sample oscillator. You can layer several sources and use modulation to move between them inside a single patch.
- Spectral Warping
The oscillator section can reshape the harmonic content of a wavetable. I find this particularly useful when a basic wavetable needs more character before reaching the filters and effects.
- Free Basic Edition
The free edition includes 75 presets and 25 wavetables, while the main synthesis engine remains available. The paid tiers primarily add more factory content and additional features.
- Custom Wavetable Editing
You can edit and import wavetable material rather than relying only on factory content. That makes it possible to turn your own recordings or waveforms into a more personal source for synthesis.
- MPE Support
The synth supports MPE, giving compatible controllers access to per-note expression. I find that useful for leads and pads where pitch, pressure and timbre need to move independently.
3. Matt Tytel Helm
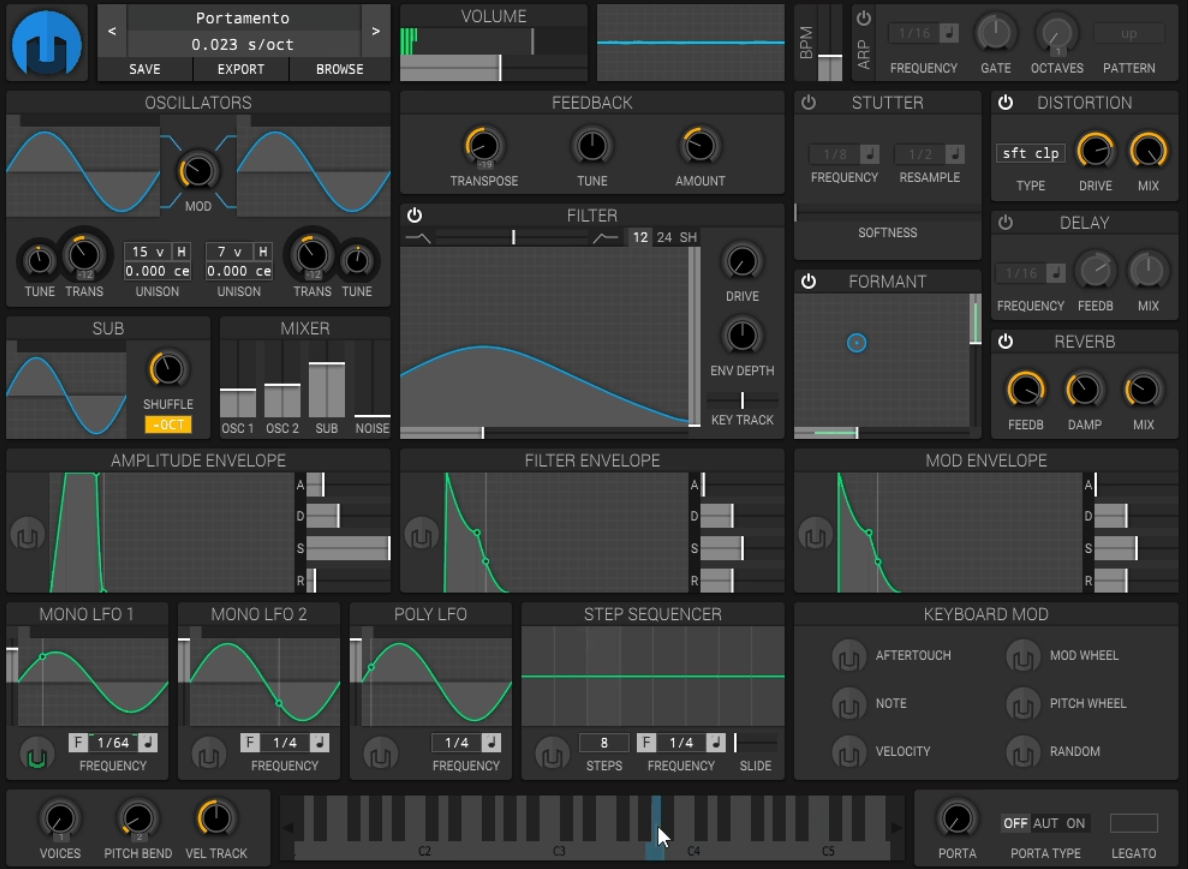
When you want the basics without the extra layers of a modern wavetable environment, Helm remains a practical free subtractive synth. It covers oscillators, filters, envelopes, LFOs and modulation without requiring you to navigate several synthesis engines.
I still find it useful in FL Studio because some sounds are faster to build in a simple synth. When the patch only needs an oscillator, filter and envelope, a smaller interface can keep the process moving.
- Subtractive Synthesis
Helm uses a conventional oscillator-to-filter signal path. That makes it suitable for basic basses, leads, pads and plucks.
- Modulation
LFOs and envelopes provide the main movement controls. You can build evolving patches without dealing with a large modulation matrix.
- Lightweight Workflow
The simpler layout keeps programming quick. I use it when I want to sketch a sound without turning that sketch into a full sound-design session.
- Visual Modulation
The modulation routing is easy to see while you work, which makes it a useful way to learn what an LFO or envelope is actually doing to a synth parameter.
4. Surge XT
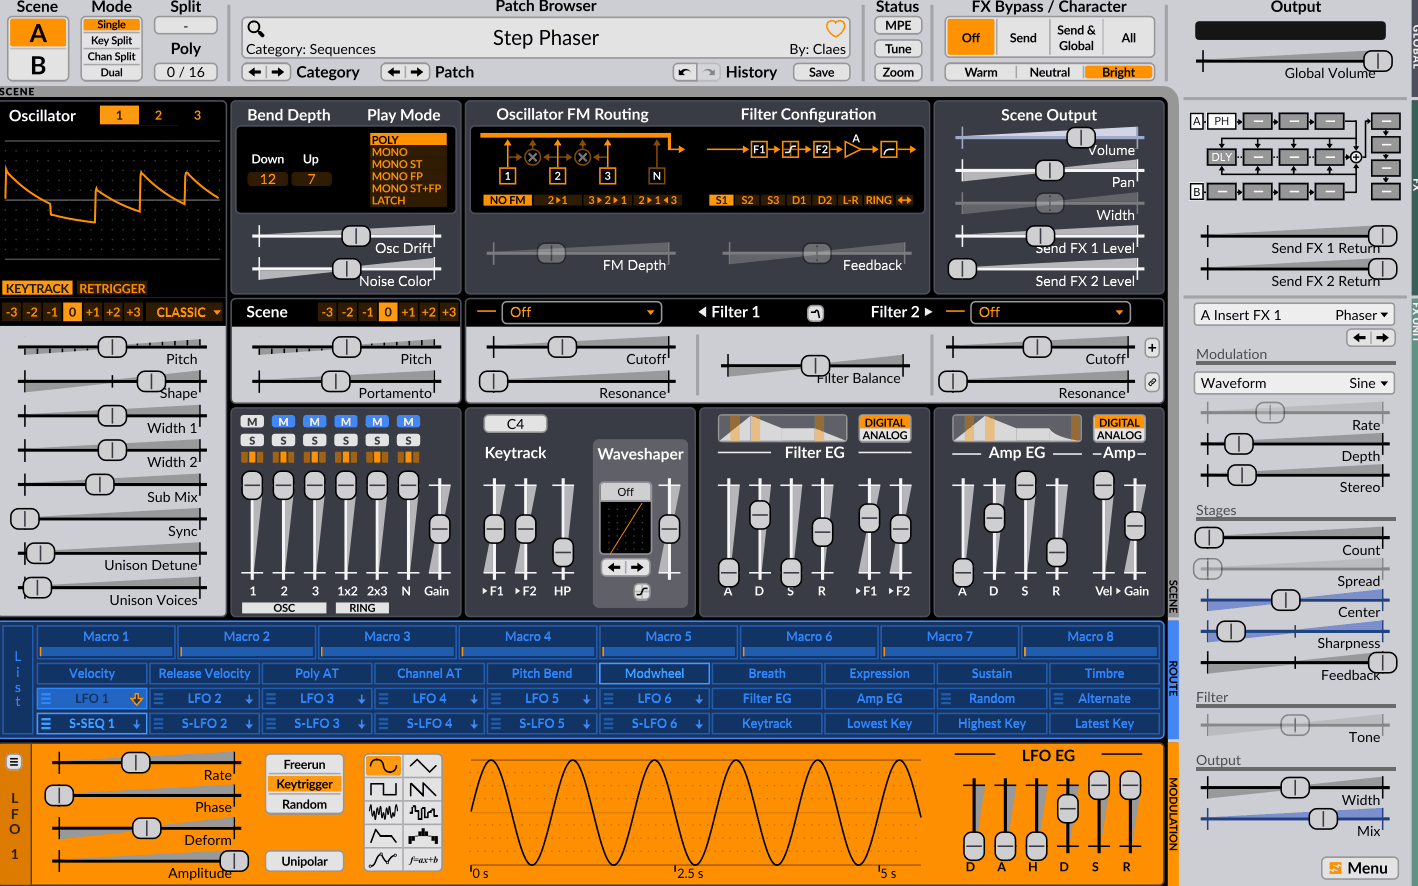
Surge XT gives you several synthesis methods, filters, effects and a deep modulation system without a commercial licence. It can cover conventional subtractive sounds as well as more experimental digital and hybrid patches.
The interface takes longer to learn than Helm or Vital, but the extra depth becomes useful once you move beyond basic subtractive programming.
- Multiple Synthesis Methods
The synthesizer supports several synthesis approaches, including wavetable and physical-modeling-related methods. That gives you more ways to move into unusual timbres without leaving the instrument.
- Deep Modulation
The modulation system can connect envelopes and LFOs to many destinations. I find this useful for evolving pads, sequences and patches where movement needs to be part of the sound itself.
- Open-Source Ecosystem
The open development model provides a growing collection of presets and community resources. You can therefore expand the instrument without being tied to a commercial expansion system.
- Full Effects Section
The internal effects give you enough processing to take many patches from oscillator stage to usable finished sound without immediately opening another effects chain. That makes the instrument practical for sound design as well as synthesis.
5. FB-3300 by Full Bucket Music
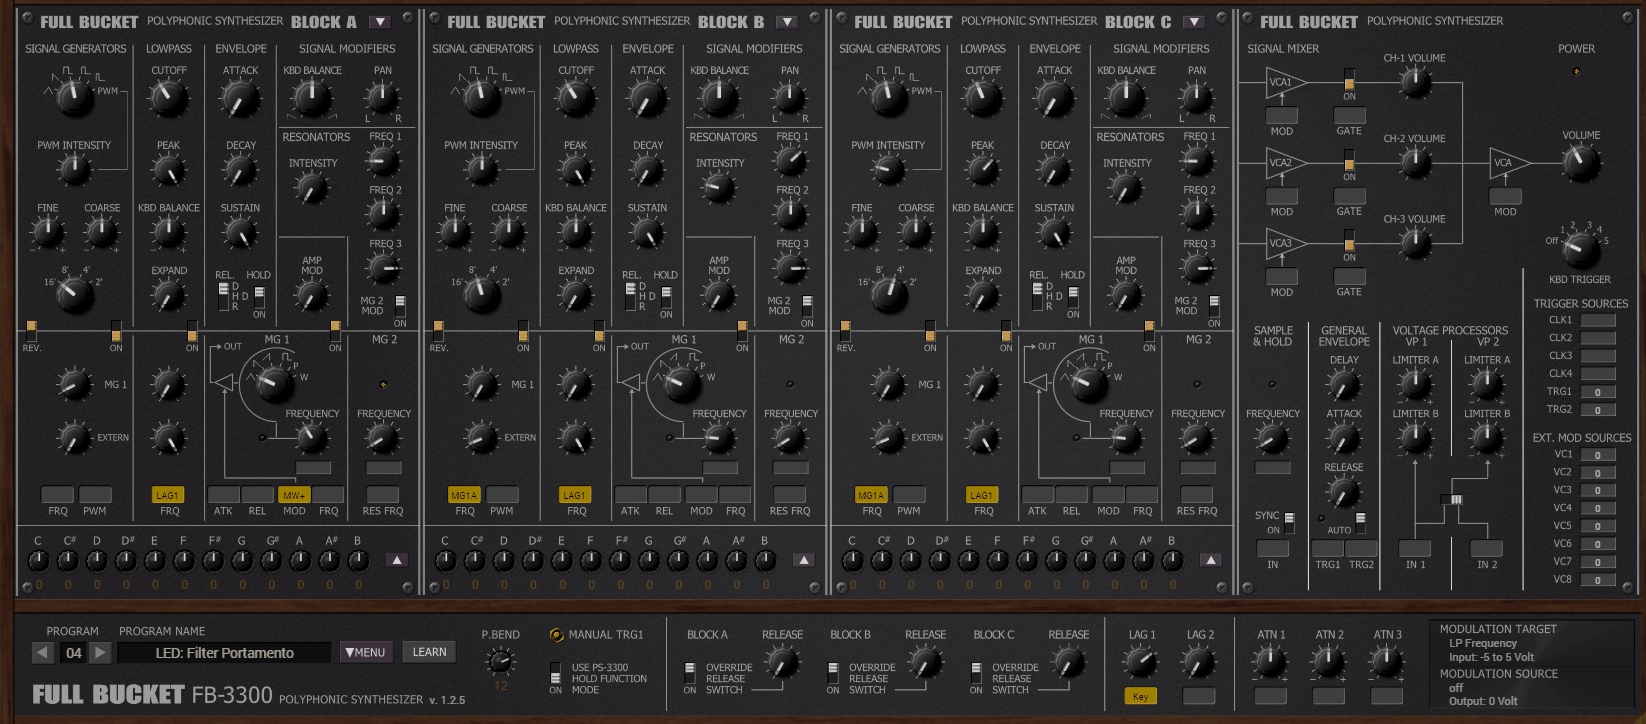
Vintage-style polyphonic synthesis does not necessarily require an expensive emulation, and FB-3300 recreates the architecture of the Korg PS-3300 through three connected synthesis sections and a semi-modular structure. It is particularly useful for pads, drones and polyphonic sounds where the older architecture is part of the character.
I use it more for unusual polyphonic textures than conventional basses. The three-section design is the main reason to open it.
- Three Synth Sections
The plugin recreates three connected synthesis sections, each with its own controls. You can use them independently or combine them for denser sounds.
- Semi-Modular Routing
Internal patching lets you route modulation and audio between different sections. That makes the signal path itself part of the sound design.
- Analog-Style Character
The oscillator, filter, resonator and envelope architecture follows the original PS-3300 concept. That makes it useful for vintage-style pads, drones and layered sounds.
- Polyphonic Layering
The three sections give you several ways to build dense chords and layered patches. I find that useful when a single oscillator voice sounds too thin but stacking three separate synth plugins would be unnecessary.
6. Sonigen Modular
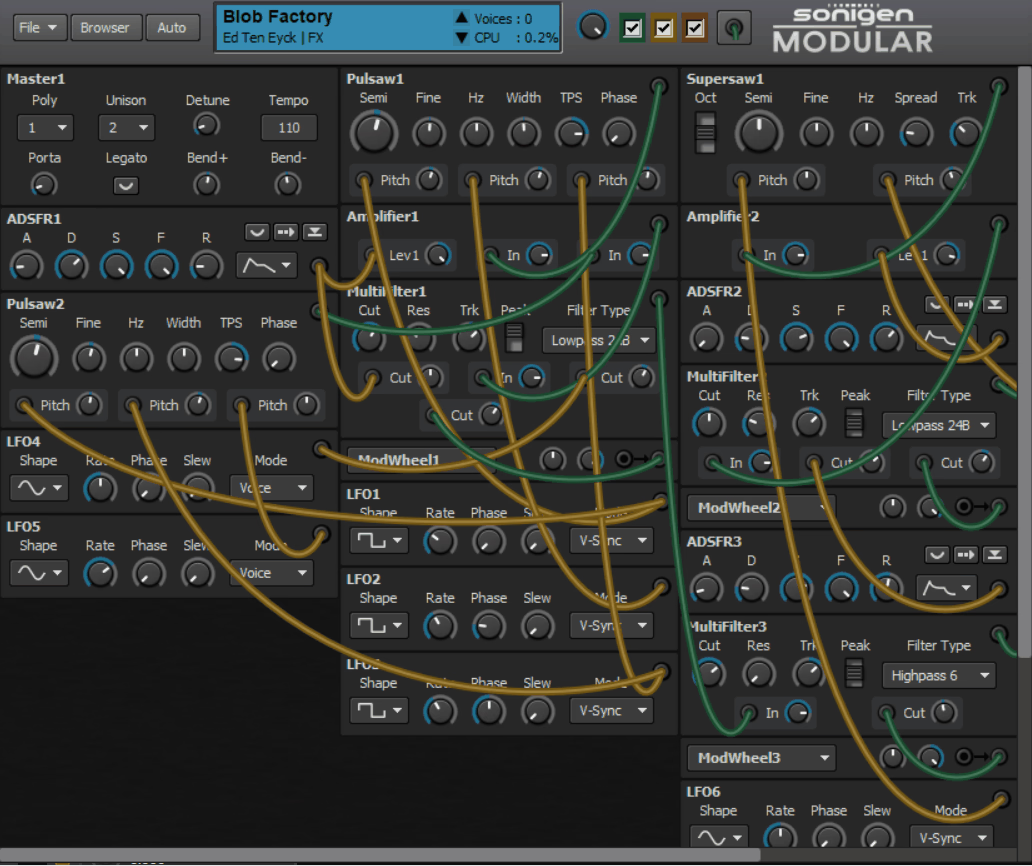
Modular synthesis is useful as much for learning signal flow as for making sounds, and Sonigen Modular gives you that environment for free. You build the signal path from connected modules rather than working inside a fixed synthesizer architecture.
I would use it as a sound-design sandbox rather than a preset instrument. The point is to build the structure yourself and hear what changes when you alter the routing.
- Modular Signal Path
You can connect oscillators, filters, envelopes, LFOs and other modules into a custom structure. That allows simple subtractive patches as well as more involved feedback and modulation setups.
- Sound Design Focus
The modular layout makes routing part of the patch rather than something hidden inside a fixed architecture. I find that useful for learning why the same modules can produce very different results when their order changes.
- Custom Feedback Paths
The modular approach allows you to experiment with feedback and non-linear routing rather than staying inside a fixed signal chain. That is where the instrument becomes more interesting for sound design.
- Patch-Building Workflow
There is no requirement to think in terms of a conventional preset structure. You can start from the modules you actually need and build upward, which makes it useful for learning synthesis architecture.
7. TDR Nova
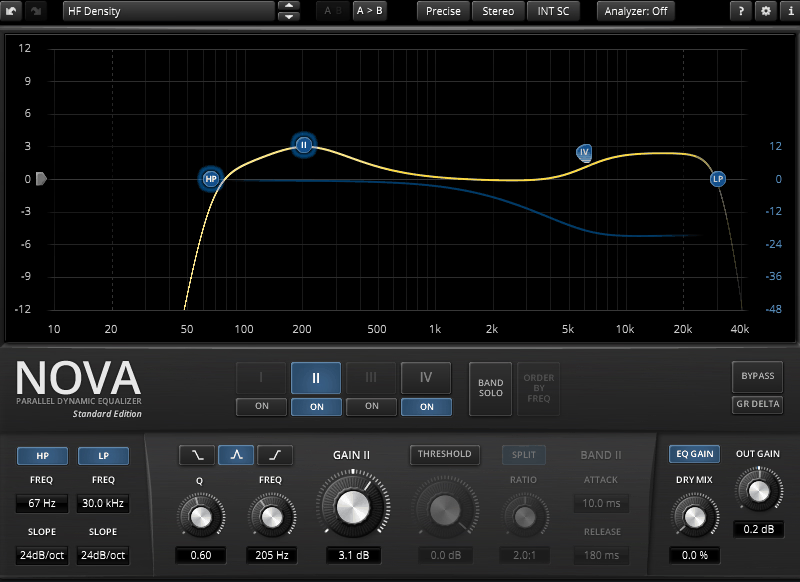
A free dynamic EQ becomes much more valuable when it can also cover compression and de-essing, and TDR Nova does that alongside corrective EQ, dynamic EQ and targeted frequency control. For FL Studio users, it is one of the more practical free utilities because one plugin can cover several corrective jobs.
I use it when a frequency problem only appears at certain moments. Instead of cutting the frequency permanently, you can make the band respond when the problem actually occurs.
- Dynamic EQ
Each band can operate as either a static or dynamic EQ. That makes the processor useful for harsh vocals, resonant synths, boomy instruments and other problems that change with level.
- Sidechain Control
The detector can respond to the source or an external sidechain. I find this useful when one track needs to create space dynamically for another, such as a bass responding to a kick.
- Standard EQ Mode
Nova can also function as a conventional parametric EQ. That gives you another reason to keep it available even when you do not need dynamic processing.
- Wideband Compression
The dynamics section can also operate more broadly across the signal, giving you a straightforward compression option when you do not need frequency-selective processing. That makes it more useful as an everyday mixer tool rather than a specialist EQ.
8. Analog Obsession BUSTERse
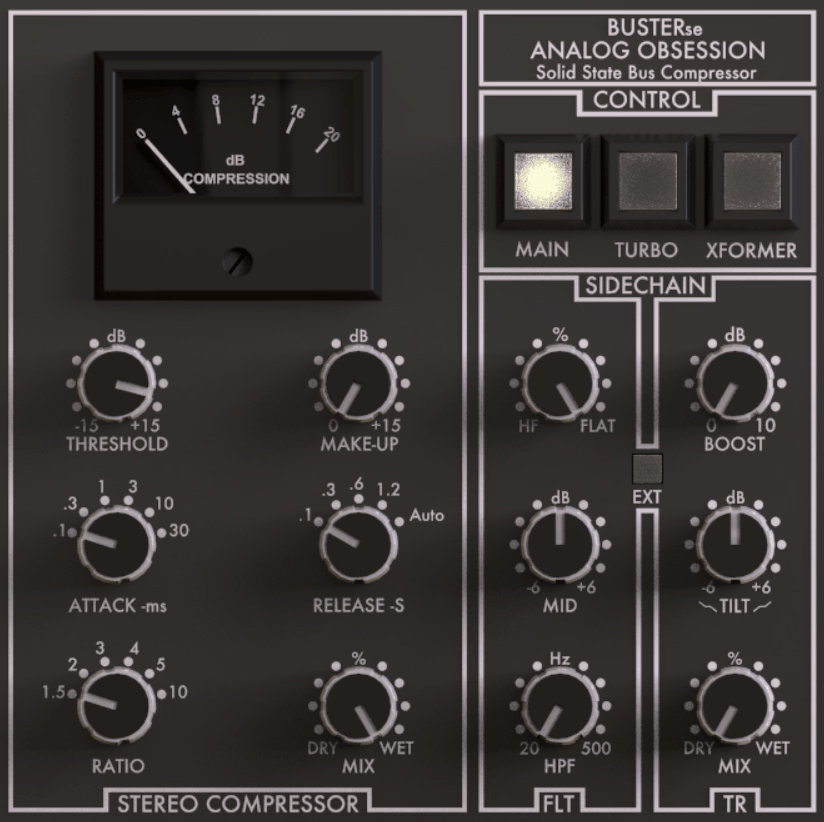
A free bus compressor is worth keeping when it provides a distinct way of controlling a group, and BUSTERse is built around the kind of VCA-style compression associated with classic mix-bus hardware. It makes sense on drum buses, mix buses, guitars and groups where the goal is to bring several sounds together rather than heavily control peaks.
I use it when I want that type of bus compression without adding another paid plugin. The controls are simple enough that it can be compared directly with FL Studio’s stock compressors.
- Bus Compression Character
The compressor is designed around a familiar bus-compression response. You can use it to pull a group together without building a more complicated parallel setup.
- Sidechain Filtering
The sidechain filtering helps prevent low-frequency peaks from driving the compressor too heavily. That can be particularly useful on drum and mix buses where the kick would otherwise make the entire signal pump.

Hey, I’m Viliam, I started Music Circuit to write about plugins and gear, so you always know what’s new and what’s worth trying. You’ll also find guides and tips here to help you get started, whether you’re picking your first plugin or building out a full studio.